Friday, November 28, 2014

Sweet Potato Pudding

I made some sweet potato pudding for thanksgiving and it was one of the few dishes that did not contribute to the leftovers pile.  Everyone ate the entire thing.  It was funny to see my sister in law's sisters making each other try the sweet potatoes (I was told it tasted like cake!).

Ingredients:
  • 2 apples, peeled and cored
  • 1/4 cup Earth Balance Soy Free Buttery Stick
  • 1/2 cup firmly packed light brown sugar
  • 1/4 cup Vanilla Flavored Almond Milk
  • 1/2 teaspoon salt
  • 1/2 teaspoon ground cinnamon
  • 1/4 teaspoon ground nutmeg
  • dash ground ginger
  • 4 medium sweet potatoes (I used purple ones that were one sale for an extra kick but regular orange sweet potatoes work just as well)
  • 1 bag of small Dandies marshmellows (corn free marshmellows)
  • 2 spoonfuls of Ricemellow Cream


First, boil the sweet potatoes until the skin starts to peel off on it's own. This makes them so easy to peel and easy to mash. Once they've been boiled, just put the potatoes to the side and boil the apple slices until they are cooked.

When the potatoes are cool enough to touch, peel off the skin and throw the potatoes in a bowl. Smash 'em.

Put the apple slices in a blender.

In a big bowl, mix together the buttery stick and the sugar first. Then add the almond milk, apples, and spices. Add the mashed up potatoes. The last ingredient is the Ricemellow cream. Just add a couple of spoonfuls. When it's all blended together well, put this evenly into a cake pan (13" x 9") and cook for 40 minutes at 350F. When you take it out and it's still hot, put the marshmellows evenly on top of the sweet potatoes. Right before you serve it, heat it up slightly just so the marshmellow melt a bit.

This was a huge hit.

Wednesday, November 26, 2014

Historical Food Fortnightly #13: Ethnic Foodways

The Challenge: 13. Ethnic Foodways November 16 - November 29
Foodways and cuisine are at the heart of every ethnic group around the world and throughout time. Choose one ethnic group, research their traditional dishes or food, and prepare one as it is traditionally made.


The Recipe: (where did you find it, link to it if possible) The Old Foodie posted about 18th and 19th Century Pumpkin pie and the differences between American and English pumpkin pies. This got me to thinking - the American pumpkin pie recipe from 1852 is different from the modern pumpkin pie but still fairly recognizable. Pumpkin pie itself is still completely necessary to any American Thanksgiving meal - making it a very traditional American dish.


The Date/Year and Region: Mid 19th C - American with some English elements added


How Did You Make It:

The original recipe:
Pumpkin Pie (American).—Take out the seeds, and pare the pumpkin or squash ; but in taking out the seeds do not scrape the inside of the pumpkin ; the part nearest the seed is the sweetest; then stew the pumpkin, and strain it through a sieve or cullender. To a quart of milk, for a family pie, 3 eggs are sufficient. Stir in the stewed pumpkin with your milk and beaten-up eggs, till it is as thick as you can stir round rapidly and easily. If the pie is wanted richer make it thinner, and add sweet cream or another egg or two; but even 1 egg co a quart of milk makes " very decent pies." Sweeten with molasses or sugar; add 2 tea-spoonsful of salt, 2 table-spoonsful of sifted cinnamon, and 1 of powdered ginger; but allspice may be used, or any other spiec that may be preferred. The peel of a lemon grated in gives it a pleasant flavor. The more eggs, says an American authority, the better the pie. Some put 1 egg to a gill of milk. Bake about an hour in deep plates, or shallow dishes, without an upper crust, in a hot oven.

Based on the Old Foodie's post, just 12 years earlier, there was still talk of English pumpkin pies being made with apples and pumpkin.

I know that going back to at least WWI, that apples are a common replacement for eggs. I use them due to my nephew's egg allergy. Rather than milk in the American recipe, I used Almond milk. I can easily trace that back - through each century- back to the 13th Century as a very common replacement for cow's milk. So, based on that, here's my recipe:

Pie crust:
  • 1 1/2 cups all-purpose flour, with another cup on the side
  • 1/4 teaspoon sea salt
  • 3 tablespoons granulated sugar
  • 1/4 cup of coconut spread, cut into thin slices
  • enough water to make dough


First the dough. I dumped everything in a bowl and mixed it until it got into a cohesive sticky lump. I then threw it down on some tin foil - for easy clean up- with more flour on the tin foil that I worked into the dough. Once I had a good dough, I rolled it out and had enough to line two tin foil pie pans. I put these in the fridge for 30 minutes. (I used coconut spread because I'm allergic to dairy)

Pie Filling:
  • 2 cans of Libby's Pumpkin Pie
  • 1 Box of Almond Dream Pumpkin Spice Almond Milk
  • 1 1/2 cups of sugar
  • 2 Tablespoons of Cinnamon
  • 3 Apples, peeled, cored, and sliced
  • 1 Tablespoon Ginger
  • 2 teaspoons of salt

Since I'm not completely crazy, I just used the canned pumpkin that everyone uses for modern pumpkin pie. I had to use about 4 cups of almond milk - which ended up being nearly the entire box. Rather than eggs, I used apples - which is similar to the English pumpkin pie. I boiled the apples, put them in the blender, and made...applesauce! I added this to the bowl filled with mushed up pumpkin and almond milk. Once I mixed this together, I added the salt, sugar, cinnamon, and ginger. It became sort of like a watery pudding which looked correct to me. I then poured this into the pie shells I made earlier and cooked the pies for an hour at 350F.


Time to Complete: 2 hours if you include the time it was in the oven
It ended up being in the oven for 2 hours and 40 minutes before the pie finally set.  Amazingly, the crust didn't burn!  I read online that a lot of other people had issues with Libby's pumpkin not cooking - one individual said it always takes them nearly 3 hours.  So...I'm not too worried. 

Total Cost: Maybe $10? I think. I wasn't paying much attention. The canned pumpkin was on sale and I had a coupon so I know that wasn't more than a couple of bucks. The almond milk was $2.19. Most of the rest I had in the pantry.


How Successful Was It?: We'll see tomorrow!!!! It looks and smells good. So, I could have cooked it a bit longer. I also probably should have cut out some of the cinnamon - I think one tablespoon would have been enough. It wasn't bad but I do need to experiment some more.

How Accurate Is It?: (fess up to your modifications and make-dos here) Since almond milk is period correct and apples were common in the English version, I'm going with pretty decent. The pie crust is another story. I had to use the coconut though because of the dairy allergy. 

Thursday, November 20, 2014

Cream of Potato Soup

No pictures - I sort of gobbled this one up.  :-)  With the super cold temperatures (it's November, right?  Not February?) this week, I really wanted soup for dinner.  However, unlike most people, I can't simply pop a can of Campbell's in a pot and reheat it.  Almost all soups - Progresso, Campbell's, even a lot of the allergy friendly brand Annie's- have either dairy or corn in them.  Since I really wanted cream of potato, that always has both.

I stumbled across this recipe for cream of potato and really wanted to try it.  Here is my redaction for the ingredients I had on hand and the ingredients I can eat.


  • 2 potatoes - I used redskin
  • water
  • half of a small chopped onion
  • 2 tablespoons Earth Balance Soy Free Buttery Sticks
  • 2 tablespoons all-purpose flour
  • 3 cups almond milk
  • 1/2 teaspoon salt
  • A pinch of pepper
  • Paprika
The original recipe calls for two medium potatoes.  I used one large potato - not peeled, just chopped up- and one small potato, also not peeled but chopped up.  I threw the pieces into a pot with the water and waited for them to soften up.

I then chopped up half of a smallish sweet onion to use for this recipe.  Once the potatoes were done, I set them aside in a bowl (drained, of course), and put the onions in the pot.  It's a bit odd to cook onions in a pot but it works for this recipe.   I also added the Earth Balance Buttery Stick slices.

Once the onions were cooked, I added the flour, stirred it together and just dumped in the almond milk on top of all of that.  I stirred it together and waited.   It will be a while before it a)boils and b)the almond milk starts to double in volume due to the boiling.  You need the latter to happen for it to be a decently thick soup.   Once it rose, I stirred the soup for two minutes and added the potatoes with the salt, pepper, and a dash of paprika.

I waited another couple of minutes before dishing out the soup.  I added more paprika to the top of the soup and added some more salt.   The soup is somewhat sweet - it tasted like cream of blooming onion with potatoes, which was fine by me.   It's a good cold winter day soup and would work for anyone with a dairy or corn allergy.

Sunday, November 16, 2014

So Delicious Egg Nog versus Silk Egg Nog


Last year, I found So Delicious Egg Nog and loved it. This year, I found not just So Delicious but Silk has a dairy free egg nog! Nom! As I can't have about 90% of the holiday treats I used to have without some modification, I was overjoyed to find not one but two egg nogs. I've missed having that spicy creamy holiday drink and I'm so glad to be able to have a choice in which one I might partake in. Both are non-alcoholic but that's easy to change. ;-)


In trying to figure out which one I like better, I first compared the ingredients. Silk scores in having fewer calories, less fat, lower sodium, and even a trace of iron in comparison to So Delicious. Granted, it's all by very small amounts. Neither are "good" for you unlike, say, a celery stick. But who wants a celery stick?


In terms of color, the So Delicious looked more like traditional egg nog. The Silk egg nog was a brighter yellower color that doesn't come out quite in the pictures. Silk is on the right and So delicious is on the left.

The Silk basically tastes like spicy milk - it's by no means bad but the texture is more watery than creamy. There is a bit of a chalky after taste but it's not horrible.

The So Delicious does have a coconut taste to it due to it being with coconut milk but it's not overpowering. It's far better in terms of texture - much creamier and almost to the consistency of real egg nog. The spice in it is pretty good and, overall, it tastes like a decent egg nog.

Of the two I much prefer the So Delicious but I wouldn't pass up the Silk either.

Saturday, November 15, 2014

Historical Sew Fortnightly #21: Re do!

The Challenge: #21: Re-do – due Sat 15 November. Pick any previous challenge and re-do it (or do it for the first time). It could be one that you didn’t finish, one that you wish you’d had more time for, or any time for, or one where you loved the theme so much you want to do it again. So, I choose to do #11: The Politics of Fashion for this challenge. The gowns of the Regency era were designed to look nothing like the gowns associated with the French court and based off of the Greek statues as a way to embrace democracy.  You can read a bit more here.

Fabric: Polished cotton

Pattern: My own!

Year: 1820s

Notions: 7 +yards of silver lace and 6+ yards of sari zardosi trim

How historically accurate is it? It's not too bad. It's machine sewn but silver lace and cotton are period.

Hours to complete: 9 or 10, I think

First worn: Today!

Total cost: I can't even remember how much I paid for the green cotton it's been so long. Maybe $5? The silver lace on the bodice was $1.50 a yard and the zardosi trim was maybe $10 for the whole thing.


So, the inspiration:

The above dress is one of the many in the Met's collection.  When I told Mom she needed a new Regency dress if she was going to come to the tea, she choose the above as an example of the dress she wanted.  Okay.

I went through the stash pile and Mom liked the green polished cotton best of the fabrics I presented to her.  She wanted silver trim - which luckily I had- and I started on a new pattern for her.

I tried to carefully mark up the bodice with multiple chalk lines to act as lace placement.  The original gown actually has tucks with netting between the tucks.  However, I have no idea how to do that without do that to the fabric first and then cutting out the bodice - which would waste fabric and take too long.   So, I just applied lace to the front.

Mom ended up loving her dress so much she bought me a new hat!   Yay!   The back picture looks a little funny because I had her in 1790's stays and covered the straps with her 1820's petticoat straps.  I need to make her new short stays.

Wednesday, November 5, 2014

Ginger Ale!

I have made ginger ale! With the now not so new sodastream, I've been trying to create various soda flavors. My latest attempt has been to make ginger ale.


Recipe:

  • 2 cups sugar
  • 1/2 cup white vinegar
  • 1/3 cup ginger juice (about $3.99 at my local Mom's Organic Market.  I used half the bottle)

Like some other recipes I have tried, I mixed all the ingredients together and brought it to a boil. I then stirred the mixture for 2 minutes and dropped the temp down to a simmer for another 10 minutes. I then removed the pot from the heat to let it cool and get syrupy.

About two tablespoons of this syrup works for a pretty rich ginger ale. If you don't like real ginger, you won't like this. However, if you are like me and happily eat the crystallized ginger raw, this is completely delicious.    This should make enough to last for about 30 or 40 glasses of ginger ale.

Sunday, November 2, 2014

Costume Roulette: Natural Form

First, the hair:
The image above is from 1875 - a bit before the Natural Form but I realized I might actually be able to do the style on the bottom left without too much difficulty.  It's a braid around the head and a bun with a drape of curls.  I've done one or two of these as part of my normal hair routine but never all three together.

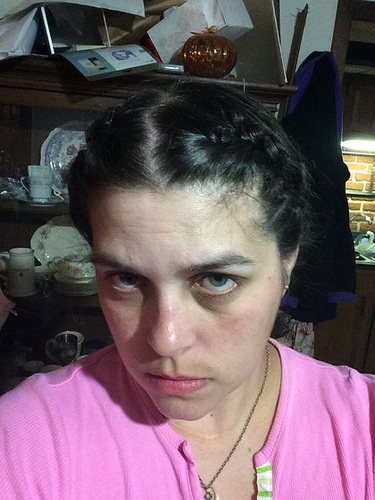
First, I divided the hair from above the ears - moving the sides of the hair (and bangs although they are almost to my chin now) to the front and leaving the rest back.  I french braids the bangs and incorporated a slight braid into the sides of the hair - this is part of what I do normally and it looks like this:


photo 2(1)


...Once I take the braids back and put my hair into it's normal bun.

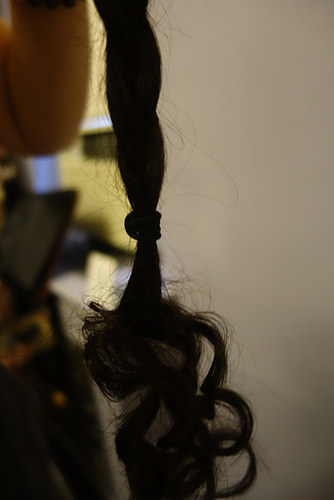
However, this time, I needed a thick braid as well as a bun and a cascade of curls. To accomplish this, I split the hair in the back of the head in half - the top part being the part that would be the bun and the bottom being the part that would be the braid. I took the slightly braided sides and incorporated them into the bottom/braid part. I only braided the sides far enough to reach the back of the head so you don't see a braid within a braid. Once I braided my hair, I tied it off and curled the ends (and plastered them with hairspray).

DSC05252


The braid had to be loose to give it that "big hair" look.

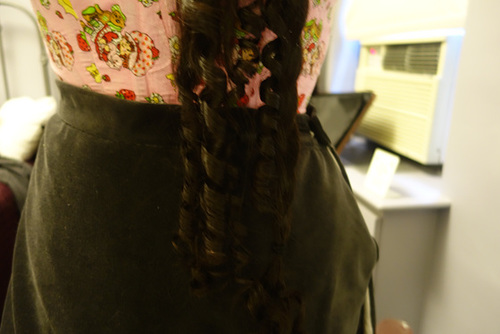
Next, I took the top part of the hair and split it to make some curls about half way down the length of my hair. Again, plastered with hairspray.

DSC05249


I then did the bun first, having the ends tucked under the bun so the cascade falls correctly. I then wrapped the braid around my head and bobby pinned everything into place.


Yes, my corset is Strawberry Shortcake print with red bias tape. It works.  Sorry for the bad iphone pic.

The dress:


 Before I put the sleeves on but you can see the train and the back of the jacket detail.
Once it was mostly completed. I think I still did some stitching to the skirt after this.

The dress is out of cotton velvet, lavender silk I originally made a dress for a Poe event out of (but I made the sleeves too small so it went into the UFO pile because I only ecked a dress out of the fabric and didn't have enough to redo the sleeves), and gray linen.  The linen is the base of the skirt.  Oh, and white silk for the lining of the train.

For my first attempt at Natural Form, I think it came out alright.  It fit, which was a big plus.  :-)   I used Wearing History's  1879 Bodice e-Pattern and only had to make a few slight changed.  The collar was odd - the original seams to end at the shoulder seams.  I made a back piece so the collar would go all the way around.   The sleeves are a LOT longer than they look on the pattern's picture.  I ended up not using the cuffs because they just weren't needed.

I used black netting to fill in the neckline.  There is a photo from the same era showing a similar bodice design but with a scarf to fill in the neckline - which is where I got the idea:


Since I've had the cotton velvet since the early 2000's (I think 2002.  I wanted to make Queen Amidala's Gray Kimono outfit at one point and never got around to it) and the lavender silk since 2008 or so, this outfit was very cheap to make.  It was mostly stash (the only thing I had to buy, I think, was the bed sheet to make the petticoat and the hoop skirt).   Even the buttons were stash.

I might get more photos later of me actually in the outfit - I know several were taken.  We'll see!


I'm wearing it in this video:

Saturday, November 1, 2014

Historical Sew Fortnightly: Alternative Universe


A long time ago, in a galaxy far, far away....


Halloween


It is a dark time for the Rebellion. Although the Death Star has been destroyed, Imperial troops have driven the Rebel forces from their hidden base and pursued them across the galaxy.
Evading the dreaded Imperial Starfleet, a few remaining Jedi knights, led by Luke Skywalker, have established a new secret base on the forest moon of Endor.
The evil lord Darth Vader, obsessed with finding young Skywalker, is attempting to lure the young Jedi in with promises of candy....


Halloween


So from left to right, Luke Skywalker, Obi Wan, and a very confused Yoda. :-)

For the Alternative Universe, I went with an alternative Galaxy and made my nephews their Halloween outfits. Oldest nephew wanted to be Luke Skywalker. Middle Child wanted to be "the guy with the blue lightsaber!" Youngest nephew didn't really get a choice. He's two and his Mom and I decided that if the other two were going as Star Wars, so was he. ...and that he had to be Yoda. Because.

The Challenge: Alternative Universe

Fabric:Knits and Fleece

Pattern: A very modified New Look children's pattern as the base

Year: A long time ago, in a galaxy far, far away.... (Since that was written first in 1977, my guess is that a long time ago is before WWII)

Notions: Thread, belts, lightsaber...

How historically accurate is it? Since I didn't follow the exact lines or fabrics of the movie, it's not. I used fleece for Luke Skywalker's Tunic, Obi Wan's robe, and Yoda's "head" and robe. The reason for this is I remember being little and having to put on a winter coat over my Halloween outfit. What was the point in that? No one could see if I was Dorthy or a Witch with my coat on. So, instead, I make my nephews' outfits out of fleece so they will be warm but don't have to wear their winter coats.

Hours to complete: 3 I think. I was worried about Yoda but it ended up being easy. After cutting out the base of the robe and the hood (basic coif style), I cut out sort of teardrop shaped pieces of green fleece with the bottom round bit of the teardrop cut off. I then pleated the teardrops to look like the inside of an ear, cut slits in the the hood, and added the ears about where I thought they should go.

First worn: Halloween.

Total cost: $23.70 for the fabric - I got a lot of it on sale