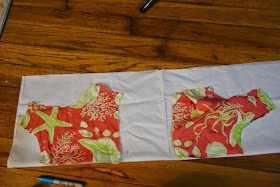
Step One: You'll need about a yard of fabric, folded in half. You can use the 36" wide muslin or any cheap fabric. I'm using a piece of an old bedsheet that I'm so glad I get to destroy. I really didn't like them.
Step Two: In the middle of the folded fabric, make a cut a couple of inches deep. This is partly to mark the middle of the folded fabric and also to help cut out the next step.
Step Three: Draw a half circle around the cut. It does not need to be perfect. All it needs to be is deeper in the front than in the back of the still folded piece of fabric.
The above is to show the circular piece cut out. What you can do is cut it out for the back and then cut it deeper for the front. Just fold the cut out piece at the half way mark to make both even if you like.
Step Four: Put the fabric with the cut out neckhole on the dress dummy.
Step Five: Pin the fabric tight at the sides. For this project, we are going to use the K.I.S.S. principle and make it a side lacing bodice.
This is to show the back of the pinned-at-the-sides fabric.
Step six: You'll want to pinch the fabric at the arms to figure out where to cut. You'll want to leave about 1" or more fabric along the edges for now so you have some play room.
Step seven: Cut the fabric away. You should have something similar to the above.
Step eight: Don't forget to pin the shoulder area and cut that excess away. You might have to pull up a bit on the fabric to get a decent about of fabric pinched up at the shoulder.
Step nine: Continue to pull the fabric tight. You might find that pinning the fabric to the dress dummy directly down the back and front helps slightly. It's okay if you end up with darts in odd places - just pin them so they are flat as I've done in the above photo. We'll draft out the darts when you cut this out to make the final pattern.
Step ten: You might find it easier to draw out the lines for the armsyce before you cut it.
Step eleven: Once the armsyce is cut and you are pretty happy with how tight the bodice is, cut away the rest of the excess fabric. Since this is an Italian bodice, you'll want to cut away the excess below the bust as well as around the side lace opening.
Step Twelve: One you have it to the length you want, it's time to cut out your desired neckline. I've drawn in what I'd like the neckline to be. Don't forget about seams! You want about 1/4" higher than your actual desired neckline.
Step thirteen: Double check everything. I had to tighten the bottom part of the bodice in the picture above. Once you've double checked everything, all you need is half the front and half the back to make a pattern.
Step fourteen: Copy the draped pieces to either fabric or paper to make a pattern. The back should be easy but if you have any darts, like I do on the front, draft those out. For more information on how to do that, please refer to how to take a commercial pattern and make it into a reasonably period pattern. There are pictures of drafting - or pinching- out the dart of a commercial pattern. The steps are the same as you would do here.
In the picture above, I'm comparing the side widths of both the front and back. You'll want to compare with the shoulders as well - make sure they are the same and cut off any excess.
Yay! Final pattern! I've been using a pattern I made using this technique for well over 8 years now. It works beautifully. Over the next week, I'll make a new Italian gown using this new pattern to show the fit and drape - as well as how to use this pattern to make a gown.


No comments:
Post a Comment