Sunday, October 30, 2011

Christening Bonnet

This is cross posted from my LJ account.

I used the February Baby Bonnet pattern for my nephew's Christening bonnet today. I made it last night and it took a full five hours to get the entire thing done. I used your basic acrylic soft white yarn from Wally World since my brother and sister in law (and everyone else in the family) just wanted something to cover the kid's head that would keep him warm. It didn't have to be any of the fancy yarns. :-)
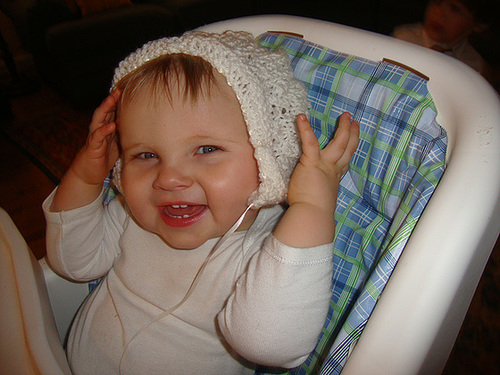
044


As you can see, my nephew liked it. :-) I didn't want to do anything too lacy -he is a boy- but I wanted something that would look special. The pattern I chose was simple, used needles I have used in the past without crying, and still looked nice. yay! Still, I messed it up. It was one of those things of reading directions at 10 pm and realizing that what you thought the directions said aren't even close to what they said. I basically was doing increases when I shouldn't have been doing increases. Rather than take it apart, I just did a few rows of decreases knowing that it would give that bonnet bump towards the back of the cap. It came out looking like a bonnet -just not the bonnet in the pattern.
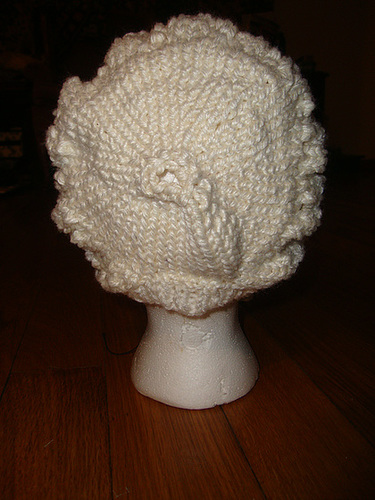
042

The back of the bonnet. I have no idea what there is that "bump" there on the back circle. I think I added one stitch somewhere and I really don't know where. I didn't notice it until the bonnet was finished.
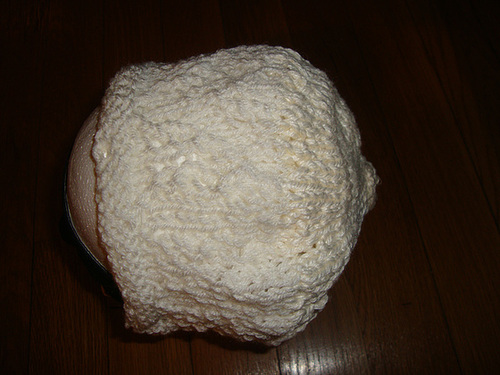
041

Top view looking down. You can see a bit here where I had to switch yarns. It wasn't obvious until you get it out in the sunlight. The back is a different yarn than the sides are.
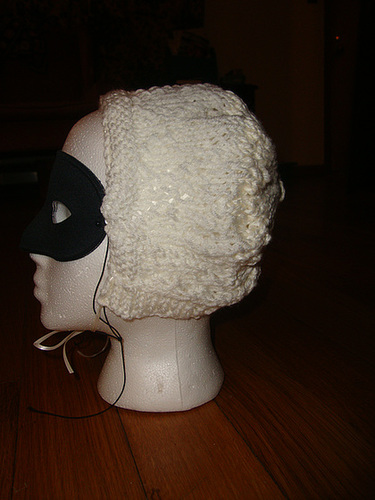
040

Side view. There is no real pattern to the design since I really messed it up. I ended up just being impressed it fit in the end.
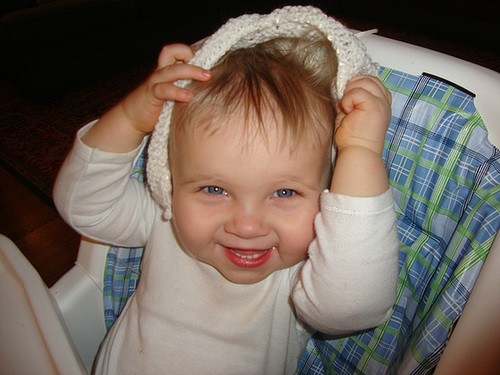
043


More of my nephew wearing his new christening cap! :-)

The Great Pumpkin!

Yesterday, I asked my oldest nephew if he could be anything he wanted for Halloween, what would he be?   His answer?  A pumpkin!

I didn't have the time to make him really look like a pumpkin (the whole sphere thing were you can't move your arms) but I did want him to wear something warm for Halloween.  (My sister in law wanted the kids to go around in their Renaissance outfits I made them, which is awesome, but they were made for 60+F temps.  I didn't want the poor kids to wear their winter coats over their Halloween costumes.  Where's the fun in that?)  My idea was to make him a cloak in green and orange that looked vaguely pumpkin-ish.


The cloak overall is very simple.   I cut out one BIG orange circle, cut out a neckhole and then a slit down the front.  The cowl is a smaller circle that I cut up a bit to make it look sort of like leaves around the edges.  The hood is a large rectangle that I attached to the cowl first.  I then sewed the cowl wrong side to the cloak right side so the seam would be tucked inside.   I also used a "pumpkin seed" shaped button for the front of his cloak.  (It's really a walnut shaped button but he doesn't know that)

His 1 year old brother's cloak is out of the green and has a green and orange tassel on the back of the hood but the 1 year old was asleep when I dropped the cloaks off at my brother's.  My nephew seemed to love it and he can say he's a pumpkin for Halloween while still being warm!   The cloak is fleece and will also work when I get to drag the poor kid and his mom to an SCA event.   My sister in law already has a lovely surcote to go with her Italian gown. 

Monday, October 17, 2011

Dress up the siblings!!!!

This past Sunday, I took my middle brother, my sister in law, and my two nephews to the Renaissance Festival. Of course, since they were coming with me, they had to dress up. This means I made an outfit for each of them. I wasn't able to do a lot of mock up which was disappointing. However, I think they came out okay for the most part.

I wasn't going for 100% accurate, by any means. What I did want was something my brother and his family could wear to the Renn Fest or to an SCA event without looking out of place. More of a generic medieval or Renaissance look.


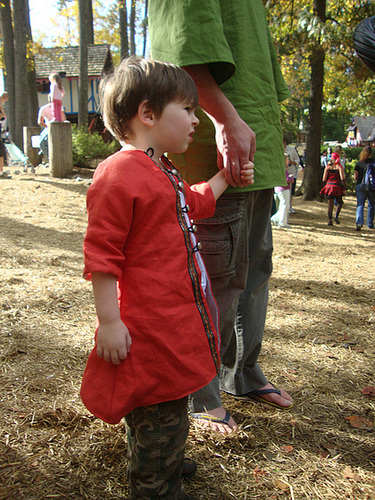
First, my wonderful 3 year old nephew!
October 141


He's sporting a Turkish style coat with a simple shift beneath it. I probably should make him a different shift because it was on the small side and looked a bit girly by itself. (Not that he cared. He's three. Such things aren't that important yet.)

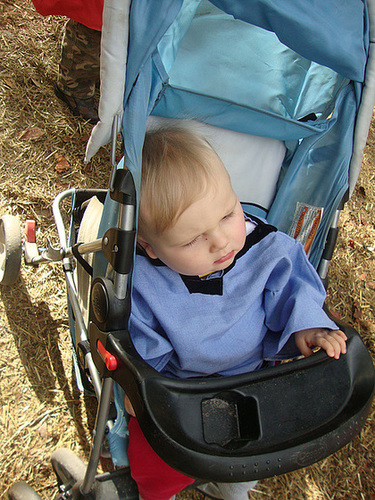
Next, my 1 year old nephew!
October 143


He's wearing a basic blue linen shift with black velvet trim. I was going to go all out and make a Prince Edward outfit for him but I cut it wrong and did this as a back up.

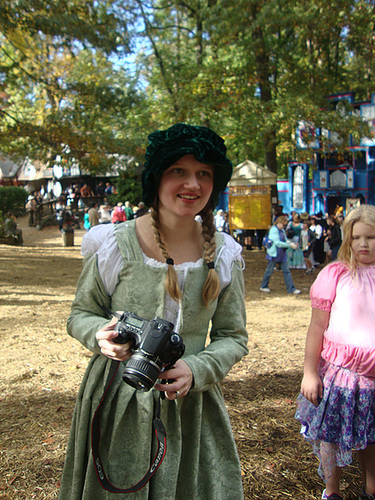
Next, my sister in law!

October 142


:-) She LOVED her dress. It's a basic 1550's Venetian in style with a generic mop cap. She loves green so I make a lot of her garb and clothing in that color. People stopped her to ask where she got her dress which made both of us very happy.

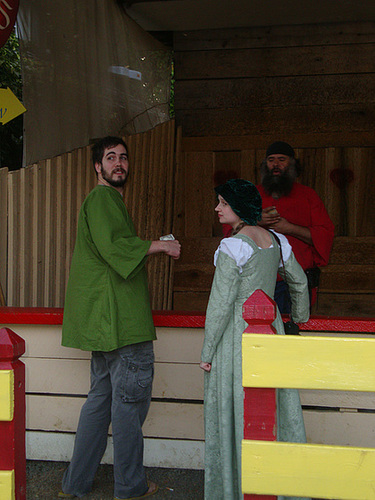
My brother! (And the back of my sister in law's dress)

October 153


My brother said "Robin hood" and so I made him a basic green linen t-tunic. He's swinging back in this picture so you can see the fullness of the tunic. He wants a doublet and shirt for next year. :-)

So, see? I made stuff this month!

Sunday, September 11, 2011

New Red Stays

I realized at some point this week that I don't have and essential part of my September 11th garb anymore - my red bodice. Every year, at the Renn Fest, I wear a blue linen skirt, a white smock, and a red bodice. The red bodice I wore last year survived the it's last day last year. So, a new bodice it was!

I found the perfect scraps in my scrap pile -a piece of silk that was just big enough for a bodice and a piece of red cotton that was the exact same color. The cotton was big enough for a lining fabric as well as just enough bias trim. Woohoo! Scrap pile win!

068

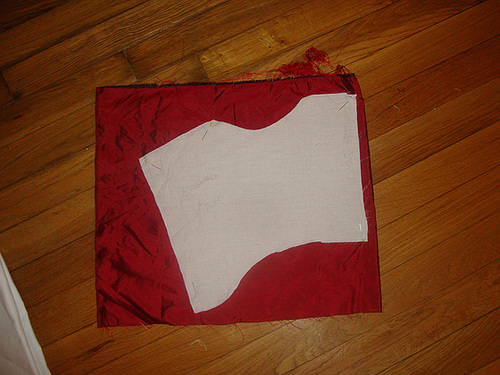
This is the pattern I used over the red silk. The pattern is my own.

Renaissance 014

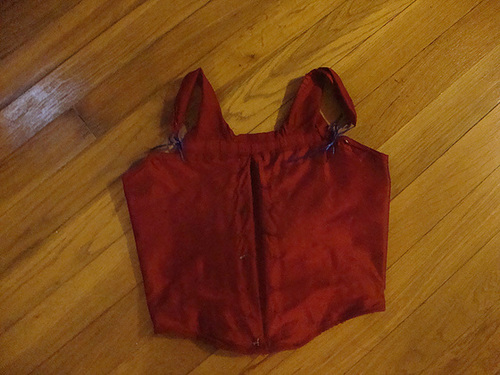
The bodice once it was finished.

Renaissance 016

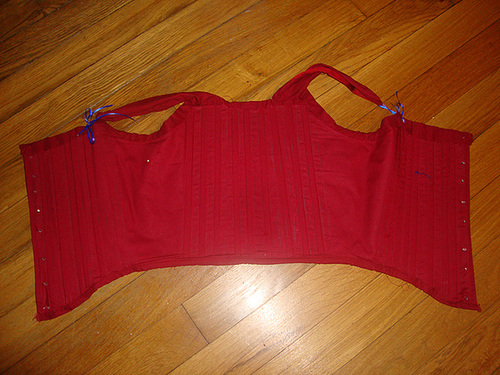
The inside of the bodice. You can see all the boning channels here.

I wore it today and there are a couple of issues. I need to add more eyelets -which I've done now- and I need to redesign the armscye because the front boning was pressing into my underarms which is not fun. I just need to cut it down a bit and it will be fine. I've already taken out the bones that were there.

Wednesday, August 31, 2011

New Blog!

As some of you know, I gave up on tumblr to publish pictures of the extant gowns I come across due to their near constant changing of their various formats. Basically, they took away the format I preferred without warning or reason. Without the ability to post in a slideshow format, the gowns and other outfits I posted looked...stupid for lack of a better word.

So, I've come over here to play with various formats and I've had some success. You can see the new home for the extant gowns in private collections here at All the Pretty Dresses or http://extantgowns.blogspot.com/

Please feel free to add and comment! I'm looking for advice on what format looks the best. I have three different options up right now; the slideshow, the multiple pictures together with links, and the table format with brief descriptions of each photo. Each has it's own pluses and minuses but, since that blog is specifically to keep a record of extant gowns for researching purposes, please tell me what style you like best.

I'll start tagging the entries soon and they'll use the same tags as I had on the tumblr site.

Monday, August 15, 2011

Coif

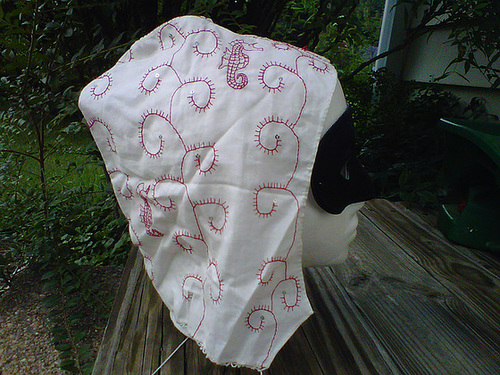
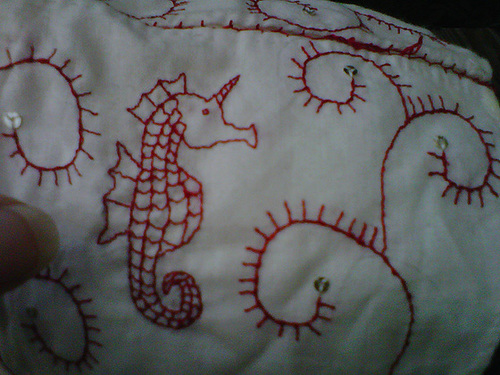
I wanted to put this over here to with a bit more explanation. Coifs were worn in the 16th Century as a cap for underneath other hats when you were out, as just a hat when you were in your own home. I wanted to make one because I do some Elizabethan in the SCA but also because they are a nice smallish project that you can finish and show off your embroidery skills at the same time. It's much easier than bothering with a full chemise!

I used red silk for the various designs. The real metal spangles are sewn on with silver/white silk thread. The cap itself is linen. The designs are all based on extant embroidery projects from the 16th Century.
coif


It's hard to tell, but I added small loops of cord at the bottom to act as a drawstring; similar to many extant coifs.

coif close up


The seahorse design is based off of the Oxburgh design here: http://collections.vam.ac.uk/item/O138490/panel/

The seaweed design is loosely based on this:
http://collections.vam.ac.uk/item/O13571/pillow-cover/

Wednesday, June 29, 2011

Under the Redcoat

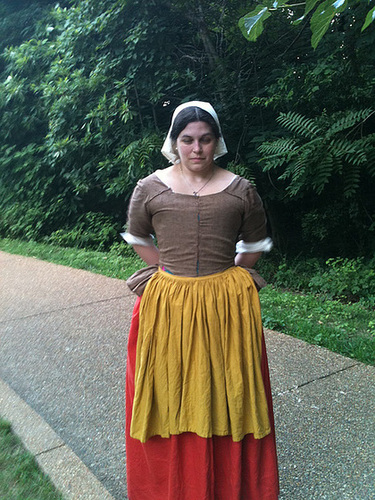
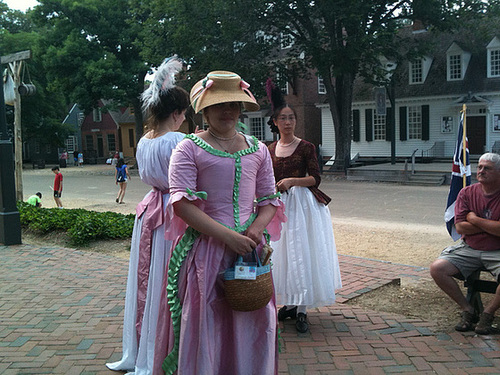
As anyone following me on LJ knows, I've been going nuts trying to get a ton of outfits done by this past weekend. I did it. Here's the photographic evidence:
photo(19)


Just read the caption on flickr to figure out that one. It was worn the first day we were there.

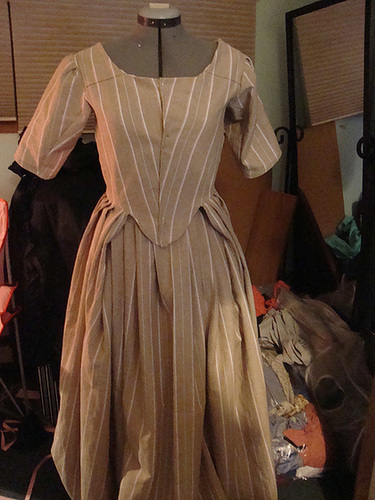
I swore there was one of me wearing my tan and pink striped round gown but I can't find it now. I wore it Saturday. It needs pink linen trim around the neckline, badly, because I'm only a shade lighter than the tan!
DSC04530


On Sunday, I wore this:

IMG_7252


Originally, I wanted a red velvet belt to go with it but I couldn't find my belt buckle...until we got to Williamsburg. By then, I didn't have access to red velvet! Oh well, next time.

photo(3)


Ignore my face in this picture. I look like I swallowed a bee and ate a blueberry. I re did the trim on the pink dress...again. This is the third time. I think I finally like it. It looks right with this style dress. Now, to make sure I don't swallow a bee or a blueberry next time I wear it....

Mom's outfits:

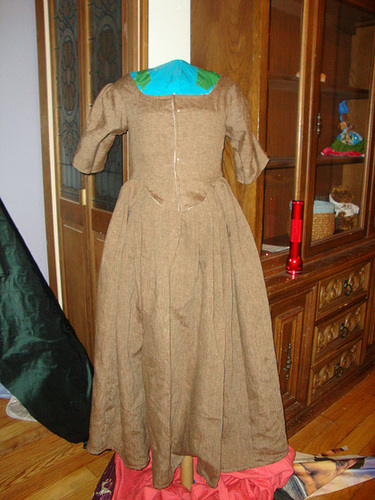
I can't find any pictures of Mom wearing her brown striped dress although she liked that one.
Summer 2011 162


photo(12)


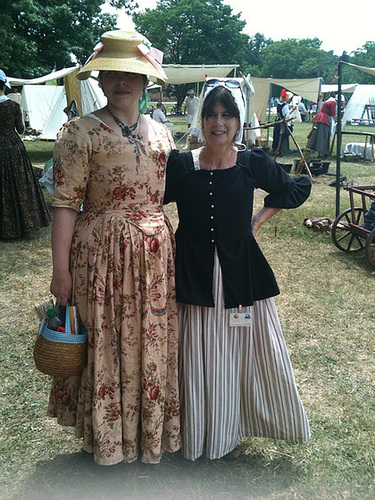
Mom and me. No, I have no idea what we were looking at. Probably the campfire...or Ice Cream making!

photo

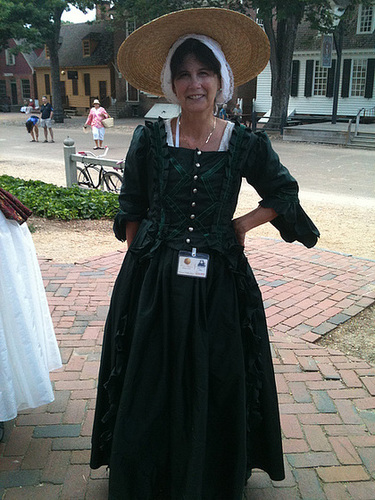
Mom's green silk dress. It needs a bit of work but she loved it. It's going to be her Halloween outfit. Now to get Dad to be the headless horseman!