
The Pink 1790's Dress is done!!! Yay!!!
So, first, the inspiration:

This dress can be seen online here. Just type in 1795 into the "cerca simple". The pink dress is in the middle row, typically, of the search results. Click on "Fixta completa" and a new window will pop up with a lot more information. In the new window, click on "imatges" and then "ampliar" for really big photos of the front, back, and embroidery.
I did deviate from the original in a few things beyond mine being more pink - the sleeves. I couldn't figure out the original sleeves and what the heck is on them. I just added silver metal sequins to the white silk taffeta sleeves on my dress and then took some silver zari lace to add that to the bottom of the sleeve.
I also couldn't really figure out the skirt. As far as I can tell, there isn't a seam in the thing! And how did the seamstress gather the back to allow for that lovely full train? I have no idea. However, in the 1790's, it was perfectly acceptable to just cut a rectangle and gather a lot of it to the back to give you that back puff without the use of a bumroll - which they had. So I did that.
However, the bodice is pretty much cut and constructed the way I think this dress is.
 First, the back. Those that have been following the blog have already seen these photos. I constructed a pattern based on the lines of the original gown. This meant a diamond shaped back.
 Rather than gathering the front for the pattern, I just pinned it. It worked.
 The sleeve is based on the pattern from Janet Arnold.
 Back of the sleeve.
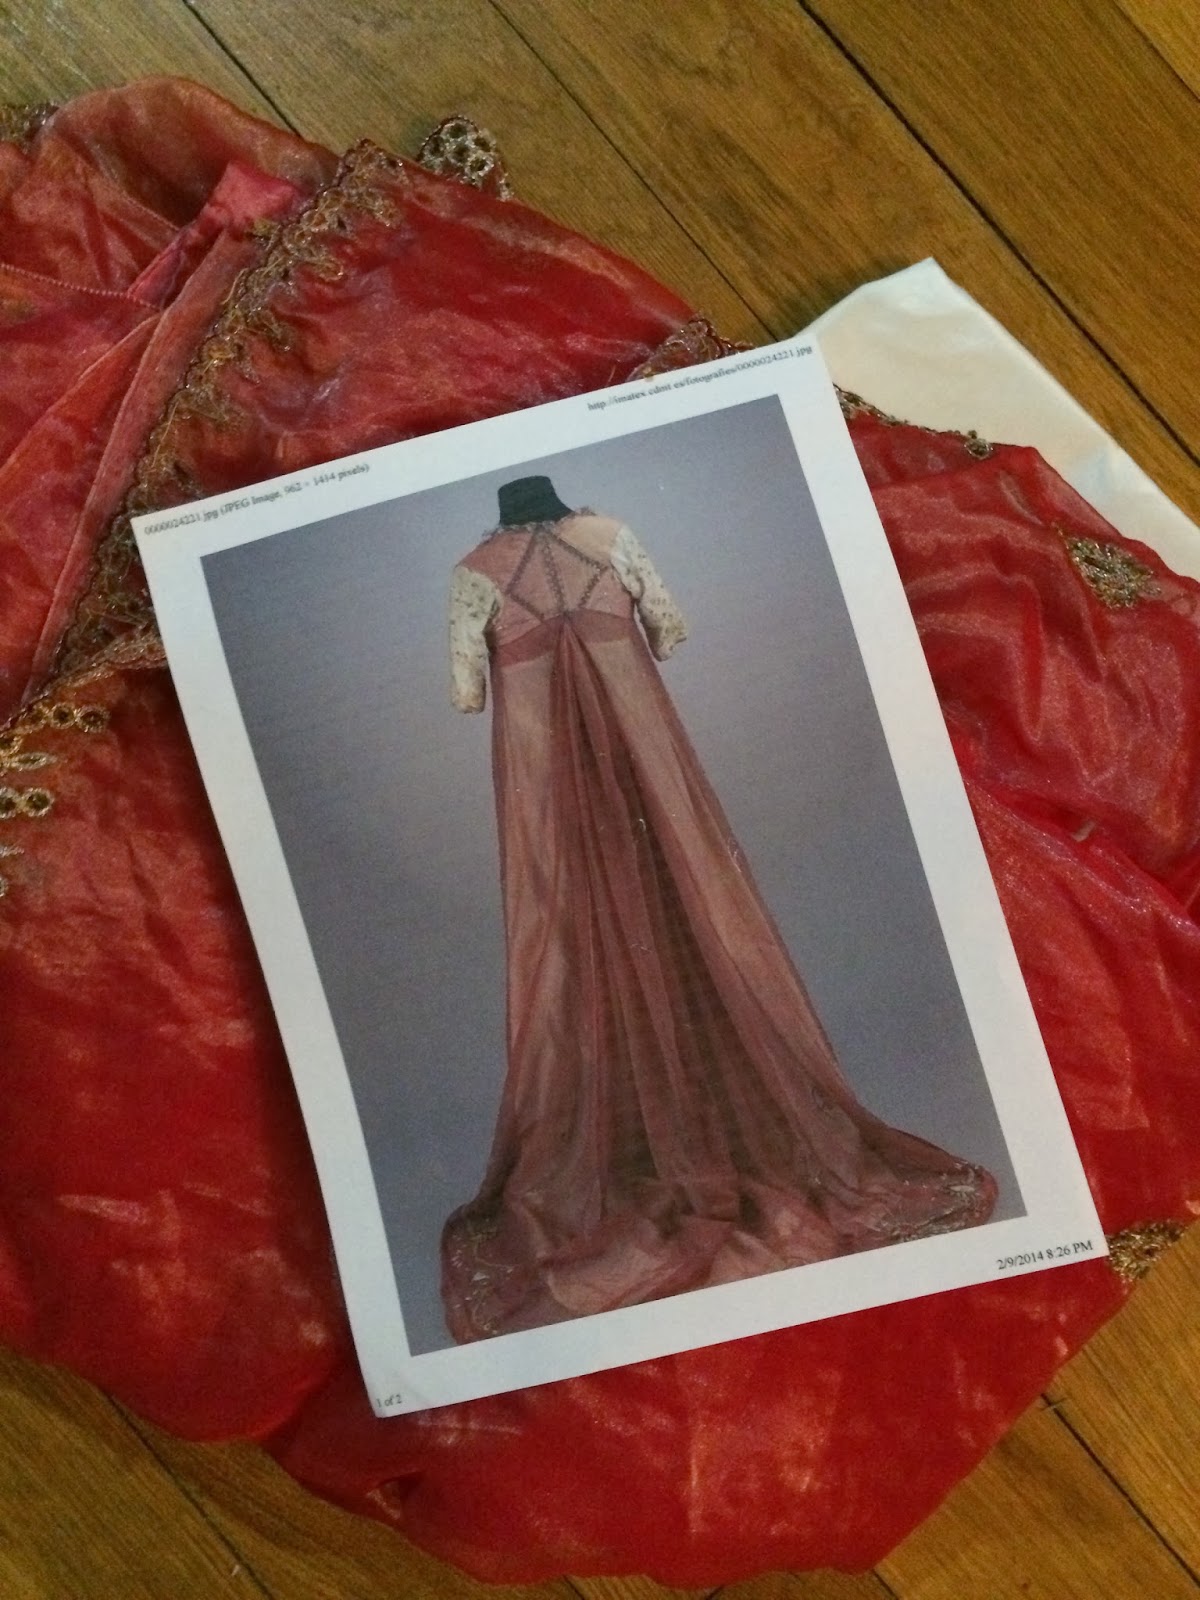 Print out I was going by and the sari before I chopped it up into pieces. You can also see the silk taffeta peeking out. The silk taffeta was left over from my 1860's ball gown.
 The bodice! I had done everything except attach the skirt last night, pretty much. The sleeves worked, the lace was added to the neckline, the dress was nearly done - but this was also taken at 1 am in the morning and I figured finishing the dress that late/early really wasn't a good idea.
 So skip to this morning when I added the skirt! The bottom of the bodice also has a gathering ribbon in it. I had to gather the front part of the skirt (which was the pallu of the sari) to the ungathered tube of the bodice and then stitch the rest of the skirt to the back of the dress.
 The photos look funnier than the dress really is. It is puffy in the back but it actually looks nice - well, nice for the 1790's. The attached petticoat skirt was easy to sew around the bodice. I just machine stitched that. However, it was just four trapezoids (the original dress doesn't show gathers in the attached petticoat so I tried to copy that) and didn't need to be gathered.
 The sleeve! Those sequins kept jumping away from me as I tried to sew them down.
Now the important stuff:
The Challenge: Pink
Fabric:A sari from my stash of silk organza, white silk taffeta, a ton of muslin
Pattern: My own! Pictures to prove it too!:-)
Year: 1795
Notions: Not accurate nylon yellow ribbon, accurate silver zari lace, silver sequins
How historically accurate is it? I'm going to put it at about 90%. I did machine sew the big seams but you can't see them. Anything you see is probably hand sewn.
Hours to complete: Maybe 12?
First worn:Tonight!
Total cost:
Probably about $17 for the sari, if I recall. I think the silk taffeta was some of that $5 a yard stuff I got years ago as well. And the muslin was $1 a yard. So...$32 for the fabric? Maybe $40 total with the notions?I did deviate from the original in a few things beyond mine being more pink - the sleeves. I couldn't figure out the original sleeves and what the heck is on them. I just added silver metal sequins to the white silk taffeta sleeves on my dress and then took some silver zari lace to add that to the bottom of the sleeve.
I also couldn't really figure out the skirt. As far as I can tell, there isn't a seam in the thing! And how did the seamstress gather the back to allow for that lovely full train? I have no idea. However, in the 1790's, it was perfectly acceptable to just cut a rectangle and gather a lot of it to the back to give you that back puff without the use of a bumroll - which they had. So I did that.
However, the bodice is pretty much cut and constructed the way I think this dress is.
Now the important stuff:
The Challenge: Pink
Fabric:A sari from my stash of silk organza, white silk taffeta, a ton of muslin
Pattern: My own! Pictures to prove it too!:-)
Year: 1795
Notions: Not accurate nylon yellow ribbon, accurate silver zari lace, silver sequins
How historically accurate is it? I'm going to put it at about 90%. I did machine sew the big seams but you can't see them. Anything you see is probably hand sewn.
Hours to complete: Maybe 12?
First worn:Tonight!
Total cost:
Small edit:
Me wearing the dress!


.JPG)
.JPG)


