Showing posts with label 1870s. Show all posts

Sunday, June 19, 2016

Victorian Bathing Suit!

A couple of months ago, I wrote on some common myths about Victorian and Edwardian bathing suits.  While doing the research, I fell in love with one of the bathing suits I came across:

I adore the short sleeved bathing suit from 1870.  Since I had a Victorian seaside party to go to, I thought what is essentially to the modern eye capris and a short sleeved bolero with a button up vest is far more practical than making a silk bustle dress (I have some lovely orange silk and white silk brocade.  One year, I will make the orangesicle dress!).

Since the theme for this month in the Historical Sew Monthly is travel, I realized that a Victorian Bathing suit would be perfect.   After all, even then, if you were traveling to the beach to take in the vapors (or get away from them) you needed your bathing suit.

My first thought for making my own bathing suit was to use white and red wool - as these were popular colors- and then I thought "but what if it really gets wet?" and struck that idea out.  White fabrics and water tend to make the white fabrics see through.

I ended up doing black and hot pink mainly because that was what was in the stash (but also because it matches my hair now!)

Like most first wearings, I do know I need to edit it a bit.  I made the front too low cut - it was easy to deal with with a chemise top underneath and I had seen chemises poking through in some later Edwardian photographs.

The skirt isn't quite the right shape and is too long - it's actually a pretty simple recut since all I did is take a rectangle of fabric, line it, and pleat it to a waistband.

Better buttons on the knees - one popped.  Whoops!

Still, I'm pretty happy with it and the way it came out.

This was the initial try on over my pj's.  I was just pleased it fit...particularly as this was midnight and I had to wear it when I woke up.  :-)

The Challenge: 
June – Travel – make a garment for travelling, or inspired by travel.
Material:
Lightweight black wool and lightweight pink wool twill
Pattern: 
A couple of different ones with some edits of my own. For the bloomers, Butterick B4861. I've used the long version many times for work pants. The short version (View B) looks like Victorian bicycling pants so I used that as is with only a minor addition: on the legs, you have to add an 1" width to the front and back at the inside from the crotch down.  They made the pattern without enough in the seat for most people.
For the jacket, I used Butterick B5232. I've used it before and know it's a bit on the loose side for what I wanted this time around.

So, after cutting it out, I checked it over the corset on the dress dummy to make it more fitted. The faux vest front and the skirt are both my own patterns and additions.
Year: 
1870

Notions:
Buttons! Hooks and Eyes! Ribbon! I used jet buttons for the vest front and the knees of the bloomers. I used mother of pearl looking buttons for the skirt. Hooks and eyes everywhere else. The ribbon was used to make loops for the buttons on the front of the vest.

How historically accurate is it?
They had sewing machines! The ribbon isn't a period material but the rest of the outfit is pretty close to what would have been worn.

Hours to complete:
About six or seven

First worn:
June 18, 2016

Total cost:
The pink was left over from my pink wool Italian dress from three years ago. The black I *think* I got at the thrift store but I really do not remember. The buttons were thrift store purchases - I bought a huge bag full for $1. Since it was all either left overs or stash, this probably wasn't more than $5 (I'm trying to remember how much the black wool was! Most of the thrift store fabrics are under $5).

In the end, I'm glad I wore this.  It was comfortable (it's capris and a short sleeved top so...yeah.  It's a bit too similar to what I normally wear.  :-) ) and I loved not worrying about getting it messed up (it's mostly black and wool - it can handle dirt).  With some minor changes, I will be wearing it again.

Sunday, November 2, 2014

Costume Roulette: Natural Form

First, the hair:
The image above is from 1875 - a bit before the Natural Form but I realized I might actually be able to do the style on the bottom left without too much difficulty.  It's a braid around the head and a bun with a drape of curls.  I've done one or two of these as part of my normal hair routine but never all three together.

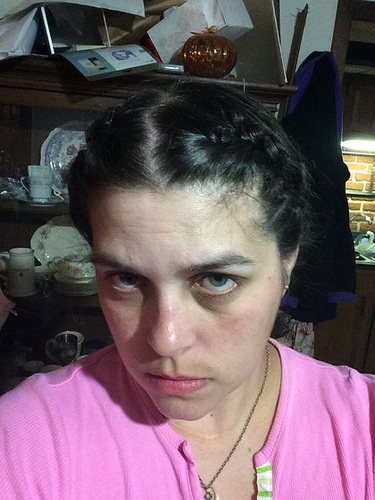
First, I divided the hair from above the ears - moving the sides of the hair (and bangs although they are almost to my chin now) to the front and leaving the rest back.  I french braids the bangs and incorporated a slight braid into the sides of the hair - this is part of what I do normally and it looks like this:


photo 2(1)


...Once I take the braids back and put my hair into it's normal bun.

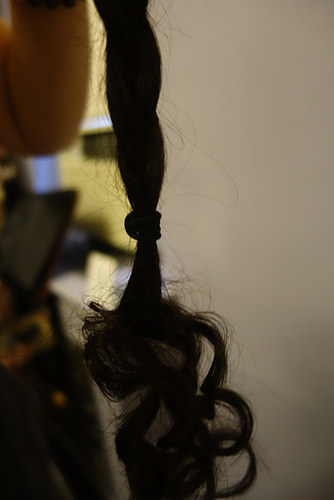
However, this time, I needed a thick braid as well as a bun and a cascade of curls. To accomplish this, I split the hair in the back of the head in half - the top part being the part that would be the bun and the bottom being the part that would be the braid. I took the slightly braided sides and incorporated them into the bottom/braid part. I only braided the sides far enough to reach the back of the head so you don't see a braid within a braid. Once I braided my hair, I tied it off and curled the ends (and plastered them with hairspray).

DSC05252


The braid had to be loose to give it that "big hair" look.

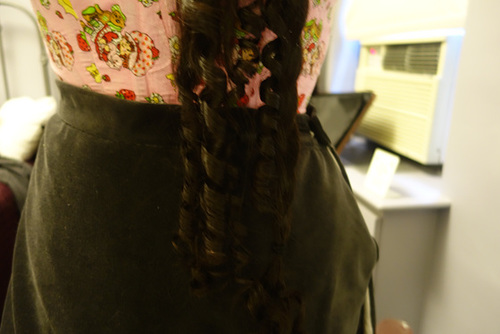
Next, I took the top part of the hair and split it to make some curls about half way down the length of my hair. Again, plastered with hairspray.

DSC05249


I then did the bun first, having the ends tucked under the bun so the cascade falls correctly. I then wrapped the braid around my head and bobby pinned everything into place.


Yes, my corset is Strawberry Shortcake print with red bias tape. It works.  Sorry for the bad iphone pic.

The dress:


 Before I put the sleeves on but you can see the train and the back of the jacket detail.
Once it was mostly completed. I think I still did some stitching to the skirt after this.

The dress is out of cotton velvet, lavender silk I originally made a dress for a Poe event out of (but I made the sleeves too small so it went into the UFO pile because I only ecked a dress out of the fabric and didn't have enough to redo the sleeves), and gray linen.  The linen is the base of the skirt.  Oh, and white silk for the lining of the train.

For my first attempt at Natural Form, I think it came out alright.  It fit, which was a big plus.  :-)   I used Wearing History's  1879 Bodice e-Pattern and only had to make a few slight changed.  The collar was odd - the original seams to end at the shoulder seams.  I made a back piece so the collar would go all the way around.   The sleeves are a LOT longer than they look on the pattern's picture.  I ended up not using the cuffs because they just weren't needed.

I used black netting to fill in the neckline.  There is a photo from the same era showing a similar bodice design but with a scarf to fill in the neckline - which is where I got the idea:


Since I've had the cotton velvet since the early 2000's (I think 2002.  I wanted to make Queen Amidala's Gray Kimono outfit at one point and never got around to it) and the lavender silk since 2008 or so, this outfit was very cheap to make.  It was mostly stash (the only thing I had to buy, I think, was the bed sheet to make the petticoat and the hoop skirt).   Even the buttons were stash.

I might get more photos later of me actually in the outfit - I know several were taken.  We'll see!


I'm wearing it in this video:

Tuesday, October 28, 2014

Natural Form Dress 2: The Underthings

For the Natural Form dress, I decided to make hoops and a petticoat.   I want the dress to have the correct look - even if the underthings are a bit off.

For the hoops, I based them off of loosely off of other natural form era hoops. Originally, I was going to do the whole belt thing - with suspenders hanging down to hold up the hoops around the hem- but it just didn't look right. So I took a rectangle of fabric and added that to get a full hoop skirt.


It still doesn't look quite right but it works. The petticoat will hide the fact it's a bit more crazy with the odd looking hoops. However, the hoops will help keep the skirt out and give it the shape it needs.

For the petticoat, I pieced together what fabric I had left over and then added some lace that I really didn't have a use for to the back of the petticoat.  It's not super pretty but it is functional.
The waist to the petticoat is just a drawstring.  If I have enough time, I might switch it to a waistband.


Tuesday, October 21, 2014

Natural Form Dress Part 1


A few weeks ago, I bought the Wearing History 1879 Dress Bodice e-pattern.  According to the description, the pattern should be very similar to my corseted measurements.  The pattern doesn't have seam allowances so I traced around each piece - after putting the pattern puzzle together (which was very easy) - to give a bit of a seam allowance.   I then cut out each piece and pinned to together to get....

This!   I only put one sleeve on - the sleeves are longer than they look on the illustration of the bodice.  The asymmetrical front went together pretty naturally, honestly.  The only things I really have to take in/down are the shoulders and where the armscye is for my own comfort.  


You can see a little bit how far the shoulder straps jut out over the sleeve. I ended up cutting a lot down/off around the shoulder area. The rest? So far I haven't had to play with it. Now for a wearable mock up....

My overall inspiration is this image:

http://archive.org/stream/BookUnSiecleDeModesFeminines/UnSiecleDeModesFeminines#page/n183/mode/2up

I want to do something similar to the red and black - but in lavendar and dark grey. The main body of the dress will be velvet with lavendar wool - hopefully to be a proper half mourning dress for the MET exhibit. We'll see!