Wednesday, April 27, 2011

Elizabethan!

First, hello new people! I think I have five new people on my blog since last time I posted.

Second...


Easter 039

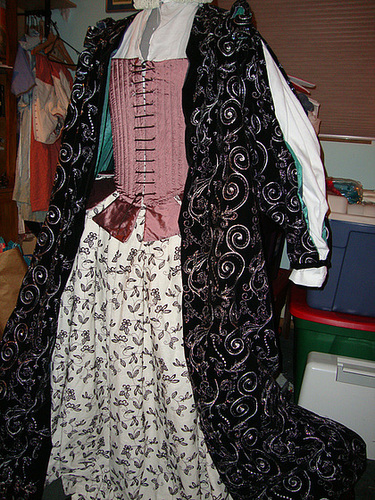
I actually finished it! Yay! After a huge issue with the first pair of stays in which I cut out the wrong pattern -the stays themselves were perfect...for a Venetian bodice to a dress; anyone have a lot of bright coral pink linen lying around so I can make a skirt for it?- I decided to go back to the drawing board and made a pair of pink silk stays instead.


I drafted my own pattern:


Easter 028


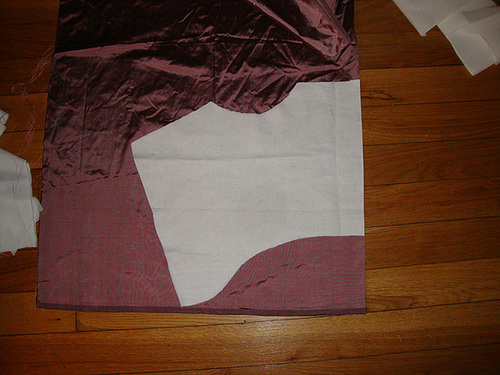
I used my 18th C stay pattern as a base, lined up all the pieces, drafted out a few of the lines, and then redrew the stays into one piece on muslin. I then tried on the muslin, corrected a couple of minor issues, and used that as my Elizabethan Stays pattern.


The stays are made out of pink silk, linen, and buckram. I used good ole duct ties for boning and it's fully boned in the front but only lightly boned in the back.


The smock is 100% linen. It has a couple of minor issues but nothing that should show up while I'm wearing the entire outfit.


The skirt is 100% linen as well but has cotton (machine) blackwork all over it. The difference between the weight of the skirt linen and the smock linen is night and day. The skirt almost has the same weight as a pair of jeans and the smock feels like a handkerchief. I know some people were thinking of using the skirt linen as a chemise but I really don't see how. It's so heavy! Which is great for a skirt or a kickin' pair of 16th C Italian bloomers (hmmm...) but not so much for a chemise/smock.


I'm planning on wearing this Friday night. I should get some good pictures from that!


Wednesday, April 20, 2011

Pictures!

DSC03963


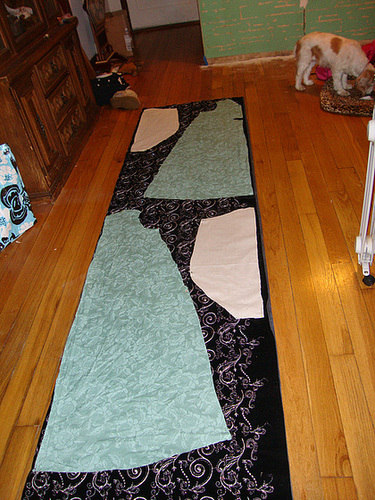
The above shows the pattern pieces for the Elizabethan Surcote on the black velvet. The green is from what was probably an old sheet at one point. I bought the fabric (along with a huge lot of other fabric) thinking it would make an amazing lining. It did...for my sister in law's Spanish Surcote. It went beautifully with the green velvet. I made a copy of that pattern to use for my own Surcote.


DSC03970


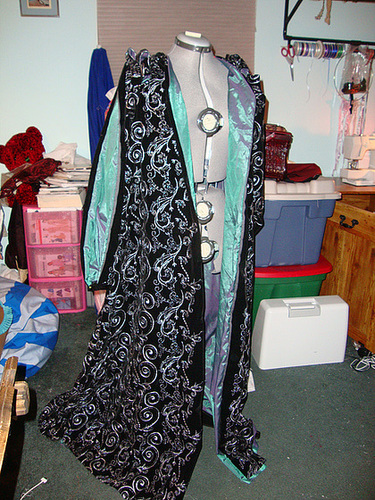
It's hard to tell in the picture, but the hem is very generous. I will hopefully take a picture tomorrow of the new petticoat to go with this Surcote, my embroidered jacket and a bumroll to give a good idea of how it fits. I need to work on making my stays was well...


DSC03973


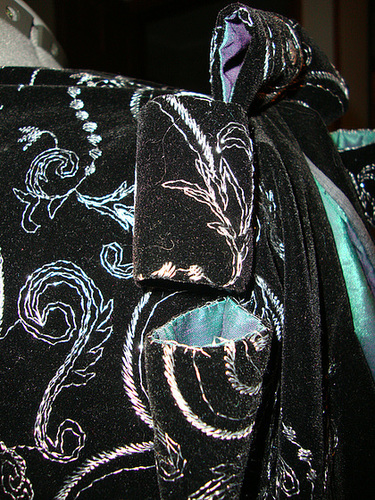
Above is a close up of the shoulder detail. I haven't finished the surcote; I do still need to hem it, stitch the armscye shut and sew up the cuffs, but most of that is a few minutes work. The hem isn't but I think I might be able to get that done quickly.

Tuesday, April 19, 2011

OT: I can't see DISQUS at work

I know a lot of you are switching to DISQUS for thread commenting. (Three people on my read list thus far)  I just wanted to let you know why I'm not commenting.   My work computer has "outlawed" DISQUS so I don't see a comment button.   I can't comment at all.  It's not that I don't want to comment, it's that I can't.  So, please, don't take offense in anyway if you are curious why you never see my comments on your page in the future.  It's probably because you are using DISQUS and I can't see where to comment.  :-)

In other news:  I began to stitch up the "shoulder loops" for the Elizabethan Surcote.   I started with a buttonhole stitch on one side of the "loop" to keep it tacked to the lining but I'm thinking a simple whip stitch might work better and quicker.  The sleeves are an open style and sewn as is the main body of the surcote and lining.  It looks really neat on the dress form thus far.  I can't wait to finish it tonight and take pictures to share with everyone!

Sunday, April 17, 2011

All in a Sunday Afternoon....almost!

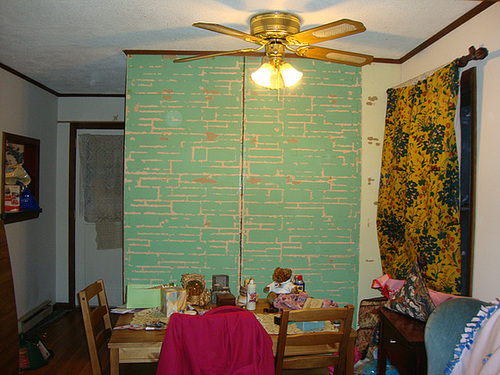
Only a little bit of sewing in this post! I started on my dining room wall today. You see, my dining room wall originally looked like this:


009


The faux wood wall? It had a price tag from Hechinger's on the other side when I took it down. I'm pretty sure that they went out of business last century. I have no doubt the faux wood was from the early 1990's at the very latest. I would say 1970's but the color that greeted me beneath it screams 1985.


011


It the aqua/turquoise color had been consistent, I honestly doubt I would have bothered to repaint. However, the brick like pattern is actually from where the glue that was helping to hold up the faux wood tore off, revealing the very lovely most-likely-lead-paint layer beneath. What looks like cream is really a lovely blush pink. Beneath that was a wedgewood blue and beneath that was another cream. No, I have zero idea why about a fifth of the wall is a yellow ivory shade. The very odd thing is that that is the closest to the window so it wasn't like the previous owner could have had anything semi-permanent up there unless she liked blocking the window.

After I chauked up all the nail holes (there were a TON because they used picture nails to put up the faux wood and painted over them so I couldn't see where they were. It was interesting taking that stuff down...), I sanded down the wall and taped it off...and waited.

You see, the lovely table you see in the photos actually belongs to my brother. About the time I thought about making black slip covers for the chairs, he decided he was going to move out and get his own apartment. He didn't/doesn't live with me -it was just easier for me to keep it for him while he was at Mom and Dad's going to Law School than to bother with a storage place. Having Sis use it is a lot cheaper. :-)

So, I figured I'd wait until he got the table since it would be a heck of a lot easier to paint and live while the paint dried without the table and chairs in the way. He got the table Tuesday and I think I did all the prep work about three weeks ago or so? I'm not sure. I took the faux wood wall down in late Feb/early March so it's been a while.

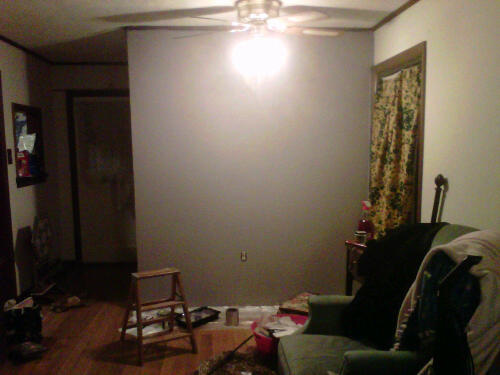
Anyway, I waited until this week and finally got the painting done!


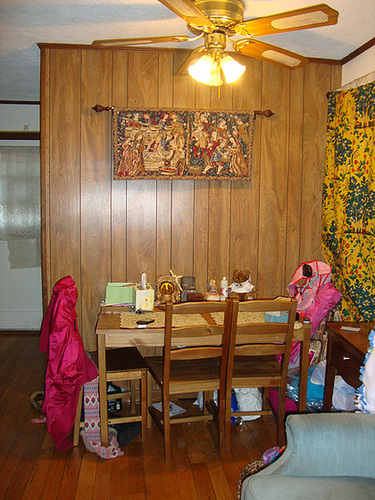
Dining room wall


See? Sorry for the bad picture, I lost my camera. Again. I'm not sure where it is this time.

So, on to other news. After painting the wall, I took the weeds out of the yard, mowed the front yard, and dyed cloth! I was going to use the turquoise silk I had from an old gown on my Elizabethan Surcote, but I think it will look far more fabulous with the purple Elizabethan Jacket I'm planning the summer. Purple wool with turquoise silk lining? Squee!

Finding nothing to my liking or a lot of fabrics that just weren't wide enough, I decided to dye some of the gazillion yards of medium weight white linen I have. (People just give me this stuff, I swear!) With the black velvet and silver embroidery of the surcote, I thought red would make an awesome lining. So, I bought two of the dye packets at the store and....got shrimp. No, really; it's coral pink shrimp colored linen now.


Fabric color


I think I'll still use it but it's not the color I was hoping for. I used two packets of the scarlet dye, salt, and only put five ish yards in so I'm not sure how it ended up...shrimp. But that's the color I got! Now, to go put the pattern pieces down and see what it looks like together!
Monday, April 11, 2011

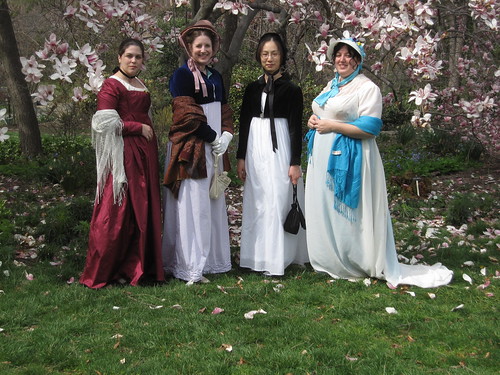
Me in the Regency Gown

Quincy134 took some great pictures of everyone this weekend at the tea. 

IMG_6293

The grounds at Green Spring Gardens was lovely. The house is from 1784 and still looks very late 18th century/early 19th century on the inside. It's a wonderful place to have tea and we will most definitely be back.

A link to my pictures as well.

Friday, April 8, 2011

Regency Gown Finished!

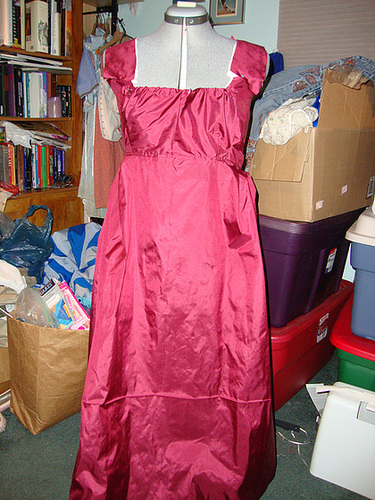
Regency Dress 007
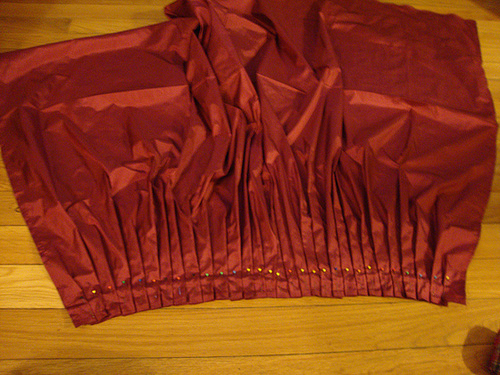
The pleated back of the dress! This was before I attached it, of course, but pleating it was interesting. The measurements for the pleats were different than what I'm use to since I wasn't making a full skirt, just two thirds of one!
Regency Dress 008
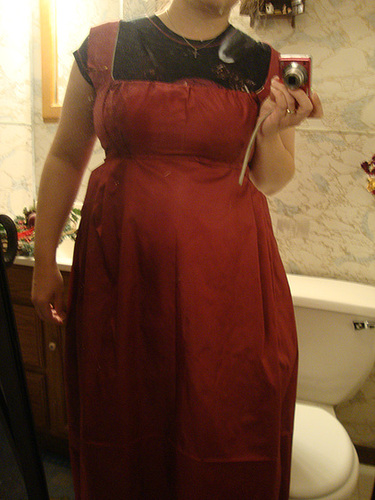
I tried on the gown over modern clothing before I put the sleeves on. Apparently my "ghost" approved (the white mark near my neck; for the past few months I've been getting orbs in my photos....)! The dress is low cut but, based on the pictures of the time, dresses were low cut then -then just filled them in with the chemise and fichu.
Regency Dress 021

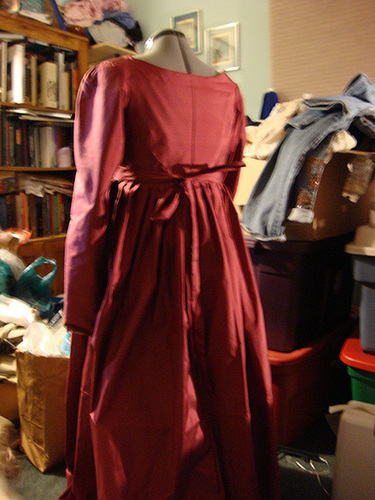
I'm sorry the picture is so blurry! And the sewing room so messy right now. :-/ The back of the dress looks really neat with the ties.
Regency Dress 025
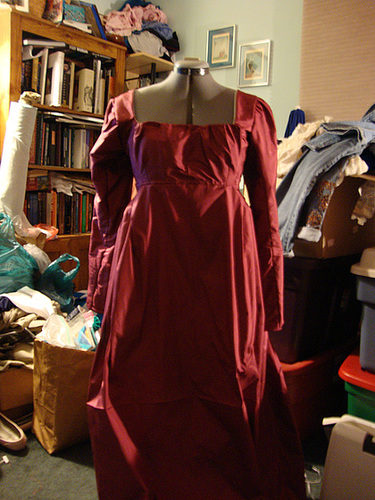
The front of the gown's picture didn't come out much better than the back. Hopefully this will give you an idea of what the gown looks like.
I lost my stays. Luckily, the pattern is very simple and I can make a new pair tonight (via sewing machine!)along with the new chemise for the dress. I plan on using regular old muslin for the chemise and some of the blue brocade I have for the stays.
Any comments or suggestions?

Wednesday, April 6, 2011

Regency Gown Progress


Above is the dress I'm attempting to re-create. I saw it a few months ago on Vintage Textile and fell in love with it. I bought the silk to re-create it back in November but never got around to it until this past week. I decided to hand sew the dress to get as close to the original design as I can.


Regency Gown 011


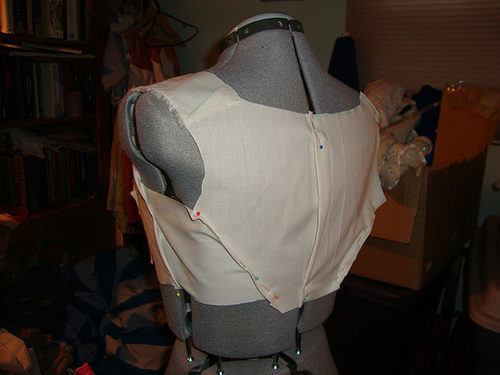
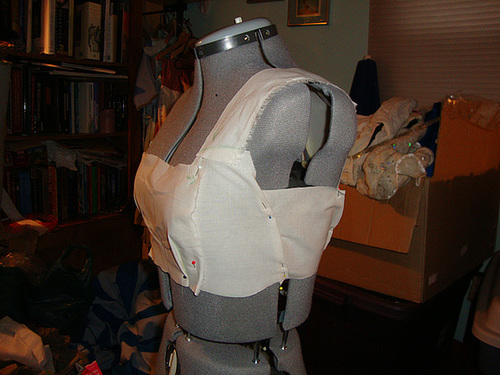
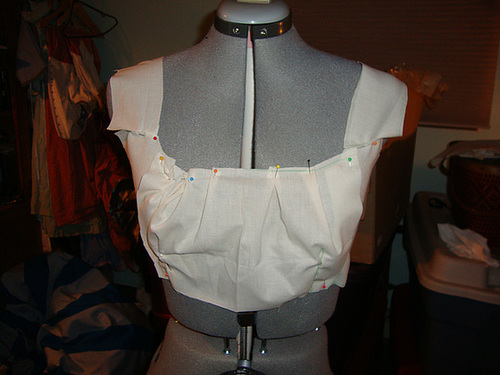
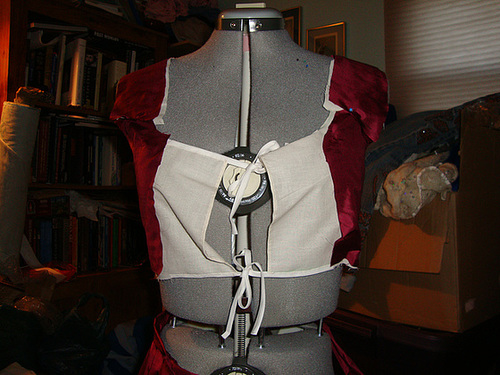
These are the first mock ups of the bodice of the gown. Since the skirt is nothing more than a rectangle that is pleated to the back and a smaller rectangle that is pleated at the sides, I concentrated on the bodice. The lines were very different from my previous Regency gown and I wanted to follow them as closely as possible. After taking in the sides and folding the back so I could get the proportions of the pieces correct, I ended up with this:


Regency Gown 002Regency Gown 001Regency Gown 003

The front of the mock up is only gathered with pins which is why it looks funny. I realized after the first mock up that I would have to cut a trapezoid, not a rectangle, for the bib front since it was gathered along the top. This actually is great for me since neckline on me and neckline on my dress dummy are two different things. I can just pull the drawstring and get the desired look easily.
Regency Dress 007

The bib/apron part of the dress is done. I also almost have the bodice done. I really just need to sew the straps (actually, one strap now because I finished one this morning), pleat & add the skirt, and sew up the sleeves. Hopefully, I can finish it tonight!


Regency Gown 015

Regency Gown 014
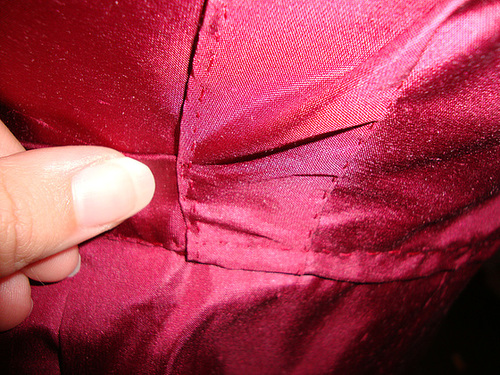
The dark picture showing the front closure isn't the greatest but I was attempting to show the way the bodice will look once it's finished completely. The lining is done and most of the bodice is. The other picture (the one with my thumb!) is the corner of the bib part of the gown with the attached straps. I wanted to give some scale to the stitches and the straps.
Hopefully, I will finish up the gown tonight. I plan on wearing it to a tea this Sunday! I'd like to have a new chemise before then as well which means -if I really plan on handsewing everything- I need to get crackin'. :-)