Monday, December 30, 2013

Historical Fortnightly 2014 Plans Thus Far


Once again, I plan on doing at least some of the Historical Sew Fortnightly. We'll see how many I actually end up doing - and how many times I change my mind on what project I do for each!
  • #1: Make Do & Menddue Wed 15 Jan. I have no idea what I'm doing for this one. Maybe the embroidered and lace chemise I've been planning forever?
  • #2: Innovation - due Sat 1 Feb. One of the greatest inventions for anything fiber in the late 15th/early 16th C is something we hardly ever think about anymore - the flyer on a spinning wheel. Probably invented around the 1470's, the flyer made it so you didn't have to stop cranking the wheel, wind the string/thread/yarn around the bobbin and then pick up the roving again. This way, you just held the roving with one hand, hand cranked the spinning wheel with the other, and the yarn wrapped itself around the bobbin. It saved a lot of time - and the yarn didn't get so crinkly and knotted either. Treadles didn't come until around the 1630's for spinning wheels. Still, the quicker you can make the yarn for the fabric, the quicker you can make fabric. This included at home- which may be part of the reason we see such a range in clothing and the start of fashion crazes around this time - fiber was getting easier to make. For this, I'm debating about two different pieces. I could do one of my favorite but simple embroidered jackets or I could go peasant. I'm leaning towards the latter but we'll see how much time I have.
  • #3: Pink - due Sat 15 Feb. Easy - Pink 1790's dress for the ball.
  • #4: Under it All – due Sat 1 March. No idea. Maybe go crazy and make a 1650's pair of stays?
  • #5: Bodice - Due March 15 Probably a doublet.
  • #6: Fairy Tale - Due April 1 I'm super excited for this one because I know exactly what I want to do. Not telling but it will be yellow with a touch of pink and very, very 16th c German.

Sunday, December 29, 2013

Historical Fortnight #26: Celebrate!


The Challenge: Celebrate!
Fabric:Silk dupioni
Pattern:  The redone trims are all my own
Year: 1822
Notions: Lots and lots of reclaimed silk dupioni
How historically accurate is it? ~70% ish. It's machine sewn and all silk dupioni so that knocks a lot of points off. However, the cut is accurate for the time period.
Hours to complete: The dress itself was already made. The retrim was about 5 hours just because I had to yank the old trim off!
First worn: Dec 29th at the Christmas Regency Tea
Total cost: None! Yay!

All the other important stuffs:

For this challenge, I wanted to make something for the annual Christmas Tea. However, I only have a gazillion Regency era dresses and I didn't want to make a new one. Any new Regency dresses are to be hand sewn - this is partly to prevent me from making new ones. ;-) Of course, I do have two hand sewn Regency dresses so you can see how well that's working!

Anyway, rather than making a new dress, I decided to do what any Regency era lady would have done when faced with an upcoming party - retrim your old dress.


This is how my watermelon dress looked after I finished it three years ago.

I was vaguely going for something like this:


But with pink and green. I didn't like the trims I put on the dress pretty much right away but there was little I could do at the time. So, therefore, the dress languished in the back of the closet until last night.

First thing, rip off all the trim and even the sleeves. Originally, I had put a growth pleat into the skirt and stuck the bright pink skirt trim under the growth pleat. This worked and is period but I ripped everything out this time. I then cut the skirt and re-hemmed it properly.

With the massive 8" I had to cut off the skirt, I decided to use that to recreate at least one row of the trim seen in this fashion plate:

From Dames a la Mode

I really love the hem on the fashion plate and it's pink and green too! Woohoo!

So I took the 8" of silk I yanked off the hem of the dress, folded it over and over, drew on it with chalk, and cut it to make it look like trim. 


On the bodice of the dress, I wanted something a little different. I really liked the bodice trim of this extant dress but went a bit simpler. The pink trim is just the old neckline trim, cut in half, and ironed.

Here is the entire finished dress. It's not super trimmed up, but I like how it came out now. I might add some more pink trim to it - I have a ton left from the old pink skirt trim- but it is fine as it is for now. 

A close up of the new skirt trim. I cut some of the old skirt trim into bias tape (about half of it) and used that around the bottom edge. The top edge is just the rest of the old neckline trim plus a small bit extra from the old pink skirt trim. I hope that all makes sense! I reused everything, pretty much, to make this dress go from roughly 1818 to 1822.

A close up of the bodice trim. It's not really that bright. The pink is bright but not hurt your eyes bright. The dress is also very clearly a nice dark green and not the least bit a muted black/green.

I was very happy to get it done in time to wear it to the Christmas Tea. It's not a ball gown, but it is a party dress - perfect for a late afternoon tea.

Thursday, December 26, 2013

Christmas


For Christmas, I like making people gifts. To me, making them something is a lot more personal and you can customize the object.
This is the apron I made my Mom. The cell phone photo is horrid, but you can see the ruffles. The apron also has pockets and can tie in the back. Mom loves blues and greens so I had to get these fabrics to make up her apron.

Star trek

My oldest nephew wanted a Star Trek uniform for Christmas. He's five for a couple more weeks. :-) When asked what color, he specified blue. Knowing that middle child nephew will want whatever his older brother wants, I made middle child a gold uniform. Although not in this picture, I also made the uniform pants.

To say oldest nephew was thrilled wouldn't be enough. He put on his uniform after church (he opened the present before church and wanted to put it on then. We told him after church.) and was completely ecstatic about it. I think his mom might have to fight him to even wash it.

You might notice the collar on the gold uniform is off. This is partly because I wasn't thinking while I was putting together the outfits. I used New Look A6398 for a pattern. The pattern top has a side shoulder opening so you can fit the t-shirt over a little kid's head. Perfect for my 5 and 3 y/o nephews. The pattern also has a neckfacing that I did edit to have the little angled front.

I cut two of the neckfacing so that there would be one inside the shirt and one outside to give the proper Star Trek look. On the gold shirt, I forgot to cut the outside neckfacing so the gold of the shirt would show. Whoops! Instead, I just sewed the neckfacing all the way around. Unfortunately, attempting to get tiny stitches out of stretch material is a nightmare. So middle child's uniform is slightly off.

On the blue shirt, I remembered. I sewed the inside neckfacing at the should opening with right sides together. I then flipped it, matched up seams, and stay stitched the neckline. The outside neckfacing had the shoulder opening cut so I stitched it, right side of the inside neckfacing to the outside neckfacing and then flipped the outside neckfacing...out. That sounds kind of funny but it's what I did to get the neckline right. I then pinned the bottom edge on both the inside and the outside and stitched those down. It came out pretty well, I think. I know my nephews think so!

The pants for the uniform I did up just like the pattern says - they are basic black pants. They fit my oldest nephew as he was running around by the end of the day in his full uniform, wearing an Iron Man mask, and waving a lightsaber (glow stick with flashlight).


My Christmas dress. I wanted something I could sew up quickly but also would look nice. The material is that stretchy velvet stuff but I loved the color. The pattern is my 1920's dress pattern and I tried to stay with the 1920's dress ideal. So, although the material is modern, the dress style itself is very 1920's. Mom liked it. :-) I wore it to church.

The sleeves I drew onto the velvet using sidewalk chalk. I really, really like sidewalk chalk because it's cheap, it lasts forever, and it works. Very basic trapezoid with a curved top. Since it's stretchy material, it's a bit more forgiving on the sleeves. The main dress pattern was the same as the one I used for my 1920's gown. I just made the front short and gathered the rectangle panels to the bottom of both the front and back to make the skirt. I then sewed up a tube of velvet (a 5" by 50" - the width of the fabric) for the belt and stitched the top of the belt to the dress at the fallen waistline. The Christmas tree pin holds the belt in place.

Monday, December 16, 2013

Historical Fortnightly #25: One Metre

The Challenge: One meter
Fabric: silk dupioni for the lining and silk satin for the main fabric
Pattern:  My own!
Year:  3rd quarter of the 18th Century
Notions: silk thread
How historically accurate is it? 95% because dupioni isn't correct. However, it is hand sewn.
Hours to complete: 3 hours
First worn: hopefully in Feb if not earlier
Total cost: $5. The dupioni was a .5 yard remnant that was 50% off. The silk satin was stash.

More!:

I wanted to make something that wasn't an apron or a pair of pockets or a coif or something else I've already done. I've been needing a pair of fingerless mittens - badly- for my gowns and knew it wouldn't take much fabric at all. I don't think it even really took half a meter for both the facing and lining fabrics.


 First, I had to create a pattern since I didn't have a commercial pattern on hand. I basically draped the muslin on my arm and cut off the excess.  I also draped the thumb.
 The rather wonky pattern.  Eh, whatever.  It works.

 Cutting out the rather wonky pattern from the silk satin scrap.


 The finished hand sewn fingerless mitten.  I would show both on but I needed one hand to take the picture and the other hand to show that it actually fit pretty well.


A close up of the folded back mitten to show off the lovely aqua silk dupioni.


Both the mittens on the floor. :-)

Saturday, November 30, 2013

Yummies!

This Thanksgiving, we went over to my brother & sister in laws again.  The one problem I have with this is that it means, if I want to eat at Thanksgiving, I need to bring all my own food.  No one save Mom knows how to cook without tomatos or butter.  Given this, I tend to bring a lot of things that mean Thanksgiving to me.  Believe it or not, it's not the Turkey.  The smell of the sweet potato pudding below is exactly what I think of when I think Thanksgiving. Add in some apple pie and yummy bread and I'm good!

For the apple pie, I'm using the medieval recipe I've used before. However, this time, I'm staying a bit truer to the Italian recipe and using light brown sugar for the crust. Turns out, I needed more sugar in the crust.  However, the filling was perfect.

For sweet potato pudding, I modified this recipe so I could eat it.

Ingredients:

  • 2 eggs, separated, room temperature
  • 1/4 cup coconut spread
  • 1/2 cup firmly packed light brown sugar
  • 1/4 cup vanilla almond milk
  • 1/2 teaspoon salt
  • 1/2 teaspoon ground cinnamon
  • 1/4 teaspoon ground nutmeg
  • dash ground ginger
  • 1 cup mashed cooked sweet potatoes

Original instructions:

In a medium mixing bowl, beat egg whites until stiff peaks form. Beat yolks in a separate bowl. In a mixing bowl, cream together butter and sugar; add well-beaten egg yolks, milk, salt, nutmeg, cinnamon, ginger, and sweet potatoes. Fold in beaten egg whites. Turn mixture into a buttered 1 1/2-quart casserole. Bake at 350° for 40 minutes. Serve with cream or a caramel sauce. Serves 4.

My Instructions:

The eggs would not peak.  I added lemon juice to them and they got very fluffy but I think it was just too humid out to get the egg whites to peak.  I beat the yolks, coconut spread, and brown sugar together in a separate bowl.  It ended up looking something like a very creamy spicy mustard.  Once that was done, I added the boiled and somewhat mashed sweet potatoes as well as the spices and almond milk.  I tried to fold in the eggs but...nothing really wanted to work that way.  After I cooked the sweet potatoes, I mashed them up more (it's very hard to mash up potatoes when you don't have a masher or a blender.  I did this all with a fork) and put it in the fridge.

When it was time to eat the next day.  I put the sweet potatoes in the oven again for 5 minutes to heat them up and then put ricemallow cream on top.  Yummy!  My brother commented that mine had the best texture since we had three very different sweet potato offerings for Thanksgiving.  :-)


I also took over Medieval herb bread which was a huge hit and my normal sweet sourdough bread I make with my starter.   I actually had food this Thanksgiving!   And yes, my very sweet SIL cooked the Turkey with veggie oil rather than butter.   This meant I could eat that too!

Wednesday, November 27, 2013

Thanksgiving Prep

For me, Thanksgiving dinner actually means everyone else gets to eat and I eat whatever I bring.  This means, I need to cook whatever I want for tomorrow.   I've been asked to bring bread, which is currently rising in the kitchen, but I'd also like to bring sweet potato pudding and apple pie.   So, tonight and tomorrow morning will be lots and lots of cooking!

I finally tried the Soy Pumpkin Spice milk and...it tastes like it would be great in a pumpkin pie but not by itself.  It is very pumpkiny and has a slight chalky aftertaste.  I'm pretty sure the aftertaste wouldn't be noticeable if you mixed the milk with other things.  Might have to make pumpkin pie soon too...

I still love the coconut milk based egg nog.  It is so good!

On the sewing side of life - I need to take pictures of my 1860's Ball gown.  I have some but none are very good.   Maybe when I wear it to the ball in Jan.   This week, I should be working my 1820's corset, my winter coat, and some work clothing for my trip next week.  This weekend will be crazy with all the sewing!

Monday, November 18, 2013

BREAD!!! NOM!

I have just taste tested the bread I made with my new starter.  I had forgotten how good this bread can be!  It's delicious.  This time, I used a bit of brown sugar with some honey for the "sugar" ingredient of the bread (bread requires a sugar, a fat, water, salt, and flour).  Typically, I just use honey but I'm running low as I have taken up being a "need tea" drinker every morning.  I have to wait until Thursday for the local honey store to be open.  Gah!

Anyway, the bread is delicious and I can't wait to use it for jelly sandwiches. 

The starter is doing really well.  It was very bubbly this morning after I fed it more flour.  I tend not to need to add a lot of water - the starter sits right on the fridge above the tea kettle.   Since I have a tendency to "forget" that, oh yeah! Tea kettle is on, a lot of moister builds up...right above the fridge.   Probably not the best way but it struck me as funny.  I couldn't figure out why the starter always looked like it had just a bit too much water until I realized right where all the steam from the tea kettle was going.  Oh...yeah...

At least it makes for a happy starter!

I do need to go get more olive oil as well.  I'm all out of my favorite.  I used the extra virgin olive oil I get at the store for this bread as the fat.   Although it works well, I really love the other olive oils I get at Under the Olive tree.  Which means a trip to Tysons...

Sunday, November 17, 2013

Food Product Review! So Delicious Holiday Drinks


They also have pumpkin spice but I haven't tried that yet.   :-)

So, first, the 'Nog.  My west coast Mom (who is really my cousin and is probably reading this right now!) and I saw the dairy free holiday themed coconut milk at the grocery store.  As we both of dairy allergies, we knew we had to try some.  We decided the eggnog had to be sampled.

It's good.  Very good actually, taste wise.   It tastes exactly how eggnog should - and pretty much how I remember it tasting.  The only slight downside is that it's off texture wise.  That is to be expected, really, but it has a watery texture rather than the super thick texture I'm used to with eggnog.  It doesn't taste the least bit watery but it sort of confuses you as you are drinking it.   Not that it stopped me from drinking it!  I'm definitely buying more.

The mint chocolate tastes great while you are drinking it and has the same texture a 2% chocolate milk does.   However, it has a chalky aftertaste that is a bit off putting.   I'm going to finish the carton but I doubt I'll buy it again. 

Both are also corn free - which is awesome for me.  Or, I didn't see any corn ingredients and I haven't had a reaction so, that's good.  

More 'Nog, please?

Public Service Announcement

I've gone back and fixed all the former Flickr, now Ipernity photos. I'm extremely happy with Ipernity - they do this amazing thing where they LISTEN to their customers. How 'bout that? /facepalm

Anyway, I should be sewing my ballgown rather than further procrastinating...

Historical Fortnightly #23: Generosity & Gratitude


Inside out

The wool 1860's dress before trim


The Challenge: Generosity & Gratitude
Fabric: For the pink dress, wool and black velvet trims. For the plaid dress, polyester, linen, silk, and vintage black lace
Pattern:Story behind this one, but Kajani posted a wonderful 1861 pattern on her website that I used
Year:  Early 1860's
Notions: Vintage lace, painted black buttons. For the pink wool dress, a bit of black braid, a lovely brooch.
How historically accurate is it? The plaid is probably about 80% period. I get major points off for the polyester but the point was to recreate this dress and the plaid poly matched perfectly.
Hours to complete: umm...maybe 15 hours total for both dresses? I'm really not sure.
First worn: Hopefully, at Gettysburg on Nov 23rd for the plaid dress
Total cost: The lace was $19 for the lace I used and the lace I plan on using on the ball gown. Since I used maybe two yards of the 15 yards, I'm guessing only a couple of bucks. The plaid fabric was $4 a yard with only 3 2/3 yards of fabric left on the bolt! The wool, linen, and silk were all stash. Actually, the silk trim used on the plaid dress was all scraps.

More information:

With the 150th anniversary of Gettysburg coming up, I wanted to do only 1860's for this challenge. The problem? I've only done anything remotely 1860's once before - and that was a simple linen blouse with a wool skirt. This time, I wanted to recreate this 
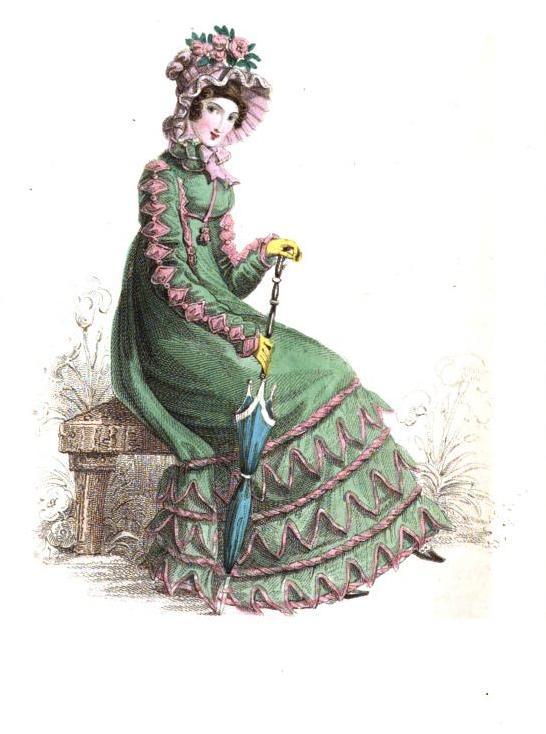
lovely dress I saw posted on ebay over the summer. The seller, Fiddybee, always sells amazing extant garments with decent pictures. Thanks to all the garments they have posted over the years, I've learned tons about the proper look for mid-Victorian garments.

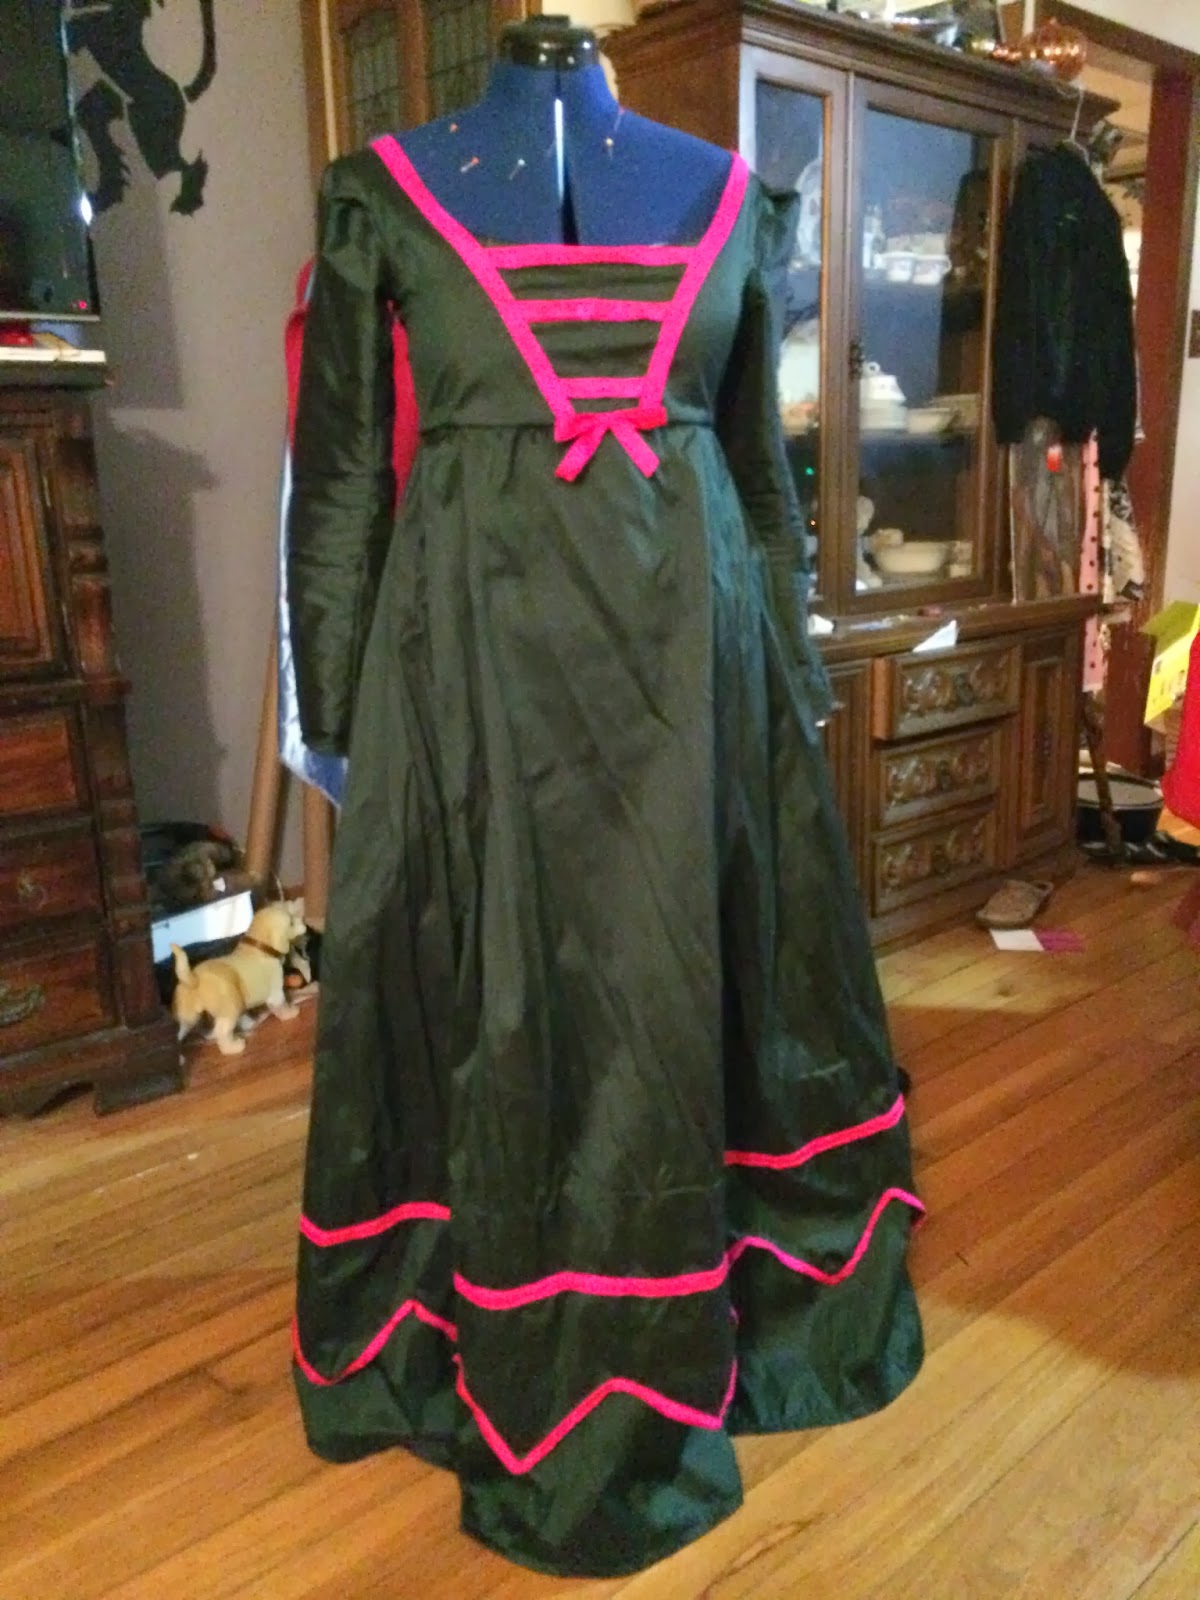
However, I only had 3 2/3 yards of fabric for the plaid dress. So, I decided early on I'd make a pink wool dress out of whatever pattern I ended up with, play with that since I had a lot of yardage to play with with the wool, and then, once all the kinks were worked out, make the plaid dress. The pink dress pictured is before I added the trims but the color on that photo is better than some of the later ones.

I began going through blogs and trying to find out what I could on 1860's patterns. I knew, from the seam lines of the extant dress, what the pattern should look like but didn't want to just guess at shoulder angles, dart placement, ect. Most of the blogs I found either didn't mention a pattern or just used a Big 3 (Simplicity, McCall's, Butterick) pattern. I looked at the Big 3 patterns I had on hand and they all looked...baggy. Somehow, I saw a lot of individuals get beautiful results from those patterns. However, if I was going to have to edit a pattern, I thought, I minus well draft it myself!

That's when I saw Kajani's pattern. Her website is in Polish but that doesn't matter for many of the items she has posted. Besides, google translate is awesome. Thanks Google! She posted a pattern from an 1861 magazine called the "Domestic Wheel" (KÓŁKO DOMOWE in Polish). What I loved about the pattern she posted is that it's on a grid. Each square is 1 inch. It helped to figure out slope and size. Thank you, Kajani!

Immediately, I took my sidewalk chalk and copied the pattern on to some green poly fabric I had lying around.

Chalking it all up

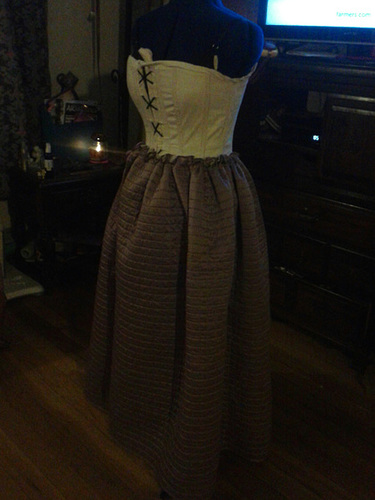
In the photo, you can see the print out of the pattern by Kajani next to my chalk drawings. I then cut it out, and started on a mock up.

There were some minor challenges, but I ended up with a nice wool dress as a back up dress for Gettysburg. (It will be useful for tending campfires). To line the dress, I used methods I found from extant gowns posted to ebay over the years. Looking at both ebay photos and museum photos, I realized only silk gowns were fully lined - cotton and wool gowns typically had lined bodices and maybe a deep lined hem. Yay! No full lining for the wool dress.

Ginger, who knows a lot about the 1860's dress, was kind enough to also show me some examples, via photos and daguerreotypes, some examples of how clothing was really worn. She pointed out that some sort of collar was typically worn. I've settled on a off white lace collar with a bit of thin black velvet for a bow based off of the daguerreotypes she showed me on her pinterest page. Thanks, Ginger!

Once the pink wool dress was done, I went on to work on the plaid dress. I had just enough fabric to make the skirt (two 60" widths by 43" length to go over the hoop skirt) and the bodice plus sleeves. In wanting to keep the dress as close to the original as possible (I couldn't do the bias sleeves due to yardage), I painted a few gold buttons I had black. The buttons had the correct design on them, but the wrong color.

The finished dress is heavy! Since the polyester is supposed to look like silk, I treated it like a silk dress - meaning it's fully lined in linen. Although cotton was commonly used to line dresses, based on this extant green dress that is part of the Litchfield Historical Society's collection, linen was also still used. I always have a ton of linen on hand (SCA costumer!) so it made more sense for me to use it. Thank you to the Historical Society for providing the fabric information!

I also want to thank everyone who left kind comments on my livejournal page as I was slowly piecing everything together. :-) It's sometimes the comments that help you get through the sewing project!

Thursday, November 7, 2013

New Starter!


It was only half way filled when I added 1/4 cup of flour and water this morning. It's been growing like crazy - which is good- but I can't use it until next week. It won't be "sour" until then. Gah!


Look! Bubbles! Actually, that just shows how alive the starter is. It's only 48 hours old and it's already very very active. And yes, pickle jars are awesome to put starters in. You just have to clean them really well. I hope to be able to use this starter for Thanksgiving. We are going over to my brothers and sister in laws again - so I'm bringing a lot of bread. My SIL has 5 sisters, at least 4 of whom live in the area. I'm one of four children. My brother and SIL have 3 kids - in other words, with just the siblings and kids, it's already a nice large party!

Wednesday, November 6, 2013

We have corset! And a quilted petticoat!


First, my camera died -in a graveyard- on Sunday. So, it's going to be these horrible, grainy, phone pics for at least a month or two (Umm, Santa? Camera please!).

Anyway, as prep for Gettsyburg in a couple of weeks, I needed proper undies. I do have one outfit done so it's not complete chaos yet.

The corset. I wanted a front lacing corset. I cannot stand back lacing corsets/stays/pairs of bodies of any kind. Although rare, there are some extant examples of front lacing corsets in the 1860's.
The inspiration.


I did do a couple of things differently - I have boning at the very front and I have it cross laced rather than spiral - but the shape is correct for the 1860's.

For the petticoat - well, it's going to be cold later in November so I wanted a quilted petticoat. However, I do not have the time nor the patience to quilt a petticoat myself. So, I went to thrift store. There, they had a lovely lavender king sized quilt that I cut up. I cut it long ways so I have 41" by 106" piece of quilted fabric. I then unpicked the top two inches (which was interesting because the stitching isn't straight across, it's zigzagged), cut out the stuffing from those two inches, folded the fabric in, and added a drawstring. This is actually pretty period as they did have drawstring quilted petticoats - my extant one is upstairs has a drawstring. I thought I posted the extant one online but I can't find it anywhere. Oh well.

So, I will have the proper shape and I will be warm!

Monday, November 4, 2013

Historical Fortnightly 22: Masquerade


The Challenge: Masquerade
Fabric: Polyester, Acetate, silk organza, silk charmeuse (the lil rose on the front of the dress)
Pattern:  None really. It's my two old bridesmaids gowns torn apart and thrown together to make a nice purple fairy gown.
Year:  Since this challenge allowed "fantasy", I ran with that. Still, the idea of a Fairy Queen is well known through out modern history.
Notions: A small amount of trim.
How historically accurate is it? I suppose it might work for Edwardian fancy dress but really, it's all about being the Fairy Queen.
Hours to complete: Maybe four?
First worn: Hopefully to the Fairy Fest in May!
Total cost: I honestly don't recall. One dress I wore way back in 2003 and another in 2007. This had been in the UFO pile for a while.


Additional Details:

So, for this challenge, it was more free for all than previous ones. Originally, I wanted to do a lovely pre-raphelite dress only to discover I didn't have quite as much fabric as I thought I did. Doh! So, I dug this out of the UFO pile instead. Here is what the dresses looked like originally:

First Gown 008
First Gown 007


I took both of them pretty much completely apart. I yanked out zippers and took the shoulder straps off the dark purple bodice only to put them on the lilac dress so I could have sleeves. I added trim to the front of the lilac bodice from a project so terribly long ago I have no clue what happened to the dress the rest of the trim went on.

The sleeves are purple silk organza and are basically very large rectangles. I did add a bit of a sleeve cap so they would fit correctly but they really are just about a yard each of material and little more.

The back of the dress now laces up and has a nice "tail"/train cover for the lacing since I am not a size 6 anymore. I didn't get good pictures of the back of the dress due to lighting issues. Hopefully tomorrow.

For the front, I took the shawl that came with the lilac dress, cut it in half, and added it to the front opening I cut into the dress. I took out the lining of the lilac dress and added the dark skirt that really always rode up to high to begin with. (The bride laughed at be when she saw how high the skirt came originally). Amazingly, the skirt of the dark purple fitted *perfectly* with the waistline of the lilac dress.
Below the bodice, I added a small silk rosette I made out of some scraps.  The scraps were from my first "Poe" gown.  The color matched the trim on the bodice perfectly.

The wings are a pair of fairy wings I bought years ago from a lady who stopped making them a month or two after I bought them.  They are fabulous. 

I think this would probably be most acceptable at an 1900's/1910's fancy ball.  The Fairy Queen was pretty much always fair game from the 16th Century (the poem was written in 1590 but there is plenty of English folklore before that) on up.  However, in the 1900's/1910's - with the rise of the new medium called "film", costuming took on a very different direction.  In 1917, we have the faux photos of fairies but even before that, we have some pre-raphelite influenced early Art Deco works.  This photo is from 1905. 
Art Noveau Fairy Queen

To sum up, the dress really is two bridesmaids gowns thrown together with some silk organza so I'd actually wear 'em again. :-)

Sunday, November 3, 2013

Masquerade Garb


Originally, for the Masque challenge, I wanted to do something Pre-Raphaelite. I ended up picking the dress from Miranda, the Tempest:

Based on comments and suggestions, I agreed a wool for the underdress and a linen for the overdress would work. Which was perfect, I thought, since I have 5 yards of red wool and 3 1/2 of the blue linen. I've been holding the blue linen forever to make a medieval dress out of. I bought 20 yards of the stuff on ebay years upon years ago, holding on to the last little bit....which turned out to be only 2 yards. Although I could make the underdress, it's the overdress that is recognizable. Oh, and I found out yesterday...so.

I could suck it up and just make a mask. I could attempt something steampunk - which is allowed this challenge- or, I realized, I could finish an old UFO project.

The Fairy Queen gown is an old UFO project. It was originally two of my bridesmaids gowns. And I've since added more fabric to them. In the back, the zipper will be hidden with a dark purple cover and train. The sleeves - one shown in the picture- will be out of a dark purple organza. The wings are ones I bought, again - years ago- on ebay. The lady that made them stopped making them maybe a month after I bought mine. Hopefully, I can figure out the skirt front (I won't tell you what I thought when I had it pleated/draped. It would break the internet.) and get this thing done by tomorrow.

The nice thing is, even though fantasy is allowed for this challenge, the Fairy Queen is a well known historical "fairy tale" - dating back to the late 16th C. So, this is what I think she might wear around the 19th or early 20th Centuries. :-)

Saturday, October 26, 2013

A new to me view of the French Hood

I was at the MET the other day when I came across this very early 16th C pendant:


I'm thinking it's probably 1490's based on the style of the hood and the dress.   What I found interesting is the way the back of the hood is stylized.  It doesn't look like a tube, to my eye, as other have speculated, but a separate veil. The black velvet band across the top of the head is folded back- popular in the early ages of the French Hood. 

I've been working on a theory that the Mysterious White Band we see a bit later is actually the straps to the coif worn beneath the hoods.  The theory is based on something I saw in Italian portraits like this one:


DSC03456


This painting is only a few years before the French hood pops up in fashion in...France! Given the interaction between France and the Italian City States (like near constant war) at that point, it's completely possible that a few French soilders brought back some lovely Italian veils for their wives to wear.

Although not shown, we know they did wear coifs or veils beneath the French Hoods.  As the French Hoods got smaller, the veils may have stayed the same size and continued to go over the front of the arms (like the French hoods originally did and the veil in the Italian portrait).  With the Mysterious White Band, what we are probably seeing is just the veil tails or coif lapels being pinned to the front of the dress during a known fashion transition period.   We always see crazy holdovers during transition periods.  

Wednesday, October 23, 2013

Middle Nephew's Halloween Outfit Progress


When middle child told me that he wanted to be a yellow butterfly for Halloween, both my brother and I were surprised. Middle child is known as the destructor, the child that will break anything given to him. I sort of thought he'd go for something like Spider-man given that is his latest obsession. Did I mention he's three?

However, middle child kept to the yellow butterfly costume idea for a good month so, that's what I'm making him. Oldest child wants to be Link from Zelda - asking his medieval minded Aunt to make him a t-tunic and hat? Sure! Yeah, it took all of a few minutes for that one.

Anyway, back to the middle child's yellow butterfly. I had no idea how to make a butterfly outfit so I did some research:


Most yellow butterflies I saw looked like this. They were yellow but had thick black lines. I realized that a simple half circle cape with some cutouts might work.

The half circle was easy enough to cut out.  Rather than a normal curve, I made the edges "wavy" to mimic butterfly wings. 
I also decided the butterfly needed a tail so I took some of the scraps - after cutting out a hood- and placed them at the back of the cape. 
The yellow will show thorough the cutouts.  The cape is basically a bottom full black fleece half circle, a yellow poly satin half circle, and a black fleece cutout half circle.   Plus a hood that I cut out as well.
The first few cut outs.  If you've ever made a paper snowflake, it's sort of like that but on a much bigger scale with fleece.  It's not hard but you do have to be careful. 
All the cut outs.  I wanted it to look like it was two butterfly wings, the top and bottom, together. 
This is the cut out over the yellow satin and bottom black fleece.  What do you think?  Will he look like a proper yellow butterfly or does it need something else?

Tuesday, October 15, 2013

Vegan Chocolate Fudge!!!!!


Ingredients:

240 ML Vanilla Flavored Soy Milk
7 oz Ricemallow
1/4 Teaspoon of salt
4 tablespoons of Coconut Spread
1 bag of Chocolate Chips (non dairy)
1 1/2 cups of walnuts (optional)
1 1/2 teaspoon of vanilla extract (optional if you use vanilla soy milk)

Directions:

You want to reduce the soy milk to about half.  Just pour the soy milk into a medium sauce pan and put it on low heat.   You'll need to stir it every so often as the soy milk gets that "film" on top.  If you stir it back in, it's fine.  I'm not sure how long it took, but I had my burner on "3" (out of 10) and was able to eat lunch plus write a couple of emails so I'm guessing a half hour.

Once the soy milk is reduced by half, add in the coconut spread, salt, and then the ricemallow.  Stir it all together over a medium heat (my burner was between 5 & 6).   Once it's pretty well blended, wait for it to boil.  It doesn't take long.  I got the chocolate chips & walnuts out at this point & cut open the bags so I would be quick once I was ready to add 'em in.

When the mixture starts to boil, stir it for a good five minutes.  Make sure it is still boiling as you stir.  This may mean you need to turn the heat up.  The mix will turn from a frothy off white to a caramel color - it's okay, it should.  Technically, the mixture should be at 240F after those five minutes but I don't have a candy thermometer and I know you don't need one to make fudge. 

After five minutes, take the sauce pan from the heat and add in the chocolate chips, walnuts, and vanilla (if you need it).   It will turn into a lovely dark chocolate goo pretty quickly as you stir everything in.  Once the mix is well blended, pour it into a 8" by 8" sized pan.  (Or any small cake pan, really)  Let it set by leaving it out at room temp or putting it in the fridge for a while.

This will make a nice bit of dark chocolate fudge.  Perfect for those of us that can't have dairy!

Edit:
Now that I've been eating some of it and it's set, I thought y'all might want to know what it tastes like.  It is good.  It tastes like a fudge flavored chocolate chew.  It doesn't taste exactly like regular dairy fudge but it certainly isn't bad either.

I admit I had a bit of an issue getting it to set. I simply didn't have the heat hot enough when I was mixing it. If you run into this issue, just pour the fudge back into the saucepan, turn it up, and make sure it is boiling. You'll know it's ready when the chocolate no longer sticks to the sides of the pan. I did add a bit more ricemallow (the rest of the can)and a small bit of olive oil since I was worried part of the reason it wasn't setting was the lack of fat. I also added some powdered sugar once I removed the mix from heat. It set pretty quickly after that.


Postus Editus:

My family tried it. And even a few family friends. :-) My dad thought it tasted too much like candy - we agreed on chocolate taffy. Mom seemed to agree. My baby brother really liked it - he had two pieces. His best friend also tried it as was surprised it wasn't quite as sweet as he thought it would be - it's a true dark chocolate fudge taste. He liked it too. So, if my very much bacon loving family liked something vegan, my guess is it's decent. :-D

I'm going to play with the recipe some more - I think almond milk might help- but I also want to learn how to make a few other confections without milk or corn...