Sunday, September 29, 2013

1920's Hair & Makeup


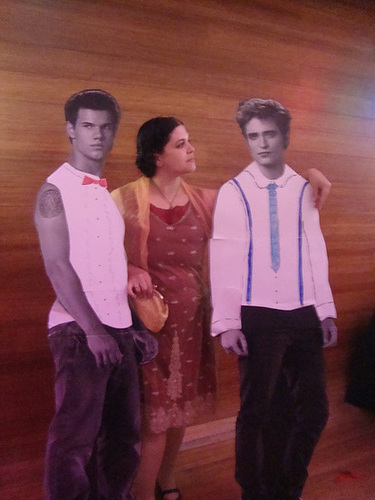
A rather silly picture of me but this is what I ended up doing for my hair and makeup in my 1920's outfit.  Here is me, posing with Edward & Jacob in the full outfit:


DSC04457
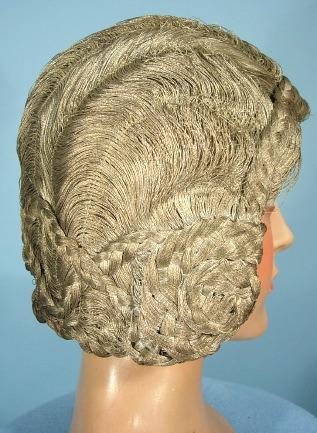
I wish I had stood up straighter. The dress is actually very flattering when I'm not half hunched over. Anyway, my hair is based on two different sources.


I wore my braids a bit further back on my head rather than go full Princess Leia but I really liked the look. Not everyone chopped off their flowing tresses in the 1920's. Many just pinned their hair up tightly at the base of the skull and carried on.

For the make up, I used a smokey eye shadow, a lot of face powder, my normal Burt's Bees lipstick (raisin), and eye liner. The eye liner really is key for the 1920's look.

Hand Puppets

DSC04377


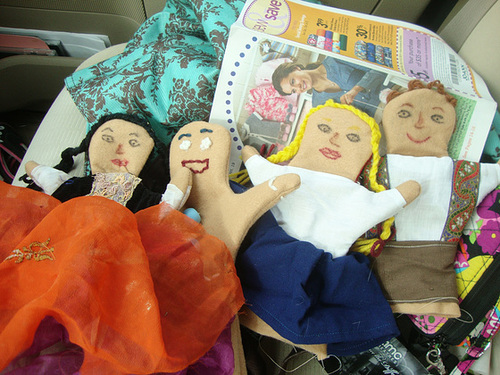
Not the best picture since I took it in the car but I did want to post about the hand puppets I made for my 3 year old nephew. From left to right we have the not so wicked witch, the gingerbread man, Gretel, and Hanzel. Gretel can double as Little Red Riding Hood as well. I had a bit too much fun with the not so wicked witch.

The puppet base is just felt. All the clothing, trim, and yarn were all "scraps". The yarn was that 5 or 6 yards you always have left over after making a scarf or a hat. The trim on the not so wicked witch and on Hanzel (his suspenders for his Lederhosen) were tiny pieces I cut off from other long forgotten projects. Every bit of the cloth is from other, older projects as well. The not so wicked witch's skirt is all pieces of old saris. Gretel's skirt is from the hem of one of my trouser's legs that I made too long. Even the Gingerbread man's buttons were in the button bag - I only bought the felt for the project.


He seemed to like them and I'm sure I'll hear stories of both the 3 year old and the 5 year old playing with the puppets soon enough.

Friday, September 27, 2013

1920's Gown!


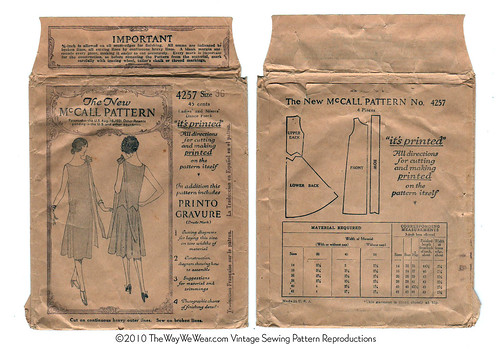
More picture Sunday, hopefully, but here's my 1920's gown!   The rusty burgundy (it's not orange like in the photo), underdress is based on this pattern:


No 4257 McCall Printed Pattern - Ladies & Misses Dance Frock - 1920's Vintage Sewing Pattern


The big differences being that a) I didn't dag the back, I made it straight and gathered the back skirt to the back bodice and b)I didn't add the bow. Really, the dress looks like it would be really cute by itself if I just made the skirt gathered all the way around and not have the a-line thing going on in the front. Still, I got a really good pattern from the above photo (I measured, cut it out to my measurements based on the lines in the photo, put it on the dress dummy and "fixed" the pattern slightly so it would fit me).

The overdress is a silk net duppatta that I was told was green but is really a gold/green color. Perfect for fall - which is what I'm trying to go with with this dress - sort of a fall theme.

Originally, I wanted the overdress to be a tabbard style with crinkle gold organza bows at the sides.  However, the only gold organza I have lying around isn't the right color.  Since I'm trying to use stuff I already have or stuff I can get at the thrift store (the rusty burgundy silk underdress was once a pottery barn curtain.  I got it for $5 at the thrift store.) ordering more organza was out of the question.  Instead, I remembered gowns like this fabulous one by BouĂ© Soeurs:


or for something more simple, like this one:


Okay, so that still isn't simple but both have gathered skirts at the sides. I left the actual sides open so you can see the gorgeous duppatta trim, but I also gathered the skirt, stitched up the bodice and...it fits! I cut the neckline with a slight V at the front to show off the plain silk beneath the sheer net and offer some contrast. I think it ended up working well.

Now I have a full 1920's outfit! Yay!

1920's Combinations


The above was the inspiration and taken from this etsy page. They didn't come out exactly correct, but it's not horrible either.


I cut them out of the cotton backing to a silk curtain. The curtain is currently in pieces and about to become the underdress for my 1920's outfit. We'll see how this goes.....

1920's Brassiere

Page 171 if you do a click through


See the brassiere on the left hand side, the second one down? That's the one I ended up making. It's a bit small length wise but fits *perfectly* width wise, which is what matters.


Me in my pj's still. :-) I wanted the photo to be somewhat decent and non scandalous even if it is a post about a bra.

The idea of cup sizes didn't come about until the 1930's. Before that, this is what our grandma's (and great grandma's) wore. Honestly, it's comfortable. It fits sort of like a modern sports bra. The pattern is very basic - typical non darted bodice back with attached straps, a curvy rectangle (the left and right edges are oval shaped) for the front, a small piece of elastic, and some antique lace I had lying around to make it pretty. It laces up the back (makes it easier to adjust) and fits pretty well. I gathered the front piece to the elastic, and then sewed the front piece into the back pieces (the back pieces are doubled for added strength). Add the bit of lace and then sew down the straps. Very simple but gives a proper 1920's look. :-)

Monday, September 23, 2013

Historical Fortnightly #19: Wood, Metal, Bone

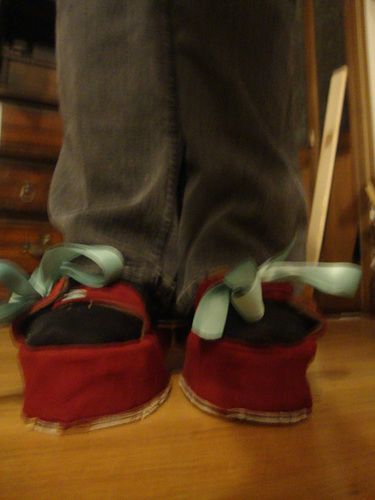
Originally, I was just going to recover a parasol but where is the fun in that? I needed to do something ridiculously impossibly challenging because....I need chopines. Actually, I just need new 16th Century shoes in general, but particularly chopines. Italian chopines. None of those "tie a brick to your feet and you are done" Spanish nonsense. Those are not chopines, those are bricks covered in fabric.

I wanted something like this:

Lovely, shaped, chopines wrapped in leather.

So, I needed to start out with wood for the core.  A lot of people have used the cork blocks but all I could find was the yoga ones and they are too small for my feet so, wood.  Pine to be exact.  It was 97 cents per a plank and it happens to be just the width of my foot, so yay!

The pattern sounds complex, but it's simple.   First, trace your foot or your favorite shoe.   In the 16th C, they did have left and right shoes - with straight lasts coming in in the Elizabethan age.  Second, draw out the base.  Now, because all your weight should be in the center of your foot, you need to make a "column" where the center of your foot is.  I measured the longest point and the widest point to get the center location.  I then transferred this to the base as well.  This helps greatly to line up the pieces later since the plank I got isn't that thick.  I had to double the plank.

Because of that, I had to make what I wanted to width of the shoe to be at the center a pattern piece as well.  That's why there are three pieces - the sole, the center, and the foot itself. 
I drew these using pencil on to the plank and cut them out.  The blue is the "top" side of the pattern and the green (probably looks black) is what the bottom side should look like.  This kept me from cutting into the wrong place on the bottom or nicking the top too much. 

A pre-sanded foot!   It didn't need to look perfect ( the marks are from using the chisel while it was face down on the pebbly sidewalk). 


Post sanded and shown with the pieces sandwiched together.  Although the mid to late 16th Century chopines are at an incline, the early ones aren't.  Since I do mostly early 16th C, this made more sense. 
A leather sole!

This is how I drafter the pattern for the leather.  Wrap some fabric really tight, pin it, cut off the excess.  It was a pretty decent pattern. 

This was the not fun part - punching all those hole with my awl along the sole just to attach the leather so I can have....a shoe. 


It's not perfect and I'm going to add some stuff to it before the end of the day but it is wood and metal (I had to use nails.  They are period)

DSC04253


DSC04256

The strap on the left one is a bit wonky and I do have to fix it but, as you can see, there are two! And I can strap them to my feet! Yay!
The Challenge: Wood, Metal, and Bone
Fabric: leather, wood
Pattern:  My own
Year:  1480-1530
Notions: Thread, nails
How historically accurate is it? I *think* it's pretty decent. I don't know as I've never made shoes before.
Hours to complete: 12 hours
First worn: Maybe this weekend
Total cost: Minus the wood crafting tools? 97 cents for the one plank of wood I destroyed. :-) I had the leather (it was an old waist cincher), picture nails, tacks, wood glue, and the leather for the soles as well so...it was just the wood!

Sunday, September 15, 2013

Hysterical History Bustled Petticoat


The Inspiration:
1870's Bustle Petticoat

Materials:
Cotton Strawberry Shortcake fabric, Duct Ties, Cotton Twill Tape, Green ribbon.

More Info:

I needed a new bustle. I wanted to go with something 1870's since I'm supposed to be working my 1860's corset and ladies still were wearing their 1860's corsets with the new bustle styles well into the 1870's. (Ie, I wouldn't have to make a new corset for the Bustle Era just to wear bustle dresses) My old bustle was a pillow with a waist tie...which worked but I love the look of the bustle petticoats. Since no one will see the petticoat with whatever dress I'm wearing, why not have a bit of fun with it? I'm not part of a stringent bustle era re-enacting group and I love Strawberry Shortcake.

I bought 3 yards of Strawberry Shortcake fabric and still have enough to make a corset. The back was about 51" before I pleated the channels for the boning. It's roughly 40" long after the channels were sewn. It's really just a big rectangle with pleats - the top pleat being slightly curved. It's also about 22" wide. The front is just a trapezoid, 41" long, with gores on either side of it from the 41" long rectangle I cut them out of. I added twill tape at each of the pleats in the back. The waistband is yet another rectangle with the bustle petticoat gathered to it.  To better explain, here is a picture of the pattern.


It's not a complicated pattern and it only takes an hour to put together. Assuming you sew the twill tapes to the inside and not to the outside accidentally... Luckily, I had only finished one seam and managed to rip it all out and turn the tapes so they faced out, not in.