Thursday, October 10, 2013

Apples, apples everywhere, but none for me to eat....yet!

Last week, I went to Butler's Orchard here in Maryland to pick some apples. I ended up with two bags in under ten minutes. Each of the bags weighed about 10 pounds each. In other words, I ended up with a lot of apples, very, very quickly.

This is not a bad thing since I love apples. Apple pie has become a staple for me during Lent since I like doing the medieval Lent thing. However, this does mean I needed to find a way to keep the apples until I actually want to use them. With around 60 apples, there is no way I could even begin to just let them sit around until I need them - like I normally do with a bag of apples. Instead, I decided to freeze them.

Yes, canning 'em would be period correct but I simply do not have the time, money, or room to go out and buy a ton of canning equipment and then store all the canned apples. I could borrow some of the canning equipment from Mom but, really, freezing apples is very simple and you end up with apple slices that are ready to be cooked.


First, you peel the apple. This is pretty standard for any long term storage of apples. I then used my apple corer/slicer to end up with nice, little pieces of apple quickly. I then took the apple slices and put them in this:


This is a bath of lemon juice and water. Technically, it's about 1/4 lemon, 3/4 water but I kept adding fresh squeezed lemon to the solution so I have no idea what it ended up being. Anyway, it worked. Bath the apple slices in this and you don't get brown apple slices.


After that, I put the apple slices in small containers. Each container or bag ended up with roughly four apples in them. Today, I have seven containers filled with apples. Tomorrow, I plan on peeling,coring, and freezing the other bag I ended with.

Monday, October 7, 2013

Historical Fortnightly #20 Outerwear


The Challenge: Outerwear
Fabric: Wool and Linen
Pattern:  My own! Based on several extant cardinal cloaks
Year:  1770's - 1780's
Notions: The clasp when I find it...
How historically accurate is it? The cut & fabrics are accurate. However, the "hidden" seams are machine sewn. The visible seams are hand stitched with cotton thread.
Hours to complete: 2, maybe.
First worn: Hopefully this winter
Total cost: The wool fabric was $5.90 at my local thrift store. The linen lining was stash.

I decided the one period I actually tend to have dresses for but no outerwear for was 18th C. I needed a red cardinal cloak like every other American historical costumer between the ages of 9 and 40 ish who also gets giddy about blue gowns and going to balls at the Governors Palace for reasons embedded in our childhood.

The wool I picked up at the thrift store was a nice medium weight and just enough to make a decent half circle cloak. The hood is just two 15" squares sewn together, gathered at the back, and a small oval shaped piece of wool placed over the gathered hole in the back of the hood.

I might make some small changes to the cloak but, overall, it's wearable. I apologize for the photos. I know they are terrible. I just wanted something "up" to prove it was completed before the deadline...and I've lost my camera. Again. As soon as the camera gets found, I'll take better photos. You really don't get the nice brightness of the red wool in the photos.

EDIT: Found the camera. :-) Even took photos outside to have the nice natural lighting.

Sunday, September 29, 2013

1920's Hair & Makeup


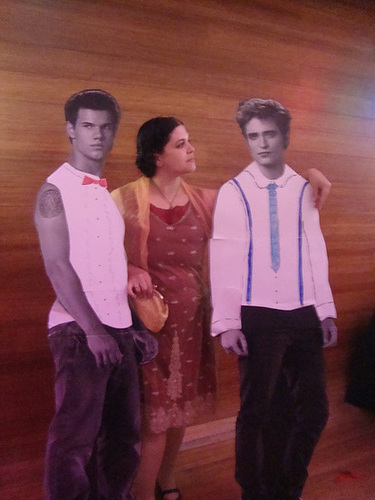
A rather silly picture of me but this is what I ended up doing for my hair and makeup in my 1920's outfit.  Here is me, posing with Edward & Jacob in the full outfit:


DSC04457
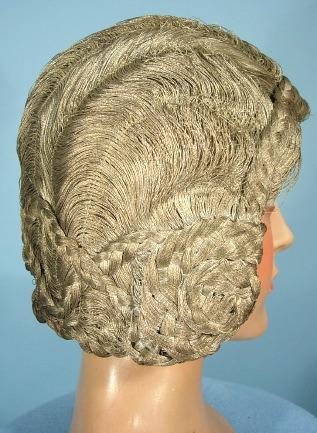
I wish I had stood up straighter. The dress is actually very flattering when I'm not half hunched over. Anyway, my hair is based on two different sources.


I wore my braids a bit further back on my head rather than go full Princess Leia but I really liked the look. Not everyone chopped off their flowing tresses in the 1920's. Many just pinned their hair up tightly at the base of the skull and carried on.

For the make up, I used a smokey eye shadow, a lot of face powder, my normal Burt's Bees lipstick (raisin), and eye liner. The eye liner really is key for the 1920's look.

Hand Puppets

DSC04377


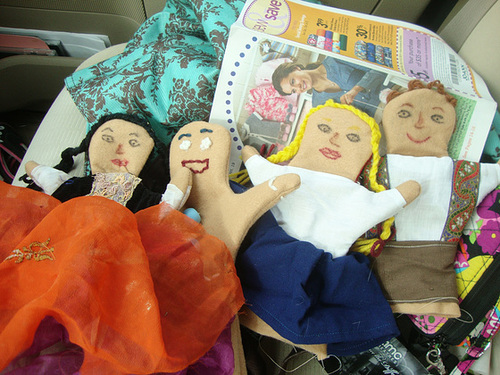
Not the best picture since I took it in the car but I did want to post about the hand puppets I made for my 3 year old nephew. From left to right we have the not so wicked witch, the gingerbread man, Gretel, and Hanzel. Gretel can double as Little Red Riding Hood as well. I had a bit too much fun with the not so wicked witch.

The puppet base is just felt. All the clothing, trim, and yarn were all "scraps". The yarn was that 5 or 6 yards you always have left over after making a scarf or a hat. The trim on the not so wicked witch and on Hanzel (his suspenders for his Lederhosen) were tiny pieces I cut off from other long forgotten projects. Every bit of the cloth is from other, older projects as well. The not so wicked witch's skirt is all pieces of old saris. Gretel's skirt is from the hem of one of my trouser's legs that I made too long. Even the Gingerbread man's buttons were in the button bag - I only bought the felt for the project.


He seemed to like them and I'm sure I'll hear stories of both the 3 year old and the 5 year old playing with the puppets soon enough.

Friday, September 27, 2013

1920's Gown!


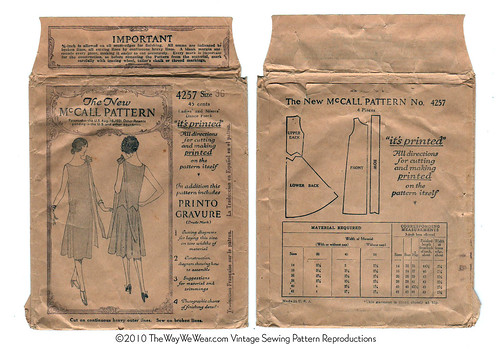
More picture Sunday, hopefully, but here's my 1920's gown!   The rusty burgundy (it's not orange like in the photo), underdress is based on this pattern:


No 4257 McCall Printed Pattern - Ladies & Misses Dance Frock - 1920's Vintage Sewing Pattern


The big differences being that a) I didn't dag the back, I made it straight and gathered the back skirt to the back bodice and b)I didn't add the bow. Really, the dress looks like it would be really cute by itself if I just made the skirt gathered all the way around and not have the a-line thing going on in the front. Still, I got a really good pattern from the above photo (I measured, cut it out to my measurements based on the lines in the photo, put it on the dress dummy and "fixed" the pattern slightly so it would fit me).

The overdress is a silk net duppatta that I was told was green but is really a gold/green color. Perfect for fall - which is what I'm trying to go with with this dress - sort of a fall theme.

Originally, I wanted the overdress to be a tabbard style with crinkle gold organza bows at the sides.  However, the only gold organza I have lying around isn't the right color.  Since I'm trying to use stuff I already have or stuff I can get at the thrift store (the rusty burgundy silk underdress was once a pottery barn curtain.  I got it for $5 at the thrift store.) ordering more organza was out of the question.  Instead, I remembered gowns like this fabulous one by BouĂ© Soeurs:


or for something more simple, like this one:


Okay, so that still isn't simple but both have gathered skirts at the sides. I left the actual sides open so you can see the gorgeous duppatta trim, but I also gathered the skirt, stitched up the bodice and...it fits! I cut the neckline with a slight V at the front to show off the plain silk beneath the sheer net and offer some contrast. I think it ended up working well.

Now I have a full 1920's outfit! Yay!

1920's Combinations


The above was the inspiration and taken from this etsy page. They didn't come out exactly correct, but it's not horrible either.


I cut them out of the cotton backing to a silk curtain. The curtain is currently in pieces and about to become the underdress for my 1920's outfit. We'll see how this goes.....

1920's Brassiere

Page 171 if you do a click through


See the brassiere on the left hand side, the second one down? That's the one I ended up making. It's a bit small length wise but fits *perfectly* width wise, which is what matters.


Me in my pj's still. :-) I wanted the photo to be somewhat decent and non scandalous even if it is a post about a bra.

The idea of cup sizes didn't come about until the 1930's. Before that, this is what our grandma's (and great grandma's) wore. Honestly, it's comfortable. It fits sort of like a modern sports bra. The pattern is very basic - typical non darted bodice back with attached straps, a curvy rectangle (the left and right edges are oval shaped) for the front, a small piece of elastic, and some antique lace I had lying around to make it pretty. It laces up the back (makes it easier to adjust) and fits pretty well. I gathered the front piece to the elastic, and then sewed the front piece into the back pieces (the back pieces are doubled for added strength). Add the bit of lace and then sew down the straps. Very simple but gives a proper 1920's look. :-)