Thursday, December 1, 2016

Making a Fake Fireplace for Christmas Office Decorating

What you will need:

  • A long thin box
  • One of those Science Fair Project boards - I got mine at Staples but any large craft store should have them
  • Brown wrapping paper
  • Red wrapping paper
  • Tape
  • Glue
  • Scissors
  • An x-acto knife


First, mark the center of your board. Second, you'll want to draw a T starting with about two thirds down from the top of your board for the top of the T and then just marking the center of the board from the top of the T to the bottom of the board. This is your cutting line for your x-acto knife. Just cut. Then, score the board (don't cut all the way through!) at the edges of the T down to the bottom of the board so you can fold the newly cut flaps back. These will help with stabilizing the fireplace so do not cut them off completely. With the long thing box on top, it should look something like this:


Next, wrap the box and glue the brown paper to the board as well. Make sure you cut it at the edges so it will fold properly.


Now, cut 5"x3" squares out of the red wrapping paper. I ended up using around 60 or so, I think. Glue each of the red paper pieces to the board, cutting as needed, to get the "brick" layout.


It may not be perfect, but it will be sturdy enough to hold some weight.

Merry Christmas!!!

Sunday, November 27, 2016

Crafting with Oldest Nephew: Making a "Stuffy"

I promised my eight year old nephew that we'd have a "crafting" day today - just the two of us. He was very excited at the idea and said that he couldn't wait. I wasn't sure what he wanted to make but promised to help with anything he wanted.

We went to the "big" Joann's fabric store in Wheaton Maryland. It's about twice the size at the one near my house and is quickly starting to have the better fabrics as well. Since Joann's was having a big sale, I figured we could stop by and check out all the fabrics to see what he wanted to make. Also, since they have paints, clay, jewelry making, and a whole bunch of other crafts, we could easily switch to that as well.

After looking all around the store and at patterns, he told me what he wanted - a stuffy. Apparently, a stuffy is like the Raggedy Andy doll we saw a pattern of but he wanted one that looked like Link from Zelda. Okay, this I can do pretty easily and make my own pattern. We ended up with "flesh" toned muslin (I don't think anyone is really that color), a green cotton flannel remnant, a brown cotton remnant, and a huge thing of stuffing to make the stuffy with.

Once home, I drew out that pattern using my frixion markers (most amazing things ever!) and he cut it out.


Once he finished cutting it out, I had him try to sew it together.  


However, that didn't work.  Unfortunately, I didn't cut it quite right and his stitches were a bit too big so we ended up cutting out a second stuffy out of the yard and a half of "flesh" tone muslin I got.   I then sewed it on the sewing machine.  He did try the peddle for a bit but the corners and curves are too tricky for an 8 year old who is learning to sew.   

Once we turned the muslin inside out, he was very happy to see it was human shaped - but without a skeleton.  So, we worked out a new system - I stuffed the stuffy and he handed me the stuffing or other things as needed.  He did try to stuff it but, like he said, it was not as easy as it looked like it should be.  Also, wooden spoons work wonders for pushing the stuffing into legs and arms.  

Once it was stuffed, I sewed up the head and started on the "hair".  The hair is just left over yellow yarn from a Navy (blue & gold) team colors scarf I made last year.   I showed him how to do it and he did do one row at least.


However, soon after this picture was taken, he got upset at his lack of ability to make perfect stitches and asked me to do the rest.   Once I sewed up the yarn on the back of the head, we started on clothing for the now naked stuffy.

I drew out a simple t-tunic patten and had him cut it out.


I also cut out a hat, sewed it up, but had him sew the hat to the head.  This way, he'd be able to point to what he sewed easily plus he got some more sewing done.   Mostly, he did all the cutting - which is also an excellent skill to have.   

Nephew with the finished stuffy!!!   We weren't able to get around to making the boots but that will be fine for next time.  The stuffy is not naked - a very important point- and does have a ribbon belt so, according to my nephew- he was good.  He later took a sharpie and drew in eyes and a mouth.  

Anyway, just a cute little project to do with my oldest nephew.   I might try something easier next time that he can sew himself - like a t-tunic or pajama bottoms.

Sunday, November 6, 2016

Commercial Sounding Post! Rocksbox is awesome!

I hate sounding like a infomercial and I know I've told a few of you about this already - Rocksbox.  Rocksbox is a neat little company I saw on pinterest that looked interesting. I only signed up a couple of months ago and I LOVE it. It's the netflix of jewelery. You tell rocksbox what your personal style is and they send you three pieces or jewelery every month. ...Did I mention this will sound like an infomercial?

It's $19 a month which is a bit $$$ when I'm used to spending that on a piece of jewelery or two. However, I also hate buying a piece, getting bored of it after a few days or not wearing it for months. This allows me to rent pieces that I like (you have a wish list that gets saved) without storing it. I can live with that. If you do like the piece (I LOVE the earrings I got in my box first box), you can buy them at a discounted rate. They also have sales on a lot of the jewelry and the second piece I bought from them I wore recently to a costume dinner.

As for shipping - they give you a return label, a reuseable mailing bag, a box, and velvet bags for the jewelry. Shipping back is easy - just like netflix used to be. :-D

This is my third box and it's great!


I'm in love with the pink necklace - I plan on wearing it on Tuesday all day. I probably will wear the dainty pink and gold dangling earrings tomorrow. Today, I wore this piece from the box:


A lovely pair of crescent shaped earrings!

If anyone wants to sign up and wants a free month, use code ElizabethCBFF29.  I've been getting great costume jewelry each month and the nice thing is I can just send it back after wearing it for a couple of weeks.  The stylists also happily take your wish list into consideration and you can mention specific pieces if you have something coming up.  They can't guarantee anything, but I've been pretty happy so far.

Tuesday, November 1, 2016

1920's Halloween

First, the inspiration:


I've been on a 1920's kick lately.   All I've wanted to do is make a 1920's style dress.  I was supposed to go to a party where the theme was fancy dress in monochrome but my truck decided to break down.  Instead, I finished the dress for Halloween.

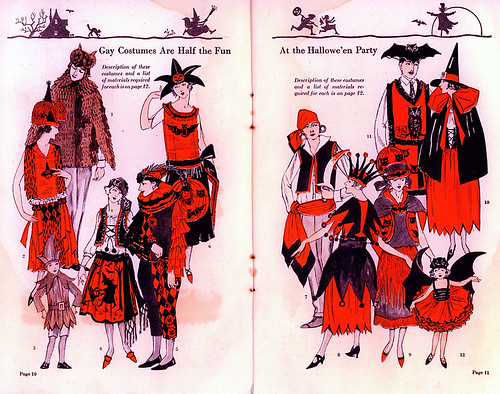
1922 Halloween Costumes
From this catalog page above, I really liked the idea of having just Halloween shapes cut out and adding them to the hem of a normal 1920's dress.  I took the crescent moon idea from the lady in the bottom left and the stars from the guy in the upper right.


1920's Celestial Fancy Dress
I couldn't track this one down to the source but I wanted to show another example of stars being used in Halloween costumes in the 1920's.

Gay Costumes are half the fun at the Halloween Party
This was not the original inspiration for the owl cut outs but I can't find the dress I saw that originally inspired it.  All I recall is that the dress was in the lower left hand side of the catalog page and had owls around the hem similar to the owls on the lower part of the upper right hand guy's tabard.  For a better idea:


1920's Owl Decoration

The cut outs for the hem of the dress are very similar to the head of the paper owl here. The eyebrows don't meet because these are fabric cut outs (black velvet) and the eyes also have to be somewhat more restrained.


Since I wanted to make a new dress for the 1920's, I had to make new undies as well.  Although my original 1920's bra was serviceable, I wanted something cuter and more attuned to my skills now.

1927 Bra

1927 undies

1920's Bra off of Etsy


Second,  making the outfit:


I don't have any pictures of making the bra and panties.  Basically, the underwear itself was pretty simple.  For the undies, I took two rectangles for the front and back, a small rectangle for the crotch out of both silk and cotton, and gores out of both the silk and lace for the sides.  Once I sewed it up, I added elastic to the waistband.

For the bra, it wasn't much more difficult.  I started with a band that was 3" bigger than my bust measurement at it's fullest by about 7".   I marked out where the darts should go - one bust dart on either side, darts for across the bust but under the arms, and one dart on either side directly under the arms.  The dart under the arms  is to straighten the band once you make the bust dart so the silk band will go around your back in a straight line.   I also added straps and lace to the front to make it pretty.

The hooks and eyes on the back of the bra are actually hook and eye tape.  I used that by folding the silk over the tape to hide it and add strength to the hooks and eyes.  This is also partly why I made the bad bigger - you'll lose a lot of fabric by folding the eyes into the fabric.

The dress - the dress is my own pattern as well.


I drew out each of these designs on just plain computer printer paper.  Using a box cutter, I cut four of each design from the scrap black velvet.  I glued each design exactly one foot apart on the hem of the dress - the skirt was made out of two 2 yard panels of silk.

Once the designs were glued on, I let them dry overnight.  This meant laying the entire four yards across my living room.  I had newspaper underneath to prevent the glue getting to the hardwood floors.

The tunic part of the dress was pretty simple.  I drew it out, cut it out, sewed the shoulders and sides, tried it on, and redrew where I wanted the neckline and underarms to be.   I then cut those pieces out better, and sewed down the rolled edges.

I realized I had cut the tunic a bit too short so I added a belt of black velvet.  I think it actually helps the dress a lot.


Third, the actual dress:


Materials: Silk, velvet, rayon lace, and a small amount of cotton
Notions: Thread, Glue
Cost: The white silk was $3 a yard at a closeout sale. The velvet and orange silk were stash as was the cotton. The was a Joann's remnant for $3, I think.  The pink silk was a joann's remnant that I bought years ago - I have no idea how much but I'm guessing $5 for the pink silk.   Since I only used under 3 yards for the dress, I don't think the dress cost much more than $20 to make.

Fourth, the critique:


My biggest complaints are as follows: I made the undies too short and the skirt of the dress too long.  The dress is pretty easy to fix - rip the skirt off the dress, chop six inches off from the waist,  and resew.  There isn't any help for the undies other than to make the rectangles more square like next time.

The coat I'm wearing in the photo is one I made a couple of years ago that works well for late teens and into the 1920's.

Saturday, October 22, 2016

Lavender and Pink 1520's Dress


I took the photo with my cell phone so the color is a bit off. I'll post pictures of me wearing the dress later this week, hopefully.

The dress is out of what was a blue cotton brocade I bought at the thrift store - 15 yard bolt for $5- that I dyed with Scarlet rit to get it to a lovely grayish lavender. It reads gray in certain lights and almost bright purple in others. I really love the way it came out.

To pull out the more purple tones, I added pink silk velvet sleeves and pink glass pearls. The glass pearls were a great find at Pennsic - $3 a strand and they are so realistic looking, even the lady who sold them had trouble telling them from the real thing! You really have to inspect them to see that they are glass - luckily glass pearls are quite period correct.

The dress is a mix of handsewn and machine sewn. The neckline is hand sewn - whipstiched. The hem is machine sewn.

The lining is linen that I dyed using the last of the indigo dye.

The dress is very comfy to wear. The cotton brocade is just thick enough to wear in a range of temperatures without getting too hot or too cold. The silk velvet sleeves are a dream when it does get cooler. The sleeves are lined in silk to help keep my arms warm this fall and going into the winter months!

I was going for the early 1520's Venetian look, similar to this:
 photo vecchio1522.jpg

Saturday, September 10, 2016

Modern Dress: Boho styled tunic dress from an old sari

Hello all!  I've been bad lately at keeping up with the blog and I apologize for that.  I have been sewing a bit - mostly fabric hoarding really because there have been amazing sales lately- but I'm being bad abut taking pictures of my creations.  So, with that, I present to you my modern knee length boho dress.


The front of the dress
Close up of the trim around the bottom edge
Close up of the neckline


The dress needs side ties so I can tie it in the back. I swear, it looks pretty cute on but I need to make a slip for it because it is very sheer. You can tell that in the last photo. I cut up the pallu of the sari years ago and what was left of that is now the pink ruffle.

I've been on a Bob Ross kick the past few days so I've been hearing a lot about "happy accidents". With that in mind, I did accidentally sew the bottom ruffle so that the seam was on the front rather than the back like it should be. So, thinking in the "happy accidents" mindset, I added the sari trim to cover the seam on the outside of the dress. Honestly, I think it looks better this way. I really love the bit of *something* that the trim adds to the hem and it also helps to match the bit of trim I added to the neckline.

I still have some of the sari left - I'm thinking handkerchief skirt but we'll see. For the slip, I keep going back and forth between simple a-line out of cotton or a more fitted late Victorian-esque princess line slip. I can't decide on a color for the slip either. Lilac? Teal? Pink? White? There is a lot of yellow in the pattern so even that might look neat. I think I need to take a couple of scraps to Joanns and buy some cotton then decide on the shape for the slip.

Sunday, August 21, 2016

Pennsic Recap

I should probably start with the fact Abigail was "dognapped" a week before Pennsic.  My Dad came over, checked out the tires on my trailer, confirmed I was good to go, and took the dog with him.  :-)   Abigail apparently greatly enjoyed her near month away on vacation.  She got to go to the beach with her very best friend Dusty (Mom's dog), my nephews, and my parents.  ...Although, after a week, she began to paw at the truck and even convinced Mom's dog to hop in with her as an indication they were tried of the beach....

Anyway, Pennsic!    I got there around 1 pm or so on the 29th.  I immediately saw one of my fellow N24-ers (Pennsic is laid out in a series of blocks.  Each block has a letter and a number.  Each block can have multiple encampments on it.  In my case we have 2 1/2 - two actual land agents but three households).  He said he wasn't stalking me but he wanted to see if I had arrived yet.  Given the giant blue house I was pulling, I'm pretty easy to spot.  :-)


We got all the paperwork done in about five minutes and I went up to the space, parked, put out the shepherd's hooks, lanterns, and the shower tent and then - done.  Honestly, most of peace week I slept.  I really needed to catch up on sleep after working 10 hour shifts, sewing the moment I got home until 11 at night, and then getting back up at 5:30 to start over.  So peace week was more sleep than it was anything else.

I did go out and take pictures, play Pokemon, and at least look at the shopping but that was about it.  I also wore garb every day like you are supposed to.  This is a HUGE gripe with me and Pennsic over the past couple of years - I saw way too many people just hanging out in their gym shorts, wearing a vintage 1960's dress, or a sundress that I honestly would wear to Church.  I even saw one woman wearing biker shorts and a flannel top - how on Earth is that even an outfit let alone garb?  Pennsic looked more like People of Walmart than it did an SCA event at some points.  It was horrible, it was distracting, and it was disgusting.  Sorry guys, I know I'm not the only one who has zero desire to see how far over your waistband your naked stomach can go.   Women?  Bras.  If you aren't wearing a self supporting dress, wear a bra.  Wrapping a scarf around you is not supportive and it looks painful.  Wearing your beach coverup is not garb either.

I'm thinking of starting some sort of fashion police for Pennsic next year.  If you are not in garb, cannot provide evidence that you just got to Pennsic in the past two hours (I'm okay if you are just hanging out at the food court after going through troll. I'm not okay if you are going to classes and not in garb), you will be forcibly returned to your camp until you put on something that is garb.  If you are forced to return three times, you get kicked out of Pennsic.  Sorry, but Pennsic has rules and wearing garb is one of them.  Yeah, I need to contact the mayor about this before I do anything too rash but this total and lack of respect for what the event is needs to stop - now.

/rant

Anyway, by Friday of peace week, I had gotten little done and all the rest of my camp showed up.  From there on in, it got crazy, of course.   (I probably should add that during Peace Week, the group that camp's next to me has another household that camps with them.  The other household tried, once again, to take over my space despite both my and the other land agents agreement.   The other household is one we ALL have issues with every single year.  This year, one of the individuals kept going off site and would knock into my shepherd's hooks with his car almost every single time.   There were other issues as well but, considering we never see that one household even attempt garb -the things you wore to Woodstock aren't garb-and only saw them down in the merchant area once during all of Pennsic, we aren't sure why they even bother to come.)

Okay, back to War Week.

Between the Disney Party, classes, and general frivolity of war week, it was crazy.   Here are some of the pictures:
DSC01193
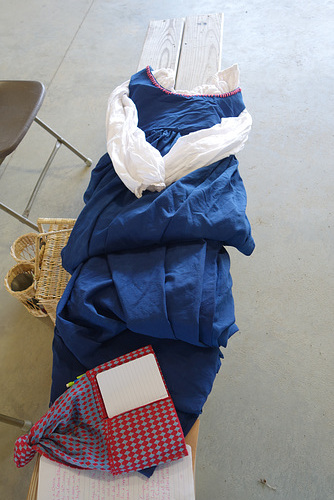
My A&S contribution. I didn't pre-register and a lot of people showed up so I ended up with just a bench and a chair - which was fine! My dress is 100% handsewn wool that I dyed using indigo dye. The embroidery around the neckline is out of silk cord. The chemise is also 100% handsewn. It's all done in the style of the early 16th Century Venetian dress. The outfit is very comfortable as I wore it a couple of days later. The wool is extremely lightweight.

DSC01249

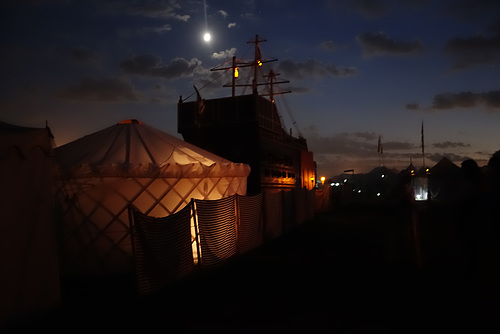
Pennsic at night.

DSC01282

Sartor.cz came and had a booth at Pennsic. I LOVED being able to see the fibers in person and handle them. I now know exactly what I need to order from them.
DSC01355

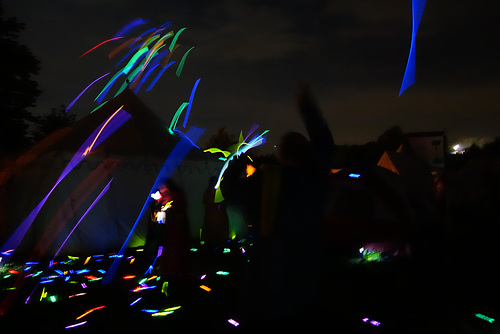
GLOW STICK WAR!!!!!!!!!!! Yes, it's blurry, but it's glow sticks being thrown at night. :-)
DSC01105

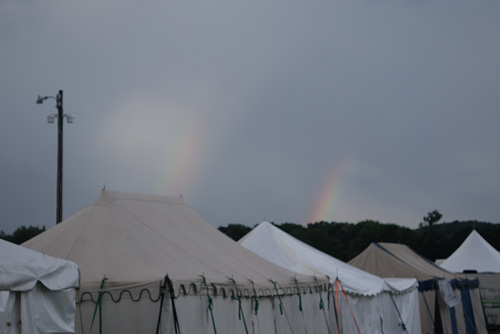
Although this photo was taken during Peace Week, it needs to be shared as well. The weather won this Pennsic - no one denies that. The problem was the humidity. The temperature rarely got out of the 80's but the humidity made the "real feel" around 105F every day. This caused a lot of people to go to the hospital. Unfortunately, the more advanced we get technology wise, the stupider we get regarding our own environment. If you go from your air conditioned car, to your air conditioned office, back to your air conditioned home later in the day, your body will have huge issues adjusting to Pennsic. Your body needs to acclimate to the weather. This means spending time actually outdoors. Drive around without the a/c on. If you spend at least an hour each day for a couple of weeks before Pennsic outside without the a/c, you'll probably do a lot better overall.

Also, at Pennsic, wear loose, long sleeved but lightweight clothing. A hankyweight linen tunic/chemise/smock is a dream in the heat. Not only does it give a barrier between you and the sun (something a lot of people needed!), but it also helps to get the sweat away from you as well. You don't want anything fitted on your arms, just a nice, loose sleeve.

The third thing is to drink water. Not Gatorade. Not soda. Not Pennsic crack. You want a lot of water to help function in the heat.

As for the actual rain and thunderstorms - first thing, look at where you want to pitch your tent. Is there a gully nearby? Is the land sloped down? Ask people who have camped there before where the problem spots are. My group had to stop a family from camping a)in our space but more importantly b) right at the mouth of a huge gully. A couple of days later, a large amount of debris appeared after a rainstorm right where the family wanted to camp. We had to explain to them that the gully turns into a river and exits right where they wanted to pitch a tent. They ended up camping across the street on a plateau - way better idea.

Pallets make excellent raised flooring if you are using a tent. Get about four, throw down a couple of boards on top of them, and instant raised floor! This will help with a lot of flooding issues. Also, you can tent up your tarp to help prevent flooding as well but I always tripped over the tarp getting into my tent when I had one. Therefore, the pallets were an excellent upgrade.

Get a rubbermaid container to put an extra set of garb, muggle clothing, and undies in. This way, if you do get flooded, you will still have dry clothing.

Pennsic is a camping trip but it's also an SCA event - people need to be prepared for both. More pictures here.