Saturday, November 30, 2013

Yummies!

This Thanksgiving, we went over to my brother & sister in laws again.  The one problem I have with this is that it means, if I want to eat at Thanksgiving, I need to bring all my own food.  No one save Mom knows how to cook without tomatos or butter.  Given this, I tend to bring a lot of things that mean Thanksgiving to me.  Believe it or not, it's not the Turkey.  The smell of the sweet potato pudding below is exactly what I think of when I think Thanksgiving. Add in some apple pie and yummy bread and I'm good!

For the apple pie, I'm using the medieval recipe I've used before. However, this time, I'm staying a bit truer to the Italian recipe and using light brown sugar for the crust. Turns out, I needed more sugar in the crust.  However, the filling was perfect.

For sweet potato pudding, I modified this recipe so I could eat it.

Ingredients:

  • 2 eggs, separated, room temperature
  • 1/4 cup coconut spread
  • 1/2 cup firmly packed light brown sugar
  • 1/4 cup vanilla almond milk
  • 1/2 teaspoon salt
  • 1/2 teaspoon ground cinnamon
  • 1/4 teaspoon ground nutmeg
  • dash ground ginger
  • 1 cup mashed cooked sweet potatoes

Original instructions:

In a medium mixing bowl, beat egg whites until stiff peaks form. Beat yolks in a separate bowl. In a mixing bowl, cream together butter and sugar; add well-beaten egg yolks, milk, salt, nutmeg, cinnamon, ginger, and sweet potatoes. Fold in beaten egg whites. Turn mixture into a buttered 1 1/2-quart casserole. Bake at 350° for 40 minutes. Serve with cream or a caramel sauce. Serves 4.

My Instructions:

The eggs would not peak.  I added lemon juice to them and they got very fluffy but I think it was just too humid out to get the egg whites to peak.  I beat the yolks, coconut spread, and brown sugar together in a separate bowl.  It ended up looking something like a very creamy spicy mustard.  Once that was done, I added the boiled and somewhat mashed sweet potatoes as well as the spices and almond milk.  I tried to fold in the eggs but...nothing really wanted to work that way.  After I cooked the sweet potatoes, I mashed them up more (it's very hard to mash up potatoes when you don't have a masher or a blender.  I did this all with a fork) and put it in the fridge.

When it was time to eat the next day.  I put the sweet potatoes in the oven again for 5 minutes to heat them up and then put ricemallow cream on top.  Yummy!  My brother commented that mine had the best texture since we had three very different sweet potato offerings for Thanksgiving.  :-)


I also took over Medieval herb bread which was a huge hit and my normal sweet sourdough bread I make with my starter.   I actually had food this Thanksgiving!   And yes, my very sweet SIL cooked the Turkey with veggie oil rather than butter.   This meant I could eat that too!

Wednesday, November 27, 2013

Thanksgiving Prep

For me, Thanksgiving dinner actually means everyone else gets to eat and I eat whatever I bring.  This means, I need to cook whatever I want for tomorrow.   I've been asked to bring bread, which is currently rising in the kitchen, but I'd also like to bring sweet potato pudding and apple pie.   So, tonight and tomorrow morning will be lots and lots of cooking!

I finally tried the Soy Pumpkin Spice milk and...it tastes like it would be great in a pumpkin pie but not by itself.  It is very pumpkiny and has a slight chalky aftertaste.  I'm pretty sure the aftertaste wouldn't be noticeable if you mixed the milk with other things.  Might have to make pumpkin pie soon too...

I still love the coconut milk based egg nog.  It is so good!

On the sewing side of life - I need to take pictures of my 1860's Ball gown.  I have some but none are very good.   Maybe when I wear it to the ball in Jan.   This week, I should be working my 1820's corset, my winter coat, and some work clothing for my trip next week.  This weekend will be crazy with all the sewing!

Monday, November 18, 2013

BREAD!!! NOM!

I have just taste tested the bread I made with my new starter.  I had forgotten how good this bread can be!  It's delicious.  This time, I used a bit of brown sugar with some honey for the "sugar" ingredient of the bread (bread requires a sugar, a fat, water, salt, and flour).  Typically, I just use honey but I'm running low as I have taken up being a "need tea" drinker every morning.  I have to wait until Thursday for the local honey store to be open.  Gah!

Anyway, the bread is delicious and I can't wait to use it for jelly sandwiches. 

The starter is doing really well.  It was very bubbly this morning after I fed it more flour.  I tend not to need to add a lot of water - the starter sits right on the fridge above the tea kettle.   Since I have a tendency to "forget" that, oh yeah! Tea kettle is on, a lot of moister builds up...right above the fridge.   Probably not the best way but it struck me as funny.  I couldn't figure out why the starter always looked like it had just a bit too much water until I realized right where all the steam from the tea kettle was going.  Oh...yeah...

At least it makes for a happy starter!

I do need to go get more olive oil as well.  I'm all out of my favorite.  I used the extra virgin olive oil I get at the store for this bread as the fat.   Although it works well, I really love the other olive oils I get at Under the Olive tree.  Which means a trip to Tysons...

Sunday, November 17, 2013

Food Product Review! So Delicious Holiday Drinks


They also have pumpkin spice but I haven't tried that yet.   :-)

So, first, the 'Nog.  My west coast Mom (who is really my cousin and is probably reading this right now!) and I saw the dairy free holiday themed coconut milk at the grocery store.  As we both of dairy allergies, we knew we had to try some.  We decided the eggnog had to be sampled.

It's good.  Very good actually, taste wise.   It tastes exactly how eggnog should - and pretty much how I remember it tasting.  The only slight downside is that it's off texture wise.  That is to be expected, really, but it has a watery texture rather than the super thick texture I'm used to with eggnog.  It doesn't taste the least bit watery but it sort of confuses you as you are drinking it.   Not that it stopped me from drinking it!  I'm definitely buying more.

The mint chocolate tastes great while you are drinking it and has the same texture a 2% chocolate milk does.   However, it has a chalky aftertaste that is a bit off putting.   I'm going to finish the carton but I doubt I'll buy it again. 

Both are also corn free - which is awesome for me.  Or, I didn't see any corn ingredients and I haven't had a reaction so, that's good.  

More 'Nog, please?

Public Service Announcement

I've gone back and fixed all the former Flickr, now Ipernity photos. I'm extremely happy with Ipernity - they do this amazing thing where they LISTEN to their customers. How 'bout that? /facepalm

Anyway, I should be sewing my ballgown rather than further procrastinating...

Historical Fortnightly #23: Generosity & Gratitude


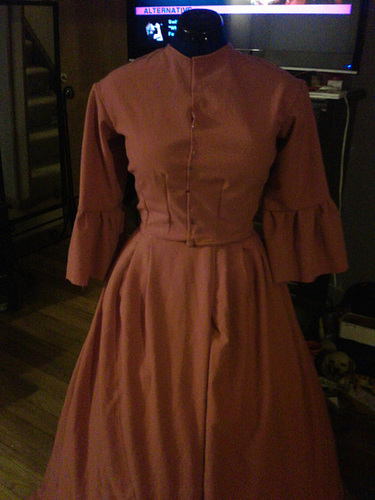
Inside out

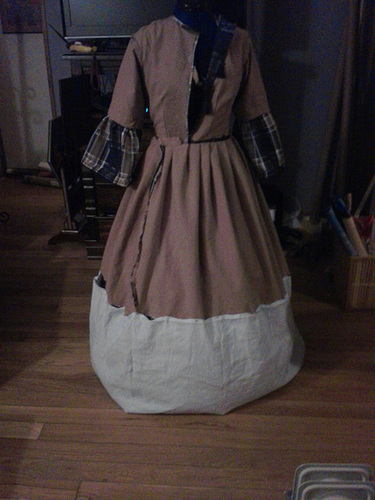
The wool 1860's dress before trim


The Challenge: Generosity & Gratitude
Fabric: For the pink dress, wool and black velvet trims. For the plaid dress, polyester, linen, silk, and vintage black lace
Pattern:Story behind this one, but Kajani posted a wonderful 1861 pattern on her website that I used
Year:  Early 1860's
Notions: Vintage lace, painted black buttons. For the pink wool dress, a bit of black braid, a lovely brooch.
How historically accurate is it? The plaid is probably about 80% period. I get major points off for the polyester but the point was to recreate this dress and the plaid poly matched perfectly.
Hours to complete: umm...maybe 15 hours total for both dresses? I'm really not sure.
First worn: Hopefully, at Gettysburg on Nov 23rd for the plaid dress
Total cost: The lace was $19 for the lace I used and the lace I plan on using on the ball gown. Since I used maybe two yards of the 15 yards, I'm guessing only a couple of bucks. The plaid fabric was $4 a yard with only 3 2/3 yards of fabric left on the bolt! The wool, linen, and silk were all stash. Actually, the silk trim used on the plaid dress was all scraps.

More information:

With the 150th anniversary of Gettysburg coming up, I wanted to do only 1860's for this challenge. The problem? I've only done anything remotely 1860's once before - and that was a simple linen blouse with a wool skirt. This time, I wanted to recreate this lovely dress I saw posted on ebay over the summer. The seller, Fiddybee, always sells amazing extant garments with decent pictures. Thanks to all the garments they have posted over the years, I've learned tons about the proper look for mid-Victorian garments.

However, I only had 3 2/3 yards of fabric for the plaid dress. So, I decided early on I'd make a pink wool dress out of whatever pattern I ended up with, play with that since I had a lot of yardage to play with with the wool, and then, once all the kinks were worked out, make the plaid dress. The pink dress pictured is before I added the trims but the color on that photo is better than some of the later ones.

I began going through blogs and trying to find out what I could on 1860's patterns. I knew, from the seam lines of the extant dress, what the pattern should look like but didn't want to just guess at shoulder angles, dart placement, ect. Most of the blogs I found either didn't mention a pattern or just used a Big 3 (Simplicity, McCall's, Butterick) pattern. I looked at the Big 3 patterns I had on hand and they all looked...baggy. Somehow, I saw a lot of individuals get beautiful results from those patterns. However, if I was going to have to edit a pattern, I thought, I minus well draft it myself!

That's when I saw Kajani's pattern. Her website is in Polish but that doesn't matter for many of the items she has posted. Besides, google translate is awesome. Thanks Google! She posted a pattern from an 1861 magazine called the "Domestic Wheel" (KÓŁKO DOMOWE in Polish). What I loved about the pattern she posted is that it's on a grid. Each square is 1 inch. It helped to figure out slope and size. Thank you, Kajani!

Immediately, I took my sidewalk chalk and copied the pattern on to some green poly fabric I had lying around.
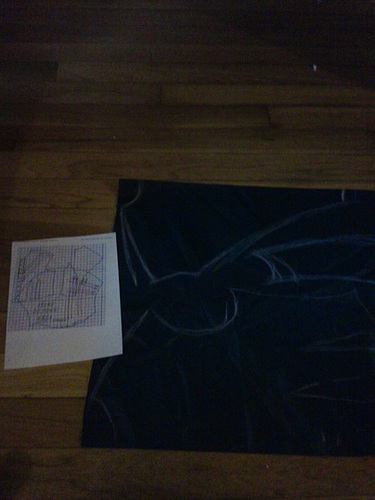
Chalking it all up

In the photo, you can see the print out of the pattern by Kajani next to my chalk drawings. I then cut it out, and started on a mock up.

There were some minor challenges, but I ended up with a nice wool dress as a back up dress for Gettysburg. (It will be useful for tending campfires). To line the dress, I used methods I found from extant gowns posted to ebay over the years. Looking at both ebay photos and museum photos, I realized only silk gowns were fully lined - cotton and wool gowns typically had lined bodices and maybe a deep lined hem. Yay! No full lining for the wool dress.

Ginger, who knows a lot about the 1860's dress, was kind enough to also show me some examples, via photos and daguerreotypes, some examples of how clothing was really worn. She pointed out that some sort of collar was typically worn. I've settled on a off white lace collar with a bit of thin black velvet for a bow based off of the daguerreotypes she showed me on her pinterest page. Thanks, Ginger!

Once the pink wool dress was done, I went on to work on the plaid dress. I had just enough fabric to make the skirt (two 60" widths by 43" length to go over the hoop skirt) and the bodice plus sleeves. In wanting to keep the dress as close to the original as possible (I couldn't do the bias sleeves due to yardage), I painted a few gold buttons I had black. The buttons had the correct design on them, but the wrong color.

The finished dress is heavy! Since the polyester is supposed to look like silk, I treated it like a silk dress - meaning it's fully lined in linen. Although cotton was commonly used to line dresses, based on this extant green dress that is part of the Litchfield Historical Society's collection, linen was also still used. I always have a ton of linen on hand (SCA costumer!) so it made more sense for me to use it. Thank you to the Historical Society for providing the fabric information!

I also want to thank everyone who left kind comments on my livejournal page as I was slowly piecing everything together. :-) It's sometimes the comments that help you get through the sewing project!

Thursday, November 7, 2013

New Starter!


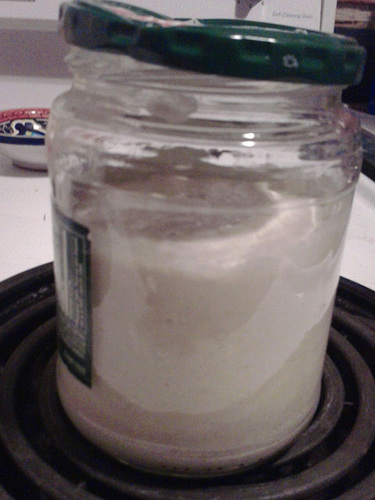
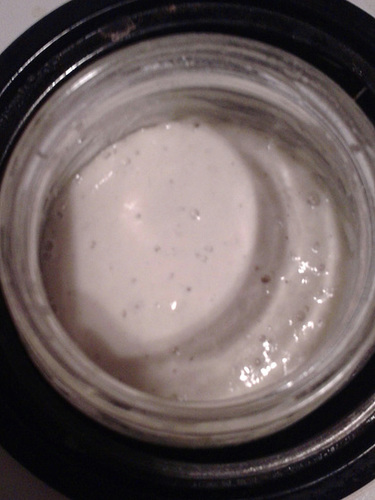
It was only half way filled when I added 1/4 cup of flour and water this morning. It's been growing like crazy - which is good- but I can't use it until next week. It won't be "sour" until then. Gah!


Look! Bubbles! Actually, that just shows how alive the starter is. It's only 48 hours old and it's already very very active. And yes, pickle jars are awesome to put starters in. You just have to clean them really well. I hope to be able to use this starter for Thanksgiving. We are going over to my brothers and sister in laws again - so I'm bringing a lot of bread. My SIL has 5 sisters, at least 4 of whom live in the area. I'm one of four children. My brother and SIL have 3 kids - in other words, with just the siblings and kids, it's already a nice large party!