Monday, September 29, 2014

An attempt at the Moy Gown, part 1


First, yes, bedsheets work wonders for mock ups. Particularly the ones you've hated for the past 10 years since your mother got them and put them on your bed in the beach house. :-) You have no idea what pleasure it was to chop this baby up.

Second, the Moy gown. There are now several good write ups out there on the Moy Gown. The first of which is March Carlson's experiment on the construction of the gown. Another fabulous one is here by Matilda La Zouche.

Basically, the Moy gown was found in an Irish bog back in 1931. It's most likely from about the 1460's to the 1480's based on contemporary drawings of the time - however it might be a bit later than that as Ireland tended to be a bit behind the times when it came to fashion.


The above is from 'Sol und Siene Kinder' by the Housebook Master, the last quarter of the 15th century, South Germany.

This image done by Maître François in his illuminations of La Cité de dieu by Augustine around 1475-1480. This image is called Mysteries of Cybele (Virgo caelestis, Berecynthia) – fol. 86 verso. (I found it at Cottesimple.com.)


I want to create a Moy gown because I am fascinated by something that has lasted this long, clearly spans a few countries (France, Germany, Ireland), and it looks interesting in construction. However it's the construction that is getting me right now.

Although the body was easy enough -I used my 1790's bodice as a template since it has the weird back thing going on as well- the sleeve has me going crazy. I'm leaving it as is until the morning.

I had to play with the construction a bit in the body as well - the original neckline I had was too wide, which is why I have it pinned.  Other than that...it really was easy.  Now to figure out that sleeve...in the morning.  Hmm...

Edit: Me? Actually wait until the morning? Bwahaha! Yeah....no.


Fixed it! The sleeve fits perfectly now. The bodice is a bit tight but that I know how to adjust for. Now to do the second mock up, fully destroy these hideous sheets, and then work on the actual dress!

Monday, September 22, 2014

Historical Food Fortnightly #9: Frugal Housewife

9. The Frugal Housewife September 21 - October 4
Throughout history, housewives and housekeepers have kept a close eye on their budgets and found creative ways to pinch pennies while providing delicious and nutritious food. Create a dish that interprets one historically-documented method of frugal cooking.


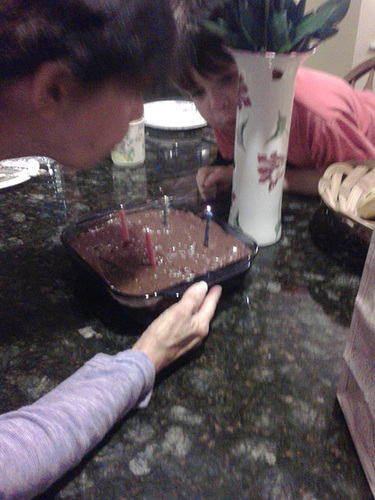
Birthday cake
The Challenge:
The Frugal Housewife


The Recipe: (where did you find it, link to it if possible)

Actually, it's a recipe that my Mom got from my Aunt Bev way back when (meaning, before I was born!). The picture of the recipe above is from here (you need an open library account to see it). The book is The Time Reader's Book of Recipes: Two Hundred and Thirty Favorite Recipes of the Women who Read Time By Florence Arfmann.


The Date/Year and Region:
Most people call this a Depression Era cake but I found no evidence of that. The earliest I could find was 1947. The book above is from 1949 (republished in 1951). It makes *sense* that I might be a WWII recipe (no eggs, no milk, due to rationing) but I didn't look for it past this book.  Actually, I found something from the BBC that states it is a WWII recipe.


How Did You Make It: (a brief synopsis of the process of creation)
Since this is later that I usually do, I just followed the directions. :-) Although, I cooked it for 40 min rather than 30 - it wasn't done at 30 min.


Time to Complete:
The cake itself was done in under an hour. It takes all of 3 minutes to whip up the ingredients together. The time consuming part is cooking it.


Total Cost:
It was all stuff I had on hand; cocoa powder, baking soda, salt, all purpose flour, olive oil (rather than shortening), vanilla extract, and white vinegar. I think these are pretty common to most household kitchens and part of a regular "supply".


How Successful Was It?: (How did it taste? How did it look? Did it turn out like you thought it would?)
I've made this cake several times and, as always, it was delicious. Everyone who tried it, loved it.

How Accurate Is It?: (fess up to your modifications and make-dos here)

I feel sort of bad about using this one for the HFF because a) it's not 15th/16th Century which I wanted to stick to and b) it really is something I make all the time. Today was my Mom's birthday. I knew my brother was making cheesecake - which I can't have (Dairy) and I was pretty sure Oldest Nephew couldn't have (Eggs). So, instead, I made this. No eggs, no dairy - just a nice vegan chocolate cake that is absolutely delicious. (Oh, and for Oldest Nephew's sake, it also didn't have peanuts ;-) And no corn so *I* would get sick. He gets worried about all the allergies!)

Both myself and Oldest Nephew (he's six) got to have the eggless, dairy free, rich chocolate cake (as did quite a few other people at the party). It tastes like a chocolate cake should and people are always surprised when I tell them it's vegan. I do use a butter flavored olive oil (no real butter in it) to help give the cake a bit of richness.

The icing is a bit on the modern side, I think - it has coconut oil solids rather than butter in it. It was necessary since I really can't have dairy. However, the rest of it is perfectly normal going back to at least the Edwardian era - confectioners sugar (corn free), vanilla extract, almond milk (common replacement for milk going back centuries), cocoa powder, and the coconut oil solids (coconut butter).

Sorry for the bad picture - I only had my android on me when Mom blew out the candles - with Oldest Nephew's help, of course!

Because all the ingredients are items that most people have around the house all the time and keep well, it's been considered a "frugal" choice. Basically, it cost nothing because I use flour for other things, the salt- well, who doesn't have salt?-, the cocoa powder I use for my Hot Chocolate, and the olive oil as well as the vinegar are items I use in other things as well. Actually, I use the olive oil in everything. It's delicious on toast with a bit of cinnamon and sugar. :-)

Sunday, September 21, 2014

1920's Outfit!

I've done some 1920's before and I really love the decade.  It might not look the best on everyone, but gosh darn it, it's simple to make!  For a Downton Abbey party, I made an early (I was going for 1923) dress, evening gown, and coat.  Even though it's still pretty decently warm during the day here on the east coast, the temps drop about 10 degrees F the second that sun goes down.  I'm SO very glad I did make the coat.
I got a flat and had to wait, at night, for AAA to arrive.  Since the dress I wore itself was sleeveless, the coat was very, very welcome.

 The coat was inspired by this extant one.  I wanted a cocoon coat but I couldn't figure out exactly how it was made until I saw the extant one.  They are so ridiculously simple.  It's a big rectangle.  You fold over the fabric, sew up the sides to about 4" from the top, cut a line in the dead center of the top layer (ie, don't cut both the front and back), and cut both layers about 4" from the folded edge in that dead center.  That's it. I had some stretch white velvet (that is of a much higher quality than I remembered) in my stash.  I bought the brown feather trim on sale for $1.60 a yard.  The lining only happens to be brown as well (seriously, it was leftover from my brother's cape lining) and is a brown flannel backed stain.  The entire coat, minus the trim, takes 10 minutes.  The trim was hand sewn on and still only took an hour.
 The overgown is a pink orgnaza dupatta that happened to be wide enough for the style I wanted.  Normally, dupattas are only a yard or so wide - this one was a good 45".  I used the borders as the neckline and hem trim.


 The belt is just some silver panne velvet.  I couldn't find anything else that went well with the color scheme.   I'm not happy with the belt but it will do until I find some silver silk I like.  The brooch is vintage, but probably only from the 1950's.  Still, I liked it with the rest of the outfit.
You can't see it well in photos but the underdress is a blue/pink iridescent dupioni silk I've had in the stash for years.  When I saw the dupatta and the silk together, I literally ran into the other room and draped them together to see how they looked.  It was too cool looking!  

I know some ladies at the mansion got a few photos of me wearing the dress.  I'll post them as soon as I find them.  

Monday, September 15, 2014

Historical Sew Fortnightly '14: Yellow!


You need to have the video going while reading the rest. It's such the perfect mood setter for this challenge. :-)
The Challenge:  
Yellow!!!
Fabric:
Some sort of mixed fiber damask for the forepart, plain muslin for the parts that won't be seen beneath the Tudor Gown.
Pattern: 
My own!
Year: 
1520's/1530's
Notions:
Thread, a hook and eye
How historically accurate is it?
Eh. The fabric design is actually *exactly* like a piece of 16th Century fabric I've seen in the MET (I think it was the Met...), however the fibers are a mix of cotton and man made somethings. The entire forepart skirt is machine sewn. However, since all anyone will see is the nice yellow forepart, it's passable but not H/A.
Hours to complete:
2 hours - mostly because I've VERY displeased that Courtney won on Masterchef - which I was watching while I cut this all out.
First worn:
Hopefully, in October when I finish the dress to go with it!
Total cost:
.... I honestly have no idea. The yellow has been in my stash for ages. I've been hoarding it until I feel comfortable enough to attempt this dress:


The dress itself is not accurate but for some reason, I love it. I love the movie, the dress, the acting - it's my favorite early Tudor era set movie. So, I need to make it. I'm starting with the forepart and figured, since the forepart is yellow/gold in color, it will work well for this challenge.


....just ignore that the dress dummy also happens to be wearing an Edwardian corset with a drapped mockup around it. I haven't finished the Edwardian yet and can't take it off the dummy.


More photos when I finish the dress to go with it. (Which will have the same fabric lining the sleeves as the forepart fabric!)

Sunday, September 14, 2014

My little Viking Cap

What I wrote in my documentation:

Based on the Jorvik excavation, this cap is made out of brown silk with buttercream silk thread stitches. The linen twill tape was used based on speculation within the archeology reports due to stitches showing that some sort of tie was at the bottom of the cap.


The original cap is made from a single rectangle and then shaped at the crown to give it a curve. I pieced my cap due to the limited amount of fabric I had that looked correct for the 10th Century. Brown color, achieved with madder among many other popular dyes in the 10th century, is plausible as well as the soft yellow from lichen. Silk was believed to be imported from the Byzantines at this time.
The cap I have presented to the A&S is entirely hand sewn and uses the closest possible materials to the original artifact.

You can read more about Norse dyes here and see the extant cap here.  Since this particular competition was "Winner take all", I didn't want to have something that was completely awesome - since I might not win- but I did want something that was accurate, fun, small, and something that I wouldn't mind having in the garb closet but wouldn't mind loosing either.  However, I - and everyone else- really didn't have a chance since someone made an accurate bone comb.

The only way to have competed with that would have been to enter a fully embroidered, hand woven apron with complete documentation on the embroidery style.  Pretty much everyone else was wire weaving - which was cool but yeah, we never really had a chance.  ;-)  

Admittedly, the cap was out of scrap silk.  The silk originally was used for lining of bell sleeves in another gown I made last year.  However, I had enough to make a decent cap.  I still have some and might do another cap - but with purple silk thread because that would be awesome.  :-)

Monday, September 8, 2014

Beef Stoganoff (dairy free version)

I originally posted this - locked- on my other journal and didn't realize that until I went to search for it!

One of my favorite food before my food allergies got to the point of ridiculousness was beef stroganoff the way Mom made it. The problem was Mom used an instant onion soup (corn!) and sour cream (dairy!) so I haven't been able to eat it for a while. I finally gave up and decided there had to be a way to make it without dairy or corn in it. What I ended up with was actually pretty good - a bit sweet but that's because I screwed up with the sweet onions and accidentally adding vanilla almond milk. However, it still tasted fine. 

1lb of ground beef
1 can of beef stock
half a medium onion, cut up (or a half cup of dried onion minced)
1/2 cup of mushrooms, sliced
1 cup of noodles (I used lil shells but really, almost any kind will do)
1 cup of unsweetened almond milk
1/4 cup of flour (or more) to thicken the almond milk
1 teaspoon of rosemary
1 teaspoon of thyme
2 teaspoons of salt
1 teaspoon of pepper

Brown the beef. Add the onions and mushrooms to saute them as well. Add the beef stock once everything looks cooked. Add the noodles and make sure they are covered by the beef stock. Cover the frying pan and let it sit on medium heat for at least 20 minutes.

In another pot, a few minutes before the noodles are done, pour the almond milk and flour together. Stir it up and make sure it thickens. Add the spices as it begins to thicken over a low/medium heat. 

Take the cover off the frying pan and let it simmer for a couple of minutes.

Add the white sauce you made in the other pan to the beef and noodles in the frying pan. Mix it up well and cook it another five minutes. Serve. 


I've since made it several times unsweetened original almond milk and it's delicious. :-)

Sunday, September 7, 2014

Modern Clothing Post

I apologize for the horrible Iphone picture.  I'll get another one when I go to get my real camera.

I've been looking at a lot of the bohemian style clothing and more homemade modern clothing.  This is my attempt at it.  I knitted a yoke of pink yarn I had in the stash and then sewed on a half circle for the top.  The bottom is just a simple ruffle and I added pockets.  All the fabric was stash fabric as well.


For the front yoke:

Cast on 42 stitches

Row 1:  Knit one, y/o *k2tog, k2tog, 2 y/o* ending with a 1 y/o 1k
Row 2: 1P, 1K, 2P *1k, 1p, 2p* ending with a 1K, 1P  Basically, you want to knit the first y/o and perl the second part of it followed by 2 perls
Row 3: 1K, 1P *slip 1 knitwise to cable needle, 1K, Knit the one on the cable, 2P* end with a 1K, 1P
Row 4: 1P, 1K, 2P, *2K, 2P* ending with a 1K, 1P

Repeat the above twice.  Then finish off the first 4 stitches, slip the next 8 to a needle, finish the next 18, slip the next 8 to a needle, and finish off the last 4.

For the straps:

Pick up either of the needles with 8 stitches.

Row 1: 1K, y/o, k2tog, k2tog, 2 y/o, k2tog, 1k
Row 2: 2P, 1K, 3P, 1K, 1P
Row 3: 1K, 1P, slip 1 knitwise to the cable needle, 1K, Knit the one on the cable, 2P, 1K, 1P
Row 4:  1P, 1K, 2P, 2K, 2P

Repeat until desired length - about 13".  Do the same for the other strap.

Back yoke:
Cast on 4 stitches. Knit on the 8 stitches from the first strap, cast on 18 stitches, knit the 8 stitches from the second strap, cast on 4 stitches.  (42 stitches)

Row 1:  Knit one, y/o *k2tog, k2tog, 2 y/o* ending with a 1 y/o 1k
Row 2: 1P, 1K, 2P *1k, 1p, 2p* ending with a 1K, 1P  Basically, you want to knit the first y/o and perl the second part of it followed by 2 perls
Row 3: 1K, 1P *slip 1 knitwise to cable needle, 1K, Knit the one on the cable, 2P* end with a 1K, 1P
Row 4: 1P, 1K, 2P, *2K, 2P* ending with a 1K, 1P

Repeat twice and finish.  This will not go under the arms but adds straps to the blouse.