Saturday, November 15, 2014

Historical Sew Fortnightly #21: Re do!

The Challenge: #21: Re-do – due Sat 15 November. Pick any previous challenge and re-do it (or do it for the first time). It could be one that you didn’t finish, one that you wish you’d had more time for, or any time for, or one where you loved the theme so much you want to do it again. So, I choose to do #11: The Politics of Fashion for this challenge. The gowns of the Regency era were designed to look nothing like the gowns associated with the French court and based off of the Greek statues as a way to embrace democracy.  You can read a bit more here.

Fabric: Polished cotton

Pattern: My own!

Year: 1820s

Notions: 7 +yards of silver lace and 6+ yards of sari zardosi trim

How historically accurate is it? It's not too bad. It's machine sewn but silver lace and cotton are period.

Hours to complete: 9 or 10, I think

First worn: Today!

Total cost: I can't even remember how much I paid for the green cotton it's been so long. Maybe $5? The silver lace on the bodice was $1.50 a yard and the zardosi trim was maybe $10 for the whole thing.


So, the inspiration:

The above dress is one of the many in the Met's collection.  When I told Mom she needed a new Regency dress if she was going to come to the tea, she choose the above as an example of the dress she wanted.  Okay.

I went through the stash pile and Mom liked the green polished cotton best of the fabrics I presented to her.  She wanted silver trim - which luckily I had- and I started on a new pattern for her.

I tried to carefully mark up the bodice with multiple chalk lines to act as lace placement.  The original gown actually has tucks with netting between the tucks.  However, I have no idea how to do that without do that to the fabric first and then cutting out the bodice - which would waste fabric and take too long.   So, I just applied lace to the front.

Mom ended up loving her dress so much she bought me a new hat!   Yay!   The back picture looks a little funny because I had her in 1790's stays and covered the straps with her 1820's petticoat straps.  I need to make her new short stays.

Wednesday, November 5, 2014

Ginger Ale!

I have made ginger ale! With the now not so new sodastream, I've been trying to create various soda flavors. My latest attempt has been to make ginger ale.


Recipe:

  • 2 cups sugar
  • 1/2 cup white vinegar
  • 1/3 cup ginger juice (about $3.99 at my local Mom's Organic Market.  I used half the bottle)

Like some other recipes I have tried, I mixed all the ingredients together and brought it to a boil. I then stirred the mixture for 2 minutes and dropped the temp down to a simmer for another 10 minutes. I then removed the pot from the heat to let it cool and get syrupy.

About two tablespoons of this syrup works for a pretty rich ginger ale. If you don't like real ginger, you won't like this. However, if you are like me and happily eat the crystallized ginger raw, this is completely delicious.    This should make enough to last for about 30 or 40 glasses of ginger ale.

Sunday, November 2, 2014

Costume Roulette: Natural Form

First, the hair:
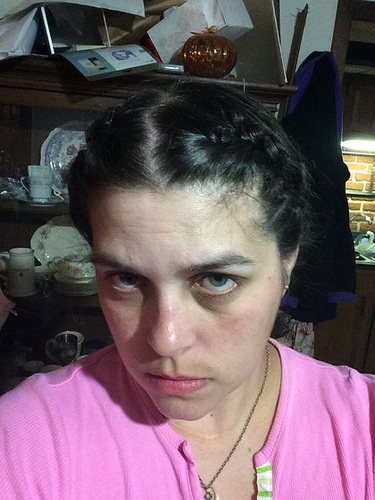
The image above is from 1875 - a bit before the Natural Form but I realized I might actually be able to do the style on the bottom left without too much difficulty.  It's a braid around the head and a bun with a drape of curls.  I've done one or two of these as part of my normal hair routine but never all three together.

First, I divided the hair from above the ears - moving the sides of the hair (and bangs although they are almost to my chin now) to the front and leaving the rest back.  I french braids the bangs and incorporated a slight braid into the sides of the hair - this is part of what I do normally and it looks like this:


photo 2(1)


...Once I take the braids back and put my hair into it's normal bun.

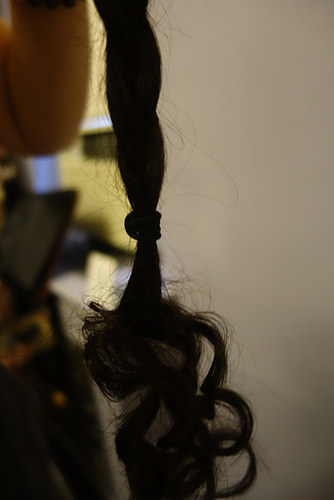
However, this time, I needed a thick braid as well as a bun and a cascade of curls. To accomplish this, I split the hair in the back of the head in half - the top part being the part that would be the bun and the bottom being the part that would be the braid. I took the slightly braided sides and incorporated them into the bottom/braid part. I only braided the sides far enough to reach the back of the head so you don't see a braid within a braid. Once I braided my hair, I tied it off and curled the ends (and plastered them with hairspray).

DSC05252


The braid had to be loose to give it that "big hair" look.

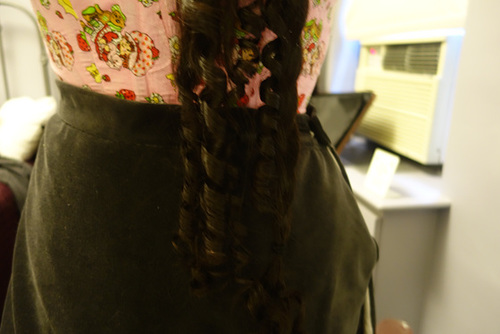
Next, I took the top part of the hair and split it to make some curls about half way down the length of my hair. Again, plastered with hairspray.

DSC05249


I then did the bun first, having the ends tucked under the bun so the cascade falls correctly. I then wrapped the braid around my head and bobby pinned everything into place.


Yes, my corset is Strawberry Shortcake print with red bias tape. It works.  Sorry for the bad iphone pic.

The dress:


 Before I put the sleeves on but you can see the train and the back of the jacket detail.
Once it was mostly completed. I think I still did some stitching to the skirt after this.

The dress is out of cotton velvet, lavender silk I originally made a dress for a Poe event out of (but I made the sleeves too small so it went into the UFO pile because I only ecked a dress out of the fabric and didn't have enough to redo the sleeves), and gray linen.  The linen is the base of the skirt.  Oh, and white silk for the lining of the train.

For my first attempt at Natural Form, I think it came out alright.  It fit, which was a big plus.  :-)   I used Wearing History's  1879 Bodice e-Pattern and only had to make a few slight changed.  The collar was odd - the original seams to end at the shoulder seams.  I made a back piece so the collar would go all the way around.   The sleeves are a LOT longer than they look on the pattern's picture.  I ended up not using the cuffs because they just weren't needed.

I used black netting to fill in the neckline.  There is a photo from the same era showing a similar bodice design but with a scarf to fill in the neckline - which is where I got the idea:


Since I've had the cotton velvet since the early 2000's (I think 2002.  I wanted to make Queen Amidala's Gray Kimono outfit at one point and never got around to it) and the lavender silk since 2008 or so, this outfit was very cheap to make.  It was mostly stash (the only thing I had to buy, I think, was the bed sheet to make the petticoat and the hoop skirt).   Even the buttons were stash.

I might get more photos later of me actually in the outfit - I know several were taken.  We'll see!


I'm wearing it in this video:

Saturday, November 1, 2014

Historical Sew Fortnightly: Alternative Universe


A long time ago, in a galaxy far, far away....


Halloween


It is a dark time for the Rebellion. Although the Death Star has been destroyed, Imperial troops have driven the Rebel forces from their hidden base and pursued them across the galaxy.
Evading the dreaded Imperial Starfleet, a few remaining Jedi knights, led by Luke Skywalker, have established a new secret base on the forest moon of Endor.
The evil lord Darth Vader, obsessed with finding young Skywalker, is attempting to lure the young Jedi in with promises of candy....


Halloween


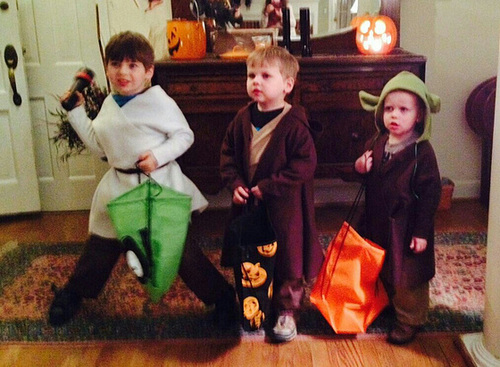
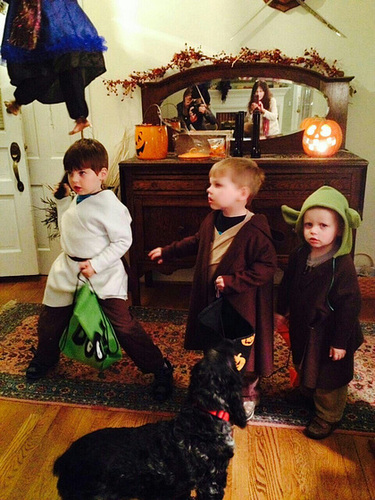
So from left to right, Luke Skywalker, Obi Wan, and a very confused Yoda. :-)

For the Alternative Universe, I went with an alternative Galaxy and made my nephews their Halloween outfits. Oldest nephew wanted to be Luke Skywalker. Middle Child wanted to be "the guy with the blue lightsaber!" Youngest nephew didn't really get a choice. He's two and his Mom and I decided that if the other two were going as Star Wars, so was he. ...and that he had to be Yoda. Because.

The Challenge: Alternative Universe

Fabric:Knits and Fleece

Pattern: A very modified New Look children's pattern as the base

Year: A long time ago, in a galaxy far, far away.... (Since that was written first in 1977, my guess is that a long time ago is before WWII)

Notions: Thread, belts, lightsaber...

How historically accurate is it? Since I didn't follow the exact lines or fabrics of the movie, it's not. I used fleece for Luke Skywalker's Tunic, Obi Wan's robe, and Yoda's "head" and robe. The reason for this is I remember being little and having to put on a winter coat over my Halloween outfit. What was the point in that? No one could see if I was Dorthy or a Witch with my coat on. So, instead, I make my nephews' outfits out of fleece so they will be warm but don't have to wear their winter coats.

Hours to complete: 3 I think. I was worried about Yoda but it ended up being easy. After cutting out the base of the robe and the hood (basic coif style), I cut out sort of teardrop shaped pieces of green fleece with the bottom round bit of the teardrop cut off. I then pleated the teardrops to look like the inside of an ear, cut slits in the the hood, and added the ears about where I thought they should go.

First worn: Halloween.

Total cost: $23.70 for the fabric - I got a lot of it on sale

Tuesday, October 28, 2014

Natural Form Dress 2: The Underthings

For the Natural Form dress, I decided to make hoops and a petticoat.   I want the dress to have the correct look - even if the underthings are a bit off.

For the hoops, I based them off of loosely off of other natural form era hoops. Originally, I was going to do the whole belt thing - with suspenders hanging down to hold up the hoops around the hem- but it just didn't look right. So I took a rectangle of fabric and added that to get a full hoop skirt.


It still doesn't look quite right but it works. The petticoat will hide the fact it's a bit more crazy with the odd looking hoops. However, the hoops will help keep the skirt out and give it the shape it needs.

For the petticoat, I pieced together what fabric I had left over and then added some lace that I really didn't have a use for to the back of the petticoat.  It's not super pretty but it is functional.
The waist to the petticoat is just a drawstring.  If I have enough time, I might switch it to a waistband.


Monday, October 27, 2014

Vegan Chocolate Chip Cookies!


Ingredients:

  • 1 cup olivio coconut spread (you can use Earth Balance coconut spread but I've found olivio is typically softer)
  • 1 cup white sugar
  • 1 cup packed brown sugar
  • 2 apples, peeled and cored
  • 2 teaspoons vanilla extract
  • 3 cups all-purpose flour
  • 1 teaspoon baking soda
  • 1/2 teaspoon salt
  • 2 cups semisweet chocolate chips (Enjoy life has the dairy free allergy friendly kind)


Directions:

Preheat oven to 350F.

In a pot, boil the apple slices until they are mushy. Drain them and then mash them up into a sauce. Leave to the side for now.

Mix in a large bowl the coconut spread, the white sugar, and the brown sugar until it's blended. Add in the the applesauce, the baking soda, and the vanilla extract. Then add in the salt, chocolate chips, and flour. Once this is mixed together, put small spoonfuls of the dough on an ungreased cookie sheet. Cook for about 15 minutes (check them at 12).


These cookies are perfect for anyone with dairy or egg allergies. You could probably sub the flour for rice flour to make them gluten free as well. I think these make about 4 dozen cookies - I was eating them as I was baking so I have no idea. :-)

Sunday, October 26, 2014

MOR APPLES!!!!!!!!!!!!!!!11!

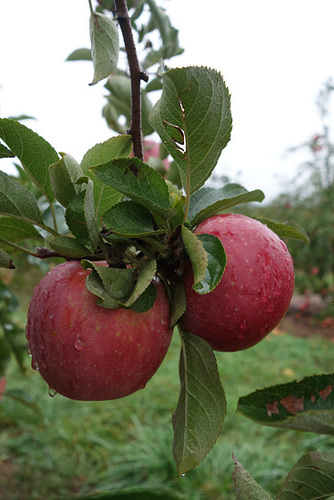
25 pounds of apples this year!   This photo was taken after I had already frozen about half of the apples I picked this year.  Some of you might recall that last year I picked roughly 20 pounds of apples at Butler's Orchard.  This year, Butler's was picked clean early so my Mom and I headed up the road from her house to Homestead farm in Poolesville Maryland.

The amount of apples at Homestead was unreal.  This year, I picked Fuji apples - mainly because they are a known apple to me and there were TONS of them.   Fuji apple trees don't look like what I would consider normal apples trees.

DSC04958

The trees look more like a cross between a bush and a vine.  The branches were supported by posts and wire - like you would do for a grape vine.  The main trunk looks more like one of those young stick trees you buy from a planter company when you want to plant a new tree in your yard.  The difference is that the stick has ten or so branches, each overloaded with apples.

After picking 47 pounds total - between myself and Mom, we also went to pick up a couple of pumpkins and then went back to the farm's market to get potatoes, onions, and apple cider.  I won't need apples or potatoes for a very long time.

Anyway, I did what I did last year to freeze the apples.   I peeled them, cut and cored them, and then bathed them in a mix of lemon juice and water to prevent the apple slices from browning.
After the lemon bath, I threw them into a plastic bag.  I'm keeping with the four apples to a bag since that worked really well last year. It seems to be the perfect amount for a decent apple pie.
The big difference this year is only that I have one bag where I cut the apples into donut slices rather than the chunks like you see above.  I LOVE medieval apple fritters however you have to cut the apples in the way of the host - ie, like the Eucharist bread.  So to help keep the slices separated during the freezing process, I put pieces of wax paper between each slice.  We'll see if that works.

I have been eating some of the apples this year already.  They are so good!   I had one as a snack when I went into work last week.   Another ended up being a snack with peanut butter today when I was in a mad sewing session.  (Had to finish up all the nephew's Halloween outfits)

Since my oldest nephew's egg allergy has gotten much worse, I'll be using some of the apples to make apple sauce - a substitute for eggs in many recipes.  It tastes great in cakes and cookies and the starch works well as a nice, natural egg replacement.  Much better than bananas - which can also be used if you mash them up.  However bananas only taste good in chocolate cake because they dramatically change the flavor profile.