Sunday, August 18, 2013

Modern Sewing: Curtains!

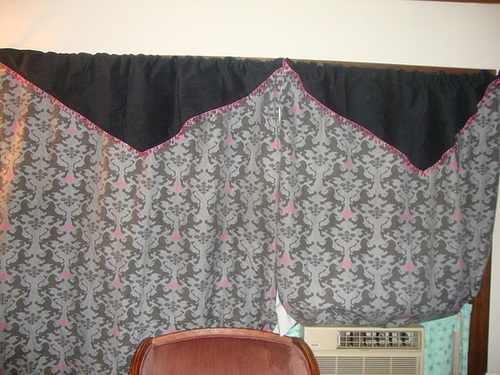
DSC03641

My new curtains. The fabric I used is available up on spoonflower and is based upon an extant 15th C print. Not that it had hot pink fleur de lis in it or anything like that. ;-) They are very simple, as you can see, but I like them. They are lined in light blocking fabric so that anyone driving by can't see shapes moving about. Really, I just love that I finally can take down the old yellow curtains and put these up. Gotta love the hot pink beading around the black uncut cord.

Friday, August 16, 2013

Repurposing an old cigar box


My Dad smokes cigars. This means he ends up with some pretty cool looking cigar boxes which he often offers to me to play with. This one I thought was really cool and could work nicely for a jewelry box. I did add a mirror to the inside but it's lopsided. Hint - do not use too much glue! I'm going to try hack away at the glue to see if I can reposition the mirror. If not, oh well, it's for me and not for anyone else.


Today, I came across some neat adhesive fabric paper for scrapbooking at Joanns. It was on sale. The fabric inside was all rather shabby chic but cute. I thought that, given that it was on sale and adhesive and fabric, it might work well. (no glue!)


This was after the first layer of sticker fabric. You can still see the writing on the box but with the patchwork look I had in mind, this wasn't going to be an issue for long. I traced the box on the back of the fabric, cut out the piece with just enough overlap to cover the lid. I cut the front so I could just flip a piece of the fabric up to allow for the lock.


Patchwork complete! I had fun cutting out the shapes. :-) I wanted some more detail on the box so I went to my scrap pile of cool trims I just don't have the heart to throw away. In it was a bit of lace. One the adhesive paper cover was a cute ribbon I ripped off of it.


This is what the box look like now. :-) I'm rather pleased with it. I just glued the lace and ribbon on -far more carefully than the mirror- and it looks like a very girly jewelry box now and not like a cigar box. Yay!


Thursday, August 15, 2013

New (Modern) Robe


I stated going through my fabric pile looking for something that would be suitable for an Edwardian or Victorian robe when I saw my strawberry fleece I bought earlier this year (I think) for a robe.   I decided that, since fall will be here before we know it, I should just sew the thing up before it does get cold. 

My old robe was pink fleece with blue stars and thanks to Simplicity pattern 5931.  It was always...big.  Way too big since I sewed it up, I think, 11 years ago?  Maybe 12.   It was a while ago and back when I really had only been sewing for a couple of years.  It was one of the very few modern patterns I did back then.  Oh well.  It worked and I loved it but...my sewing has come along a LOT since then and so have my tastes in clothing.  ;-)

This new strawberry printed fleece robe is my own pattern.  It's pretty much a rectangle with curves for the waist, gores on the sides, and pockets!   I used pinking shears for around the collar to give it more finished look - since it's fleece, fraying isn't an issue.   I love the way the top of the robe looks on but the bottom of the robe probably could have used larger gores.  Oh well.  It works and maybe this one will last another decade!

Historical Fortnightly #18: Recycling!

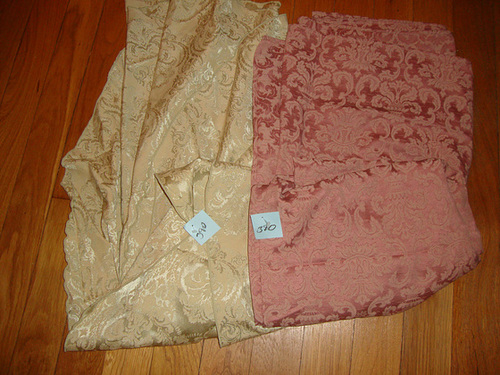
DSC03614


I know I should be working on the #17 Robe & Robings one but I love the idea of recycling fabric.   I was considering just finally getting off my duff and remaking my first renn gown into something more...renn?  But I saw these at the thrift store the other day and they need to be a 1490's Florentine.  The pink rectangular tablecloth will be the dress and the pale green oval tablecloth will be pieced into a giornea (that big sideless over gown thing).  They are both mostly cotton with some dead dino thrown in for good measure but look at those colors!  And the designs!   And, for $3.90 each, it's hard to pass up on a full Italian Renaissance outfit for under $10. 

New Velvet Fall Jacket


I saw these two blouses at the thrift store the other day.  They are both typical nylon velvet but look at the cut out velvet on the black one!


How could I resist that?   So I picked up figuring I could do *something* with it when I saw the purple velvet shirt in the same color as the highlights on the black velvet shirt.  Both were XL, making them great for remodeling and leaving me some room. 

Both shirts were $4.90.  (The thrift store doesn't bother with decimals or dollar signs.  I have no idea why.)  Before I even left the store, I knew what I wanted out of them - a new jacket!   Together, I thought, they'd make a great simple fall jacket.  So, the second I got home, I washed both shirts and got to work. 
The black velvet shirt ended up being the base.  I carefully took it apart so I could restructure it into a neat little jacket. 
Here are all the pieces after I cut up the purple shirt as well.   The top of the sleeves to the purple shirt ended up being the top of the sleeves for the jacket.  The bottom part is that lovely cut out velvet.  I added gores to the sides and faced the front of the jacket with purple as well.  And I added a hood. 
The finished cape/jacket!
The back of the jacket.
A picture of the sleeve and the side gore.

So, what do y'all think?  Like it?  Hate it?  Let me know!

Monday, August 12, 2013

Historical Fortnightly Challenge #16: Separates


Better pictures in the morning, I swear.  I just wanted to get this posted before the deadline
The Challenge: Seperates
Fabric: Linen
Pattern:  Based upon extant high necked smocks a la Janet Arnold
Year:  16th Century and early 17th Century, really. The embroidery is from 1526 but was a common pattern throughout the 16th Century.
Notions: silk thread, linen thread
How historically accurate is it? I doubt it could be more H/A without time traveling back, really. I suppose it could use a bit more embroidery but the point was to show that an embroidered, accurate smock was possible in 2 weeks.
Hours to complete: 30 very long hours
First worn: Probably tomorrow. :-)
Total cost: I think I got the linen on sale for $5 a yard and the silk was $5...and the linen thread was $7 so about $32 unless you want to count the beeswax used on the linen thread then it's $35.

Research!

The idea was a two fold one - to prove that a hand stitched, hand embroidered smock was possible in a pretty tight window (15 days) and also to get a high neck smock to use during cooler events. Most of my chemises/smocks/shifts are all open around the neckline. This helps in the summer when it can get HOT at outdoor events but it's just not practical during the cooler events. I didn't want a partlet since they weren't always worn and they don't work with some of the gowns that have embroidered necklines (even if it's the linen ones, then you have to tie them beneath the arms and it's just more fuss. A high neck smock just made more sense).

High neck smocks appear all over Europe and they stay in Europe for over a century. There is this one from 1540 that I really loved and this one from a hundred years later. So, a high neck smock would go with a lot of different outfits from a lot of different eras.

I've sewn a chemise before by hand and knew how quickly that can go but I haven't really completed an embroidery project like this before. That was interesting. My five year old nephew declared the collar his when he saw it. I had to be disciplined to work on the embroidery a bit every day. It's far from perfect - the lines look like my five year old nephew helped with the sewing- but it does look neat. I used violet thread similar to the collar in this extant Italian chemise simply because I wanted something that would have high contrast against the white linen but also would look good with a variety of colors.

More inspiration photos and pictures later - I'm beat from sewing all day to get this finished!

EDIT: I added a couple more pictures.  One of the actual finished smock up on the dress dummy and the other of one of the neck gussets (you can see my finger in that photo for size).  Edging the neck gussets was an interesting experience since they are so terribly small and triangular.  Everything else on the smock is a rectangle or square, making edging very easy.   Luckily, I had enough foresight to edge the neck gussets first.  :-)  

For the body of the smock, I used the selvage on both the hem and the shoulders - using the selvage is both period and practical.  I couldn't sew the body together at the shoulders by edging it since the rest of the top of the smock makes up the gathered neckline - it would get messy quickly and there would be raw edges sticking out somewhere near a neck gusset.   So, using the selvage, the fabric was still thin enough to gather at the neckline but wouldn't unravel at the shoulders without being rolled either.  

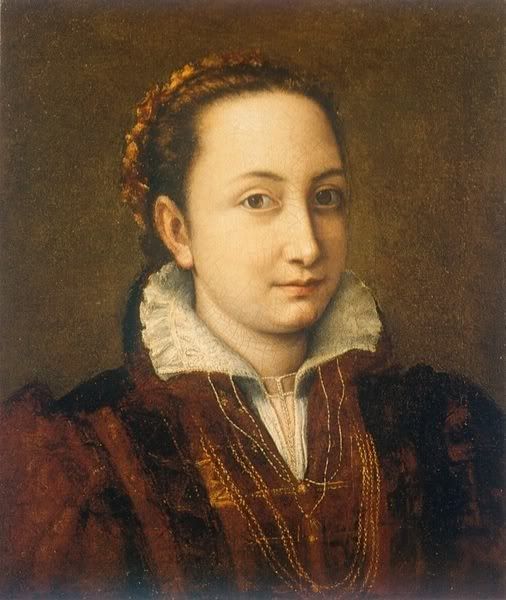
Portrait inspiration:
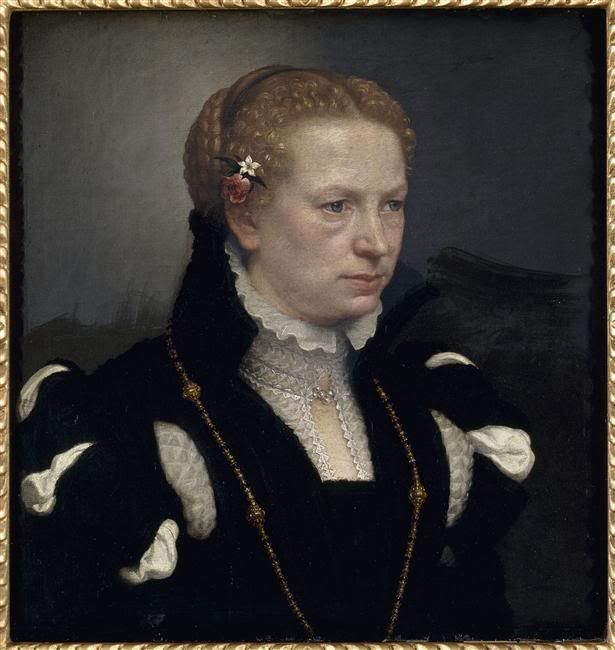
 photo moronischoolspain.jpg photo anguissolacrem2.jpg
 

Deadline tomorrow update on the embroidery project


I'm about an hour behind where I'd like to be right now. Saturday, I really didn't get a chance to sew much so I ended up getting way behind.  All four roses on the not quite finished cuff are brought to you by the movie Despicable Me.  The collar is done, one cuff is done, the other cuff has a little over an hour of work left on it.  The shift is cut and I just need to sew straight lines - no going back over them like with embroidery- to finish this thing.  We'll see how well I do...